Pumpkin Mini Muffins
 I know that I have professed my dislike of all things pumpkin many, many times on this blog. But these babies? They may have changed my mind. A little. Sort of. Kind of. I mean, I’ll still gravitate toward anything BUT pumpkin… but… these mini muffins were actually pretty good. My friend Andrea made them originally and brought about 80 of them to school. Our fellow law students descended upon her like vultures and the mini muffins were gone in about 20 minutes. I figured they had to be amazing and worth a try. :)
Pumpkin Mini Muffins
Recipe source: Sally’s Baking Addiction
Print Recipe
Mini muffins:
1-3/4 cups white-whole wheat flour (I used all-purpose flour; worked fine)
1-1/2 teaspoon baking powder
1/2 teaspoon salt
1 teaspoon ground cinnamon
1 teaspoon pumpkin pie spice
1/2 teaspoon nutmeg
1/4 cup (1/2 stick) unsalted butter, melted
1/2 cup dark brown sugar
1 large egg
1-1/2 tsp vanilla extract
3/4 cup pumpkin puree (not pumpkin pie filling)
1/2 cup milk
Cinnamon sugar coating:
1/4 cup (1/2 stick) unsalted butter
1/2 cup white sugar
2 Tablespoons ground cinnamon
1. Preheat oven to 350F. Spray mini muffin tin with nonstick spray. Set aside.
2. In a large bowl, combine the flour, baking powder, salt, cinnamon, pumpkin pie spice, and nutmeg. Set aside.
3. In a medium sized bowl, whisk together the melted butter and brown sugar. Add the egg and stir for about 1 minute. Add the vanilla, pumpkin puree, and milk. Slowly pour wet ingredients into the dry. Stir together until just combined – don’t overmix!
4. Using a small spoon, spoon the batter into the muffin tins, about 2/3 way full. I used a cookie scoop for this — made it so much easier!
5. Bake for 11-12 minutes, or until a toothpick inserted into the center comes out clean. 6. While the muffins are cooling, make the coating: combine the sugar and cinnamon a small dish. In a separate small dish, melt the butter.
6. Once the muffins are relatively cool, dip into the melted butter and then into the cinnamon sugar.
Makes a couple dozen mini muffins.
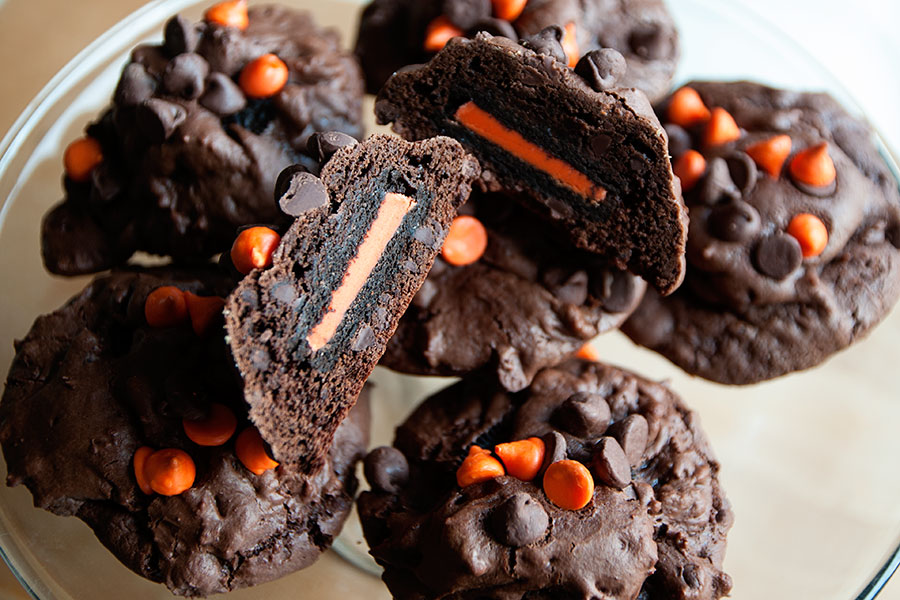 Did you like yesterday’s post but felt that there just wasn’t enough CHOCOLATE involved? Well I hope these cookies help! Basically the same concept as the cookies posted yesterday — but it’s a chocolate cookie dough instead. These are also a little more tricky to make, so read the instructions carefully. Because I didn’t the first time around. Whoops.
 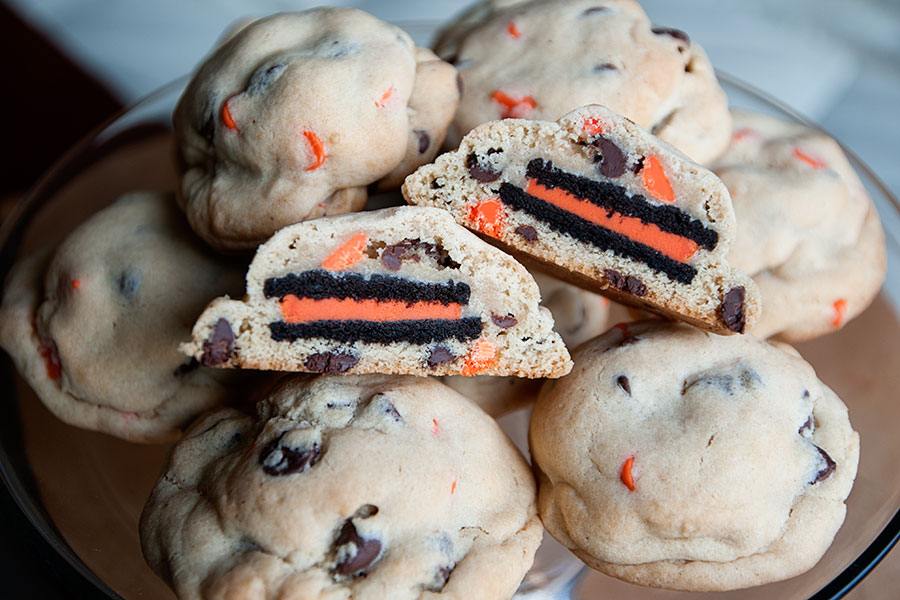 These cookies are nothing new to my blog. I
  I’ve always liked Indian candy corn better than plain candy corn. It’s like that little sliver of chocolate somehow helps to make the candies less sickly sweet. I’ve seen a ton of Indian candy corn-inspired caked on Pinterest and other food blogs over the years and finally decided to make one.
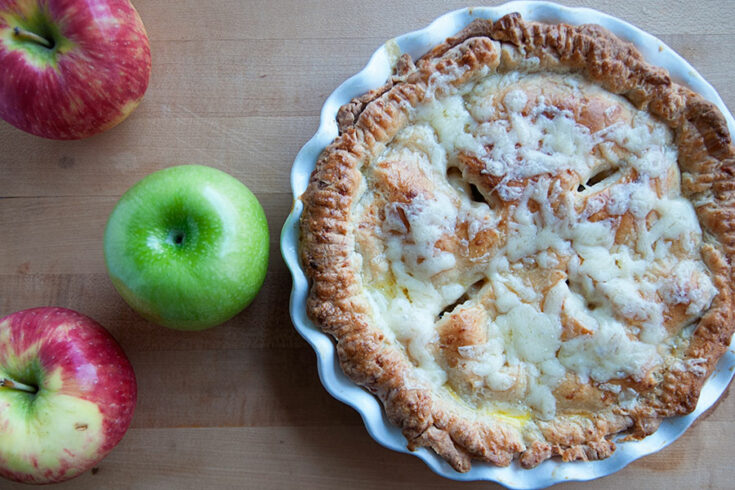
  My friend Andrea suggested that we take a breather from law school and have a Disney movie and pie day. Ummm, YES. PLEASE. I understand that it’s silly for two grown women to watch cartoons and bake pies all day, but this is what law school does to you. I expanded my Disney horizons (by finally viewing Mulan, Lilo & Stitch, and Pocahontas) and we made a delicious, 100% from scratch apple gruyere pie.