Month: May 2012

Teeny Tiny Hiatus


Hi all!

I am taking a mini, teeny, tiny hiatus from my blog. I will be back sometime in June with tons of fun summer treats & recipes! Reason for said hiatus is that I recently moved to Milwaukee and just need some time to get my ducks in a row and my life settled. Milwaukee is pretty great so far – yummy food, German heritage, and more beer than one knows what to do with.

See you all in June! And until then, enjoy this photo of the Italian sausage falling flat on his face at a Brewers game. Yes, we do sausage races at the bottom of the 6th!

Bailey’s Irish Brownies


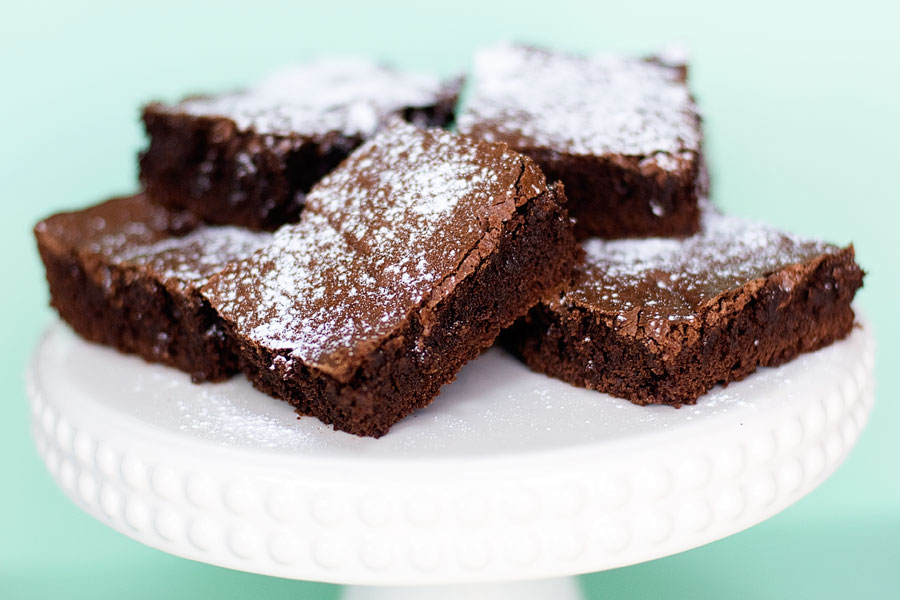
A good, dense brownie is one of my favorite treats. A good, dense brownie paired with alcohol? Even better.

I made these brownies for St. Patrick’s Day. You can still serve these to your kids because the alcohol in the Bailey’s will evaporate during baking… and you’ll be left with the delicious pairing of chocolate + Irish cream!

Yield: 9 brownies

Bailey's Irish Brownies

Bailey's Irish Brownies

A perfect dessert for St. Patrick's Day!

Prep Time 10 minutes
Cook Time 30 minutes
Total Time 40 minutes

Ingredients

  • 1 cup all-purpose flour
  • 1/2 cup unsweetened cocoa powder
  • 1/4 tsp. baking soda
  • 1/4 tsp. salt
  • Heaping 1/3 cup bittersweet or dark chocolate chips
  • 1/4 cup butter
  • 2 eggs
  • 1 cup sugar
  • 1/3 cup Baileys Irish Cream
  • 1 tsp. vanilla extract

Instructions

    1. Preheat oven to 350°F.

    2. Line an 8x8 inch pan with aluminum foil and cover with non-stick spray.

    3. In a medium bowl, whisk together flour, cocoa, baking soda, and salt until combined. Set aside.

    4. Place chocolate and butter in a large microwave-proof bowl and melt in 30 second spurts, stirring in between each interval until completely melted. Set aside to cool a bit. (Alternatively, melt chocolate and butter in a double boiler until melted. Set aside to cool.)

    5. Once the chocolate mixture is warm (not hot!), add eggs one at a time, whisking constantly to incorporate.

    6. Whisk vigorously for about 10 seconds to incorporate fully.

    7. Add sugar, vanilla, and Bailey’s and whisk until combined.

    8. Add the flour mixture into the chocolate mixture, folding until just combined.

    9. Pour batter into the prepared pan, using a spatula to smooth out the top.

    10. Bake at for about 18-20 minutes, or until a toothpick comes out with a few moist crumbs attached.

    11. Let cool, and dust with powdered sugar if desired.

Notes

Recipe credit: Gimme Some Oven

Homemade Vanilla Extract

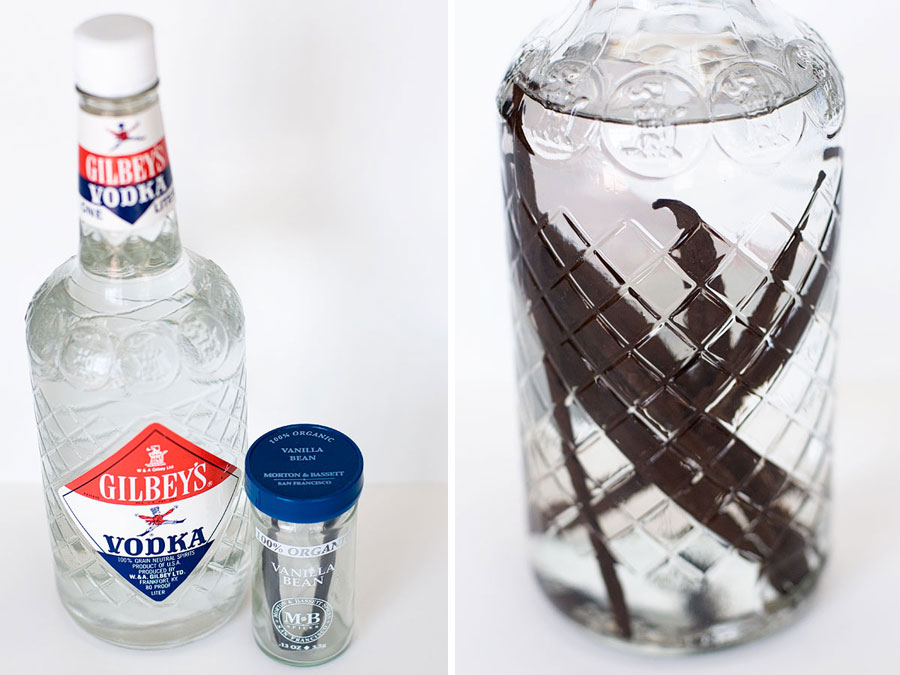
I don’t know about you, but it PAINS me to buy vanilla extract at the grocery store. A teeny tiny little bottle for such an outrageous price. If you bake a lot (which I’m guessing you do if you’re reading this blog), consider making your own vanilla extract! It could not be more easy to do and you’ll end up saving a ton of money in the long run. It’s also really awesome to have a HUGE bottle of vanilla sitting in your pantry that will last you for months, if not years.

My dear friend and fellow food blogger Amber did a price comparison of buying vanilla vs. making your own. I encourage you to read the post about it on her blog, Bluebonnets & Brownies. Another bonus of making your own? You can give it to your friends and family for Christmas! Better than giving fruitcake, right?

So how do you make your own vanilla extract? Let me woo you with the simpleness of it!

Homemade Vanilla Extract
Recipe source: Bluebonnets & Brownies, A Beautiful Mess, Food Network
Print Recipe

1 bottle of booze (vodka, bourbon, or Southern Comfort all work beautifully)
8-12 vanilla beans

1. Slice each vanilla bean open length-wise. No need to cut it in half, but just slice it open so that the alcohol can reach all the vanilla bean goodness.
2. Place the beans into the bottle of alcohol.
3. Cap the bottle, make note of the date, and place the bottle in a dark cabinet or pantry for 2 months. That’s it!

Two months later, you’ll have an entire bottle of extract ready to use in your baking projects. You can let the extract sit for longer than 2 months, as that will only enrich the flavor. The extract can sit at room temperature indefinitely – it’ll never expire. Something to note with this — use CHEAP alcohol! Don’t spend a ton of money on a high-quality bottle of vodka. The alcohol will burn off during baking or cooking, so regress back to your college days and buy the cheap stuff!

Here is stage 1. I had a few vanilla beans but had to order more from Amazon.com. You can find vanilla beans at most specialty cooking stores and online retailers.

And here is stage 2, two months later. I poured the extract into smaller, more manageable bottles. I used small bottles that used to contain tonic, but I know you can buy small amber bottles at stores like specialtybottle.com. Something to note about vanilla extract — if you do not have amber bottles in which to store the extract, be sure you keep your vanilla in a dark environment. Over time, light can break down the vanilla and reduce the quality of your extract. Since my bottles above are clear, I will be storing my extract in a dark cupboard.

Cinnamon Toast Crunch Cupcakes


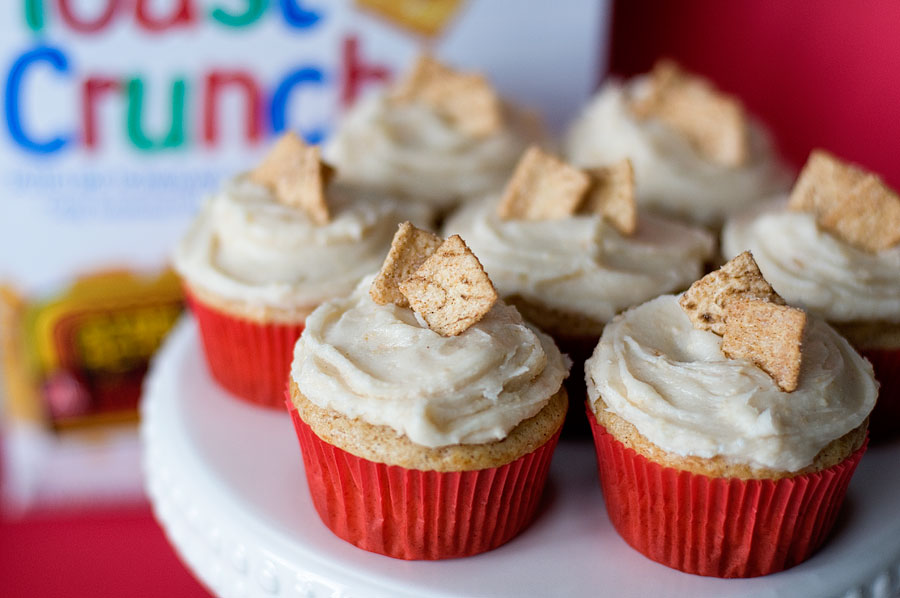
Cinnamon Toast Crunch was my favorite cereal as a kid. Given my aversion to milk, I don’t eat much cereal anymore… but I *do* love cinnamon! The other great thing about Cinnamon Toast Crunch was the flavor of the milk that was left behind. For the adult readers (over 21) of this blog, I’d highly recommend drinking a little RumChata – a delicious, boozy white liquid that tastes JUST like the leftover Cinnamon Toast Crunch milk!

But for those of you that can’t or don’t want to drink, I present a cupcake alternative!

Cinnamon Toast Crunch Cupcakes
Recipe source: Your Cup of Cake
Print Recipe

Cinnamon Cake:
3 eggs
1/3 cup oil
3/4 cup buttermilk
1 teaspoon vanilla extract
3/4 cup sour cream
Vanilla cake mix (not white cake mix)
1-1/2 teaspoon cinnamon

Cinnamon Toast Crunch Buttercream:
8 oz cream cheese, softened
1/2 cup butter, softened
1 teaspoon vanilla
3 cups powdered sugar
2/3 cup Cinnamon Toast Crunch powder (crush the cereal in a bag or food processor, then sift out 2/3 cup)

1. Preheat oven to 350 degrees and line pans with 20-22 cupcake liners.
2. In a large bowl, gently combine eggs, oil, buttermilk and vanilla. Mix in sour cream.
3. Add cake mix and cinnamon and mix until smooth.
4. Fill cupcake liners 3/4 full and bake for 15-18 minutes, or until a tester comes out clean.
5. Buttercream: Beat cream cheese and butter until fluffy. Add Cinnamon Toast Crunch powder. Add vanilla and powdered sugar. Adjust the consistency using milk if it is too thick.
6. Pipe onto cooled cupcakes and top with cinnamon sugar and Cinnamon Toast Crunch squares.