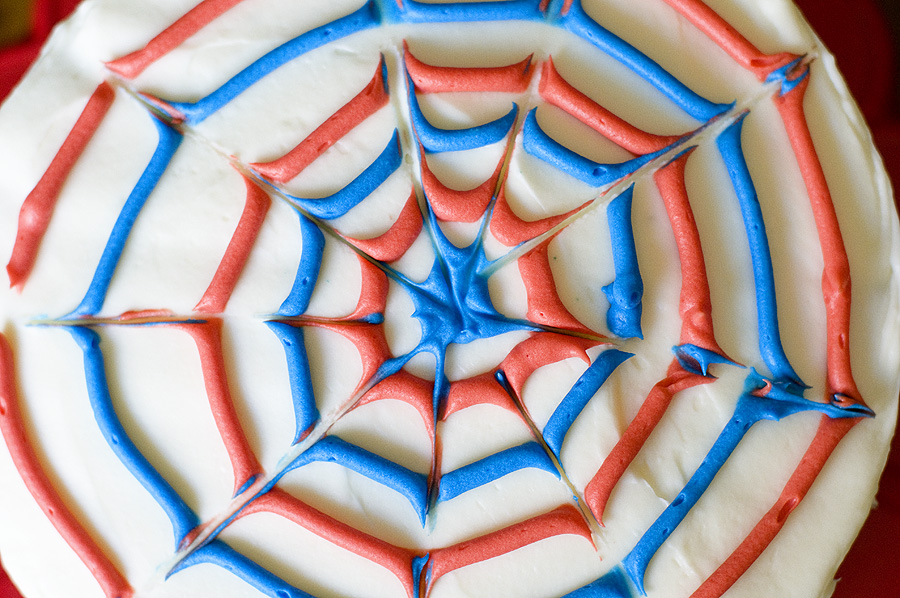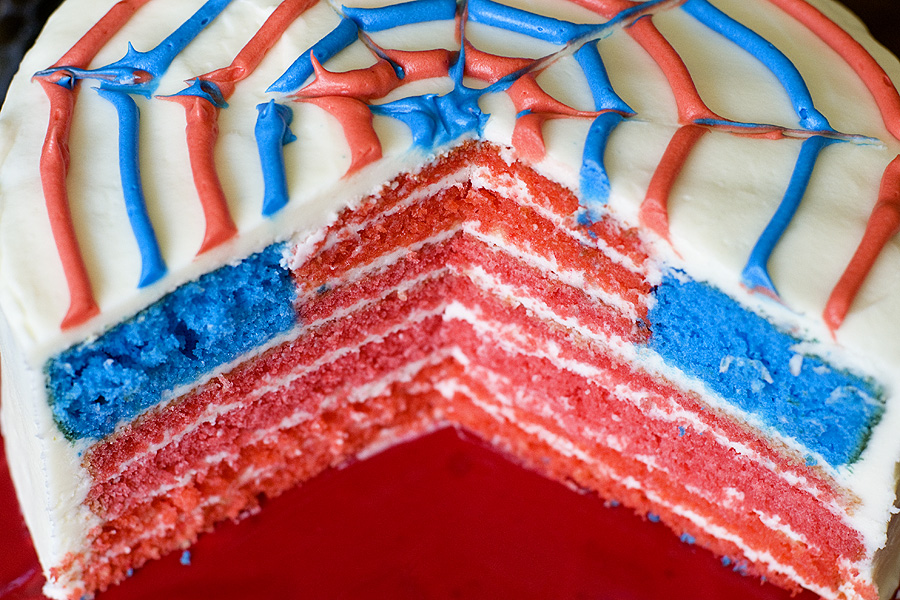
In the interest of full disclosure, let me just say right off the bat….. this cake was a pain in the ass to make! But it was so worth it! Everyone makes the traditional 4th of July cake – a sheet cake decorated with blueberries and strawberries/raspberries to look like the American flag. This cake is different because the surprise is on the inside.

American Flag Cake
Print Recipe
2 boxes white cake mix (plus oil and eggs)
Blue and red food coloring
For cream cheese frosting:
1-1/2 pound cream cheese (3 – 8oz. packages, not low fat)
1 pound unsalted butter (4 sticks)
2 pounds powdered sugar
1-1/2 teaspoons vanilla
1. Preheat oven to 350F and grease two 8″ cake pans with nonstick spray.
2. Make cake mixes according to box directions. You will need to make one 8″ blue cake, and three 8″ red cakes. I dyed one batch of cake batter red; I split the other batch in half and dye one half blue and one half red. Try to use as much batter as you can for each cake, because you want to end up with thick cakes.
3. Bake the 8″ cakes according to box directions. Cool completely before going on to the next step.
4. The most complicated part of creating this cake is torting the red cakes. Pain. in. the. butt. I used a large serrated knife to cut the cakes. Torte two of the red cakes so that you end up with 4 or 5 thin and even layers. Try to make the layers as level as possible.
5. Use a knife to level off the blue cake (remove the “dome” that forms when the cake bakes). After the blue cake as been leveled, cut a hole out of the middle of the cake. I used a large round cookie cutter for this step. Using a round cookie cutter is a good idea because of the sizing consistency it provides. At the end of this step your blue cake should look like a donut — with a hole in the middle.
6. Use a knife to level off the last red cake. Once the cake is leveled, use the same round cookie cutter to cut a circle out of the red cake. Torte the circle you cut out to get three thin layers.
7. For the frosting, cream together the cream cheese, butter, and vanilla. Slowly add the cream cheese until you reach the desired consistency. I like thicker frosting, so I always add nearly 2 lbs of powdered sugar.
8. Time to assemble! Layer the first 4 or 5 full-sized red layers on a cake platter, adding cream cheese icing between each layer. Once the full-sized red layers are assembled, add the blue “donut” to the top. Fill the “donut hole” with the small red slices of cake, adding cream cheese icing in between each. Thoroughly frost the outside of the cake and decorate the top of the cake if you’d like to. I used red and blue frosting to create a spiderweb/fireworks design.
9. Before cutting into your cake, chill the cake in the refrigerator for a few hours so the frosting can set (and the cake will be easier to cut!).
Enjoy!


Spectacular cake! Have a great 4th!
That is absolutely amazing!
you. are. amazing. totally.
Thanks, guys!
Annie – this is supercalifragilisticexpialidocious…when I see you I have to tell you about the PBS show we watched about the French Olympics of Baking (can’t remember the real name) – unbelievable!!
Aww, thanks! I can’t wait to see you at the end of the month! So much to catch up on. And I am VERY interested in hearing about the French Olympics of Baking :)
Annie – I sent you an email at gmail – did you get it?
How do you get your red so vibrant?? My frosting always turns out pink! Love the website.
Laura – I use AmeriColor Super Red coloring. You have to buy specialty food coloring for vibrant reds — the stuff available in the grocery store will just make things pink, as you mentioned. Hope that helps! :)
this is freaking awesome! Too time burdesome though, lol.
love this cake, I’m going to make it for our 4th of July party.
Great cake! I’m definitely going to try to make this for the 4th. Do you think vanilla icing in the tub would work ok?
Hi Laura – Thanks for the comment! I’m sure store bought icing would work just fine :)
Thank you so much for sharing your American flag cake!!! After seeing yours I was inspired to try making one myself. http://sweetnesshunter.blogspot.com/2012/07/american-flag-cake.html
This os one of my favorite flag cakes for 4th of July! I love how many layers there are ant he frosting on top is amazing too! Thanks so much for the tutorial. I just had to share with my followers too for 4th of July ideas http://blovelyevents.com/2013/06/26/the-glorious-red-white-and-blue-for-cake/
Thanks, Emily!