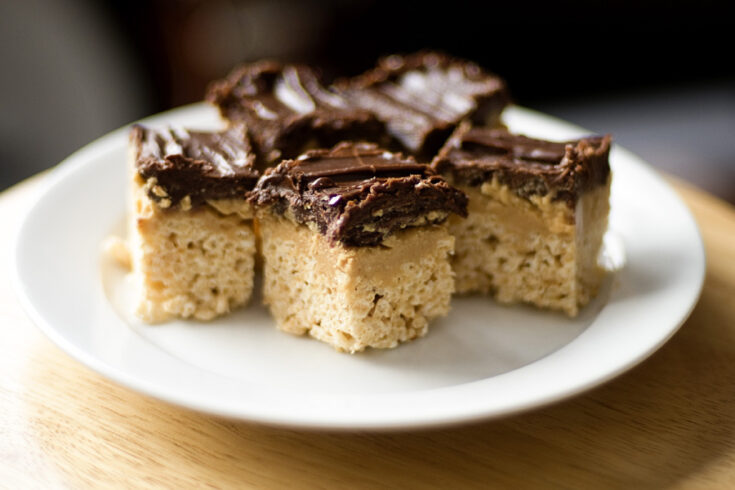
Chocolate Peanut Butter Fudge Bars

These were one of my first baking projects that I really mastered and loved. They’re easy to make, but a little time-consuming because there are three parts. They’ll be the hit of any party or bake sale!
Chocolate Peanut Butter Fudge Bars
One of my all-time favorite recipes!
Ingredients
For the rice krispies:
- 3 tablespoons butter
- 4 cups mini marshmallows
- 6 cups Rice Krispies
For the peanut butter fudge:
- 1 cup butter
- 1 cup peanut butter
- 1 tea. vanilla
- 1 pound powdered sugar
For the chocolate fudge:
- 2 tablespoons butter
- 2/3 cup evaporated milk
- 1-2/3 cups sugar
- 1/2 tea. salt
- 2 cups mini marshmallows
- 1-1/2 cups semisweet chocolate chips
- 1 tsp vanilla
Instructions
Make the Rice Krispie treat layer:
1. Melt butter over low heat in a large saucepan.
2. Add marshmallows and stir until completely melted. Remove from heat.
3. Add Rice Krispies and stir until well coated. Grease a 9x13" baking dish and press all of the rice krispy treats into the bottom of the pan.
4. Flatten as much as you can into the pan. Refrigerate while you move on to the next step.
Make the peanut butter fudge layer:
1. Microwave the butter and the peanut butter for 2 minutes on high. Stir and microwave for another 2 minutes.
2. Add vanilla and powdered sugar to the peanut butter mixture. Stir until well mixed.
3. Pour over the Rice Krispie treats in the pan and spread evenly. Let cool in the fridge while you move onto the next step.
Make the chocolate fudge layer:
1. Combine butter, milk, sugar, and salt in a saucepan over medium heat. Bring to a boil; cook for 4-5 minutes while stirring constantly. Remove from heat.
2. Stir in marshmallows, chocolate chips, and vanilla. Stir until well-mixed and smooth.
3. Pour over peanut butter fudge and spread evenly.
4. Place in the fridge for 2 hours and cut the bars into 1-inch pieces.
Notes
Your yield will depend on how big or small you cut your bars.
Recipe credit: Joy the Baker


