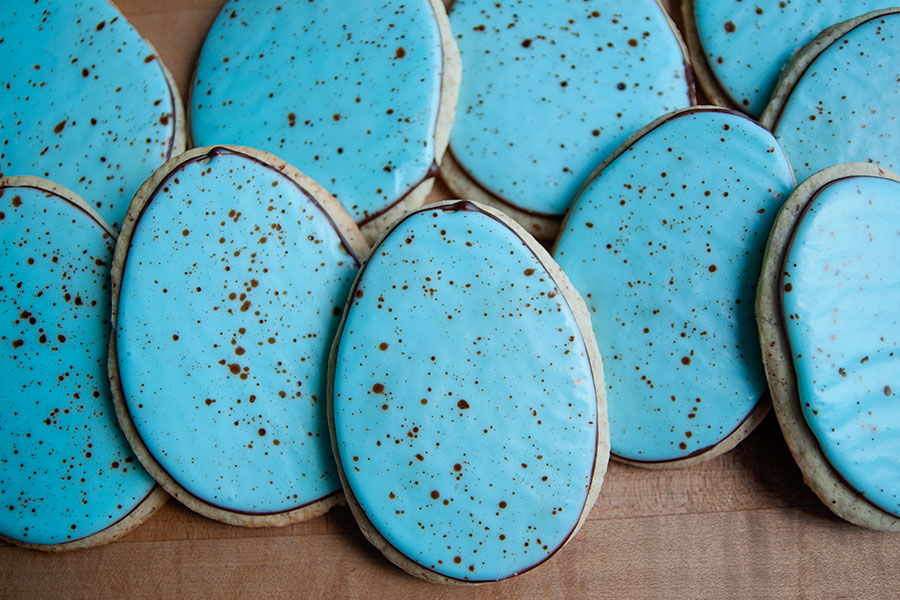
 Speckled eggs! A sign of spring. I always feel twinges of sadness when I see one of these during the spring season — usually because the egg is on the ground, cracked, and the baby bird had no chance. This post has taken a turn for the morbid, huh? But anyway! Let’s focus on all the baby birds who do hatch from their beautiful blue eggs and enjoy a healthy and fun bird life.
These cookies were pretty easy to make — but here’s my warning: you’ll make a MESS with the speckling process! Feel free to make your eggs any color you’d like. I stuck with a robin egg blue because I think it’s one of the prettiest colors in nature.
If you are a new to decorating with royal icing, here are some helpful tips and links:
- I used my grandma’s sugar cookie recipe, which is listed below. Another good cut-out cookie recipe can be found at Bridget’s wonderful Bake at 350.
- I used a royal icing recipe from Annie’s Eats, which is listed below.
- If you are new to decorating with royal icing, please visit this post by Annie’s Eats, which will teach you about outlining and flooding. Bake at 350 is also a great resource for cookie decorating and ideas (I love Bridget’s book, too!).
Here are the specifics on how I made these cookies:
- I used a Wilton comfort-grip egg cookie cutter.
- I dyed a small amount of royal icing brown, using AmeriColor’s brown dye.
- I dyed a larger amount of royal icing blue, using a combination of Wilton’s sky blue and leaf green. There’s no perfect formula I can give you for this specific color. Just add a little sky blue gel coloring at a time, mix, and see if you need to add more to make the color more vibrant. A little will go a long way, so start slow. Once I achieved the blue color I wanted, I added just a little bit of leaf green. Like, a toothpick-ful. This will help to make the robins egg blue color.
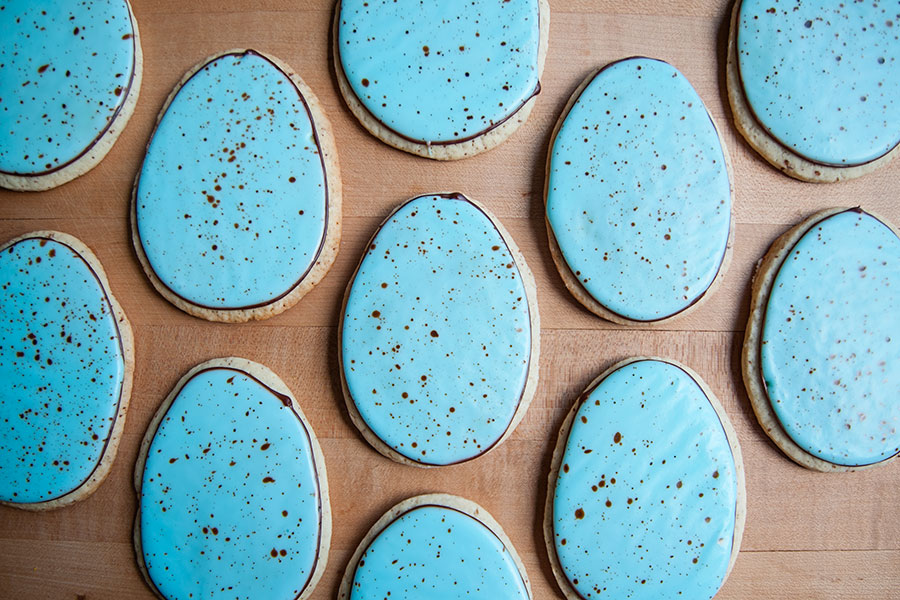
- I outlined each egg with brown icing and flooded with blue icing. Allow the icing to dry completely before moving on to the speckling process.
- You will need a small bowl (a ramekin would be best) and a paintbrush. I bought a pack of cheap paintbrushes at Target. Add about a tablespoon of water to the small bowl or ramekin, then add a few drops of brown food coloring. Mix well. Dip the paintbrush into the brown water and use your finger to flick the liquid onto the cookies. (Is “flick” a technical term?!)
- A few pieces of advice…
- You will make a mess. So cover your working area with newspapers or paper towels. There is no neat-and-tidy way to do the speckling process.
- You might want to cover your hand with a latex glove or plastic bag — because the brown water will dye your finger tips. Just sayin’. Ahem.
- You may want to practice the speckling first. I tried it out using my kitchen sink first. Just to make sure that I had the right technique. And because you’re flicking the brown water into the sink, it makes for easy clean up!
- If you have questions, please leave me a comment! I’m happy to help.
Omi’s Sugar Cookies
Print Recipe
1 cup butter
1 cup sugar
1 large egg
1/2 teaspoon salt
3 cups flour
1 teaspoon baking soda
1/2 cup sour cream
1 teaspoon nutmeg
Beat butter and sugar. Add egg, sour cream, and nutmeg. Add dry ingredients gradually. Chill the batter overnight or for at least 4 hours. Roll out dough and cut with cookie cutters. Bake at 350F until golden (in true fashion, my grandma didn’t give a specific baking time. I baked the cookies for about 8 minutes). This recipe will make about 18 egg cookies (but this will depend on the size of your cookie cutter!)
White Royal Icing
4 cups powdered sugar, sifted
2 Tablespoons meringue powder
5 Tablespoons water
Directions:
Combine all ingredients in the bowl of a stand mixer fitted with the paddle attachment. Mix on low speed until the sheen has disappeared and the icing has a matte appearance (about 7-10 minutes). Transfer the contents of the mixing bowl to an air-tight container. This will be the stiffest consistency of the icing, and at this point it is still too stiff to use for decorating. Add water a very small amount at a time and stir by hand until fully incorporated. Continue until the icing has reached a consistency appropriate for piping.
You’ll likely need two batches of this icing — but if you’re making 12 or fewer cookies, you might be able to work with just one batch.


Hello,I log on to your blog named “Speckled Egg Cookies » With Sprinkles on Top” like every week.Your story-telling style is witty, keep doing what you’re doing! And you can look our website about love spell.