Have you ever wondered how to make swirled frosting? You know, when the frosting on top of a cupcake is two or more colors swirled together — like chocolate and vanilla. Side note: we all know that swirled soft-serve is the bessssst; and all of us who are Orange is the New Black fans just thought of “chocolate and vanilla swirl, swi-irrrrl!”
Anyway. The swirled look is so pretty but sometimes the instructions on how to do it are… confusing. So I’m providing you with pictures! The general process is as follows:
1. Make two (or more) different kinds/colors of icing. Buttercream works well.
2. Fit a disposable pastry bag with a large tip (round, star, etc.).
3. Fill half the bag with one kind of icing, and half the bag with the other. See the photos below. If you are using three different colors, fill a third of the bag with each kind. I would say that four colors would be as far as you could take this — and still have the swirling turn out OK.
4. Pipe the icing onto your cupcakes as you normally would. The colors will swirl together!
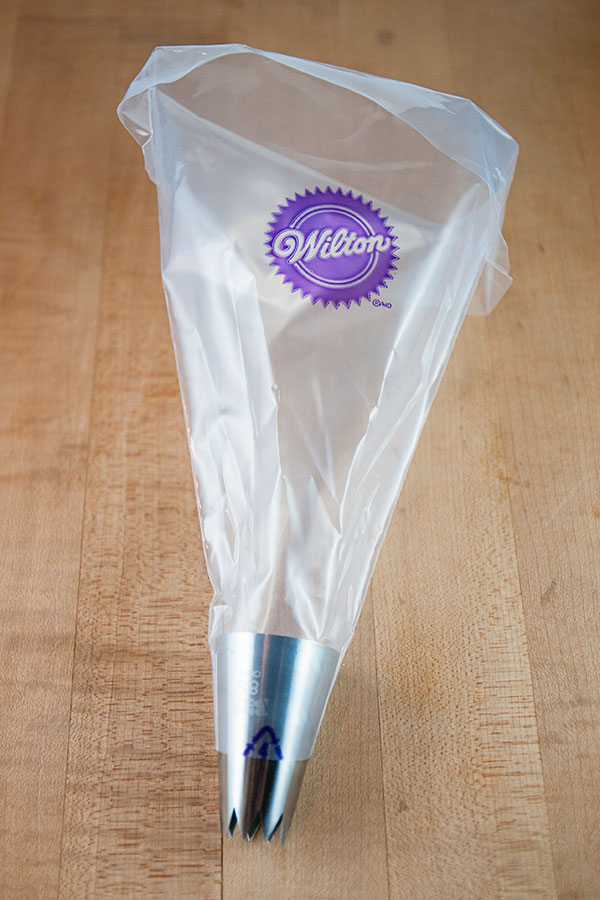 An empty pastry bag fitted with a large star tip.
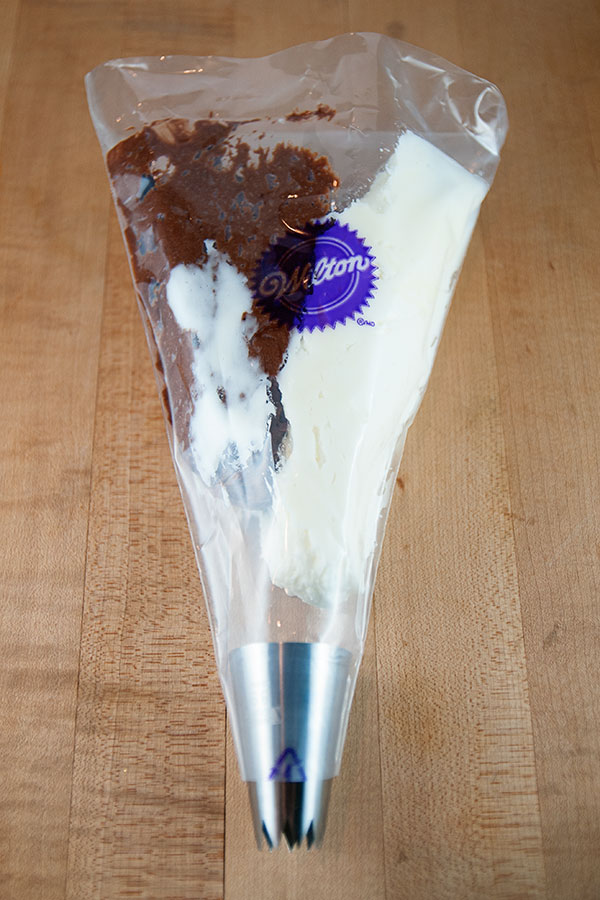
As you can see, the vanilla icing is on one half, the chocolate on the other. Just spoon it in there — don’t worry about it being perfect! The icing will swirl together beautifully. Something to note though: the colors won’t swirl together immediately. You will probably end up with one or two cupcakes that are mostly white icing (or chocolate) until the swirling starts to happen. That’s it! Easy, huh? Here are some examples of what I’ve made using this technique.

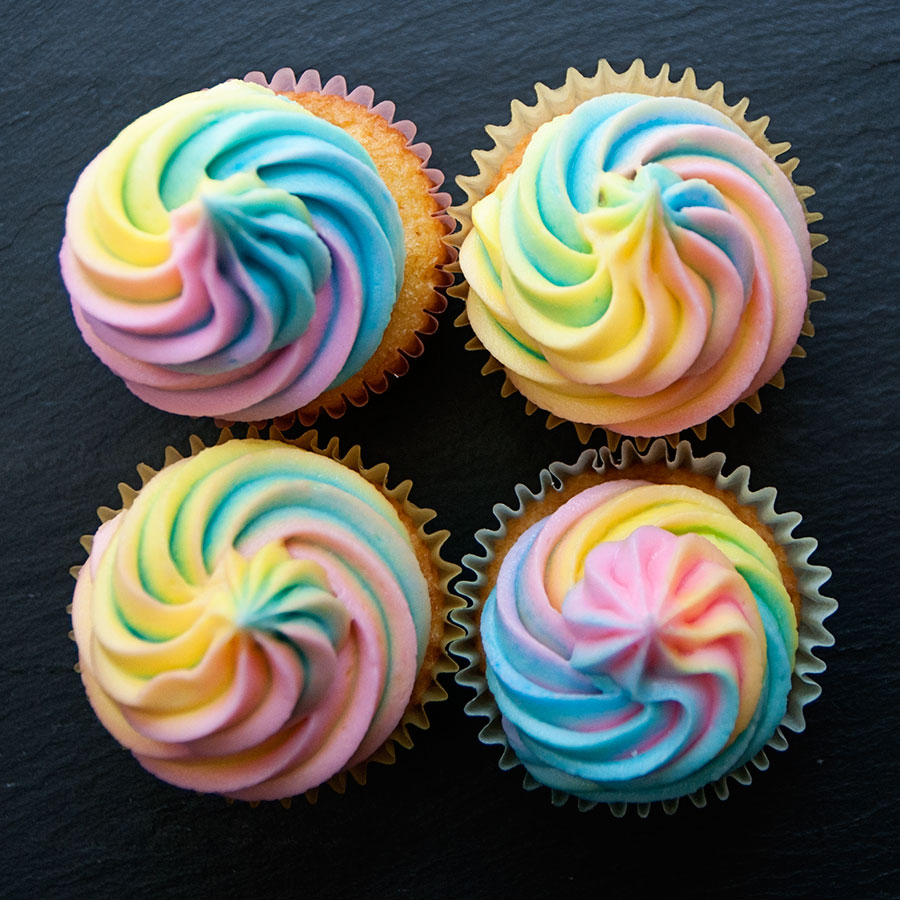
I used three colors for these: pink, yellow, and blue. It looks like orange and green are also used, but it’s just an illusion.


Leave a Reply