I’ve been on a Disney Princess kick this summer. I made Disney princess cupcakes earlier in the summer, and when one of my favorite little girls turned three, I made her a Disney princess cake. Here’s the rundown on how I made this.
Disney Princess Cake
Print Recipe
3 boxes white cake mix (plus required eggs + oil)
10″ cake pan(s) (I made a 10″ cake, but you can go smaller or larger)
Pink, yellow, and blue food coloring (I used Wilton gel colorings)
1 batch of white buttercream icing (if you really love frosting, make 1-1/2 batches)
Disposable pastry bags
A small star tip
Disney princess figurines (I bought a set in the toy department at Target)
1. Make three batches of white cake batter. Dye one batch pink, one yellow, and one blue — for a three-layer cake. Bake the 10″ cakes according to box directions. Use the baking time for a 9″ cake on the back of the box as a guide – though you may need to bake the 10″ cake longer.
2. While the cakes are baking, make your batch(es) of buttercream icing.
3. Allow the three cakes to cool completely. Once cool, remove the “dome” on each with a large knife, so that the cakes are level.
4. Assemble the layers any way you’d like, with frosting between each layer. Frost the outside of the cake with white icing.
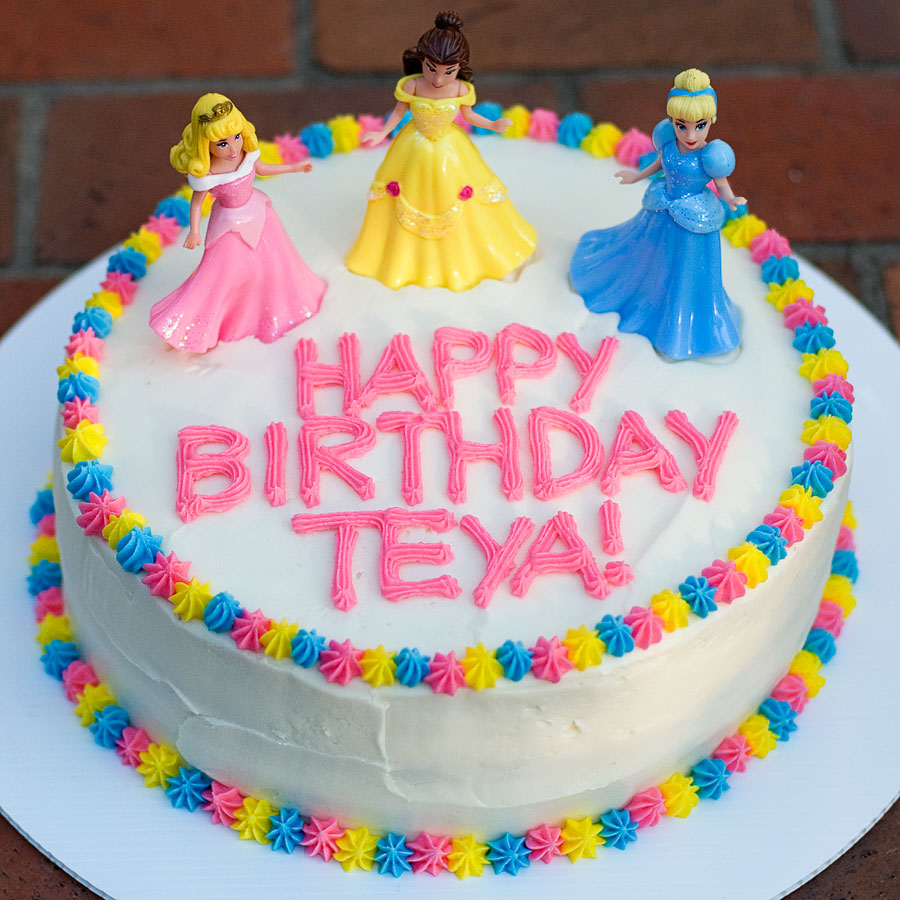
5. Dye the remaining icing pink, yellow, and blue. Pipe a decorative border around your cake — and a birthday message for the recipient.
6. Add the Disney princesses of your choosing as a cake topper. I had to place a lollipop stick underneath to anchor each princess so that they would stand upright on the cake.
I went with Cinderella, Belle, and Aurora because I liked the pink/yellow/blue color combination — and Cinderella is one of Teya’s favorites. But you can use any princesses and colors that you’d like.


Leave a Reply