Month: September 2009

Chocolate Chip Cookies

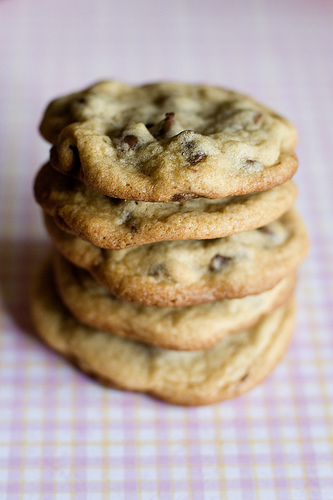
Sometimes simple is better. I will admit that given the vast amount of recipes, baking publications, and food blogger inspiration that exists, I sometimes have mini anxiety attacks over what to bake next. So many delicious things that I want to try! So this time I opted for simple. A simple chocolate chip cookie. No frills, no expensive chunks of high-quality chocolate, no nuts, nothing but a classic.

Soft and Chewy Chocolate Chip Cookies
Recipe source: Martha Stewart’s Cookies
Print Recipe

2-1/4 cups all-purpose flour
1/2 teaspoon baking soda
1 cup (2 sticks) unsalted butter at room temperature
1/2 cup granulated sugar
1 cup packed light brown sugar
1 teaspoon coarse salt
2 teaspoons vanilla extract
2 large eggs
2 cups semisweet or milk chocolate chips (I used a mix of both)

1. Preheat oven to 350F.
2. Whisk together flour and baking soda in a bowl. Put butter and sugars in the bowl of an electric mixer fitted with the paddle attachment. Mix on medium speed until pale and fluffy, about 2 minutes. Reduce speed to low. Add salt, vanilla, and eggs; mix until well blended. Mix in flour mixture. Stir in chocolate chips.
3. Drop heading tablespoons of dough onto baking sheets lined with parchment paper, spacing 2 inches apart. Bake cookies, rotating sheets halfway through, until edges turn golden brown but centers are still soft, 10-12 minutes. Let cool on sheets on wire racks for 2 minutes, then transfer cookies to wire racks and let cool completely. Cookies can be stored between layers of parchment in airtight containers at room temperature for up to 1 week.

Pumpkin Cupcakes

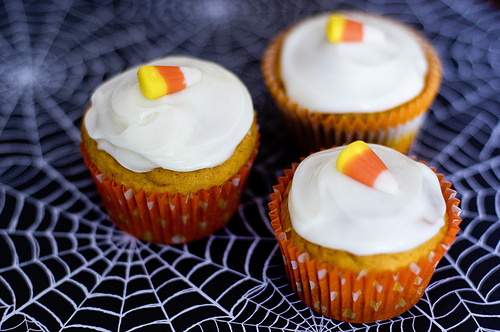
I am not a huge fan of pumpkin, but friends have assured me that these are delicious! :)

Pumpkin Cupcakes with Cream Cheese Frosting
Source: Real Simple, October 2009
Print Recipe

1 18.5oz box yellow cake mix (plus the ingredients called for in the package directions)
1/2 teaspoon pumpkin pie spice
1 15oz can pumpkin puree
2 8oz bars cream cheese, at room temperature
2 cups confectioner’s sugar
Candy corn for decoration

1. Preheat oven to 350F. Line two 12-cup muffin tins with paper liners. Prepare the cake mix as directed, but substitute the can of pumpkin puree for the water called for in the package directions. Add the pumpkin spice.
2. Divide the batter among the prepared muffin tins and bake until a toothpick comes out clean – 18-22 minutes. Let cool.
3. Make frosting. Using an electric mixer, beat the cream cheese and sugar until creamy. Spread on the cupcakes and top each with a piece of candy corn.

Peanut Butter & Jelly Cupcakes

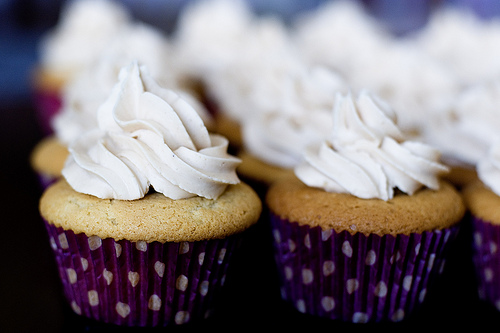
September is back to school month. This means more peanut butter and jelly sandwiches for school lunches! In the spirit of back-to-school (since I’m returning as a student myself), I thought I’d give these cupcakes a try.

Peanut Butter and Jelly Cupcakes
Source: The Mixing Bowl
Print Recipe

1 cup sugar
1/2 cup butter, softened
1/2 cup milk
1/2 cup vegetable oil
1 teaspoon vanilla extract
1 teaspoon vanilla bean/paste**
3 large eggs
2-1/2 cups all-purpose flour
2 teaspoons baking powder
2 teaspoons baking soda
1/2 teaspoon salt
Strawberry or grape jelly

**I didn’t have vanilla beans, so I just added an extra teaspoon of vanilla extract. It worked fine!

1. Preheat oven to 350F. Line 24 muffin cups with paper liners. In a large bowl, beat butter with an electric mixer on medium to high for 30 seconds. Add sugar and beat to a nice fluffy consistency. Slowly add milk, oil, and vanilla extract. When all is combined, add eggs, one at a time.
2. In a medium bowl, sift together flour, baking soda, baking powder, and salt. Add dry ingredients to wet ingredients, mixing well.
3. Fill prepared muffin cups 2/3 full with batter. Bake 15-20 minutes or until a toothpick comes out clean. Don’t overbake! Cool completely on a wire rack.
4. When cooled, fill a pastry bag with your jelly of choice. Remove a portion of the cupcake with a small circular cookie cutter and fill the hole with jelly (using about 1 teaspoon jelly per cupcake). Top your cupcakes with peanut butter frosting (recipe below).

Peanut Butter Frosting
In a medium bowl, combined 1-1/2 cups shortening, 1/2 cup peanut butter (or more, to taste), and 2 teaspoons vanilla. Beat with an electric mixer on medium to high until creamy. Slowly beat in 3 cups confectioner’s sugar and mix until well combined. Add milk, a tablespoon at a time, until the frosting is fluffy and creamy.

Peanut Butter Cup Cake

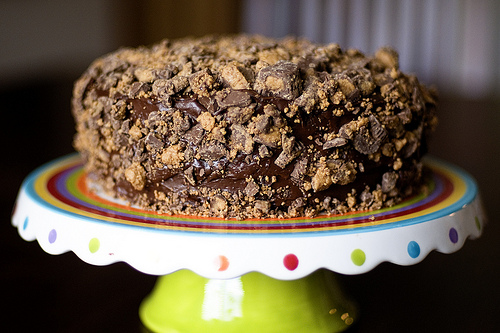
A friend’s birthday was yesterday so I made him a peanut butter cup cake. It was delicious! I’m a huge fan of anything having to do with peanut butter, so it was heaven. Nothing was homemade on this one, but here’s what I did to create the peanut buttery goodness:

1. Bake two 8″ or 9″ chocolate cakes (use a box mix, it’s so much easier for cakes!). If you’d like, crush up some peanut butter cups and add them to the batter. Bake as directed on the box.
2. Frost the cake with chocolate frosting (again, I used store-bought this time).
3. Use a food processor to chop up the peanut butter cups and coat the outside of the cake with them. It’ll be messy and won’t look like a “pretty” cake, but the taste will be well worth it!

*Note: To keep the crushed peanut butter cups on the cake, it helps to refrigerate the cake after you complete it. Otherwise the frosting will tend to droop with the weight of the peanut butter cups.

Autumn is coming..

I know I haven’t updated much lately. I just started school again (Master of Public Health program at UW), so I’m a little busy! But never fear. Fall is my favorite season & I have a lot of fall-related recipes planned! Lots of apples… pumpkin… candy corn. So stay tuned!