Author: Annie

Cherry Chocolate Kisses
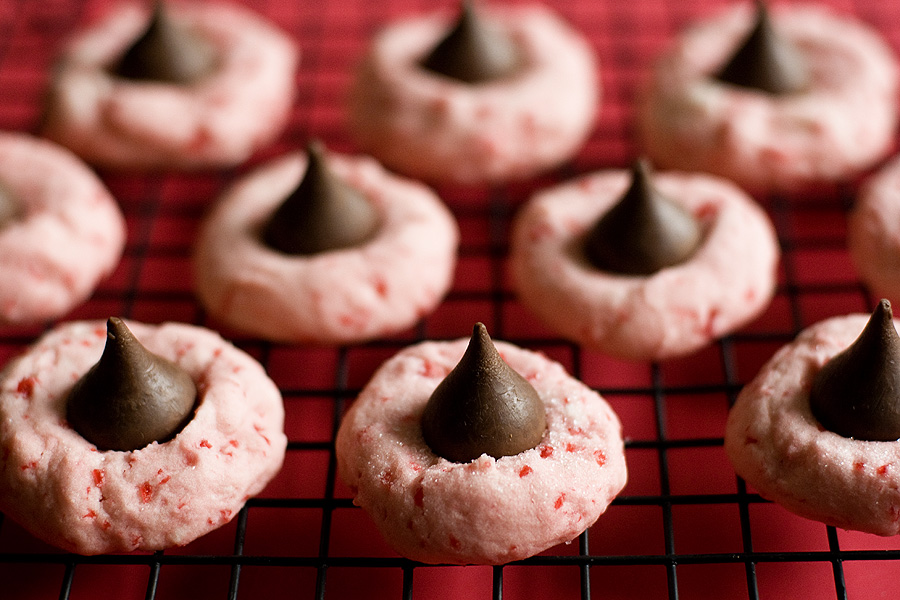
Welcome to Kiss Cookie week! I noticed that I had 5 recipes for different variety of kiss cookies, so I thought I’d make them all! Today’s post is the first of many this week. I love cherries, especially those of the maraschino variety. This is likely because I have happy childhood memories attached to them — I drank myself silly on Kiddie Cocktails for many, many years. I love cherries, but I don’t always love cherry-flavored foods. Isn’t that weird how that happens? I LOVE bananas, but generally won’t touch anything banana-flavored with a 10 foot stick (major exception being banana Runts). Anyway, cherries paired with CHOCOLATE are always delicious in my book.

Cherry Chocolate Kisses
Recipe source: The Curvy Carrot
Print Recipe

1 cup unsalted butter, softened
1 cup powdered sugar
1/8 teaspoon salt
2 teaspoons maraschino cherry “juice”
1/4 teaspoon almond extract
2-1/4 cups all-purpose flour
1/2 cup maraschino cherries, chopped
Granulated sugar, for sprinkling the cookies
~36 milk chocolate kisses, unwrapped

1. Preheat the oven to 325 degrees.
2. In the bowl of a stand mixer, beat the butter at medium speed until creamy, about 1 minute. Reduce the speed to the lowest setting and slowly add the powdered sugar and salt. Add the cherry juice and the almond extract until combined.
3. With the mixer still on low, slowly add the flour, scraping down the sides of the bowl as needed. Increase the mixer speed to medium and add the cherries.
4. Shape the dough into 1-inch balls, and place the balls on a parchment-lined baking sheet, approximately 2 inches apart. Using your thumb, gently press each cookie in its center until the cookie is about 1/2-inch thick. Sprinkle each cookie with a little granulated sugar.
5. Bake the cookies until the bottoms are lightly browned, about 14 minutes. Once removed from the oven, immediately press a chocolate kiss into each cookie’s center. Transfer the cookies to a wire rack to cool completely.

Makes about 36 cookies.
Summer Ideas 2011

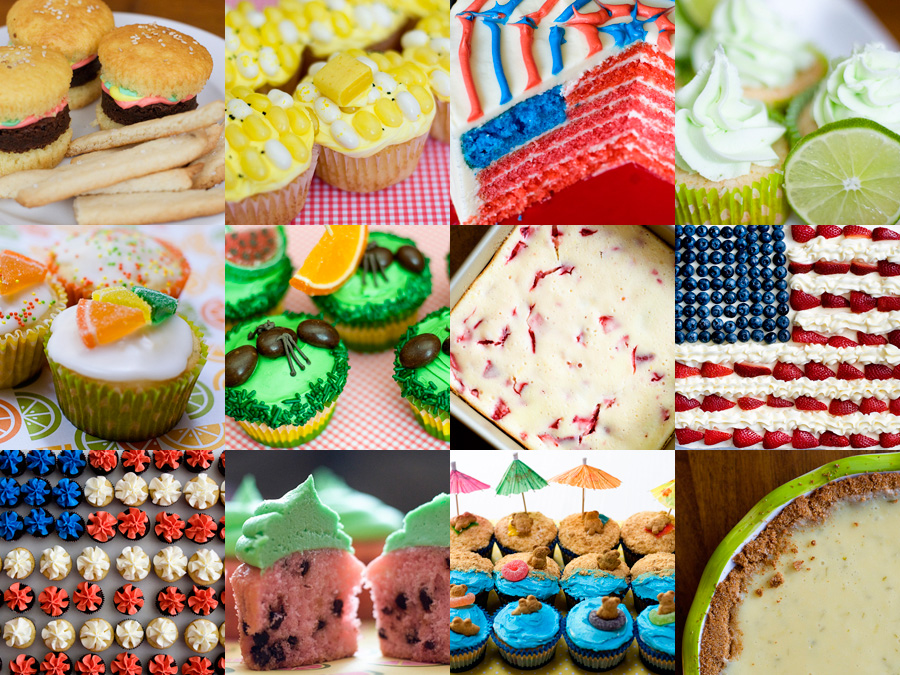
Here’s a roundup of some of the summer-inspired recipes on my site! Hopefully they will give you ideas for your summer cookouts.

1. Burgers & Fries
2. Corn on the Cob Cupcakes
3. American Flag Cake
4. Margarita Cupcakes
5. Triple Citrus Cupcakes
6. Ants at a Picnic Cupcakes
7. Strawberry Lemon Cheesecake
8. 4th of July Cake
9. 4th of July Mini Cupcakes
10. Watermelon Cupcakes
11. Beach Bear Cupcakes
12. Key Lime Pie

American Flag Cake

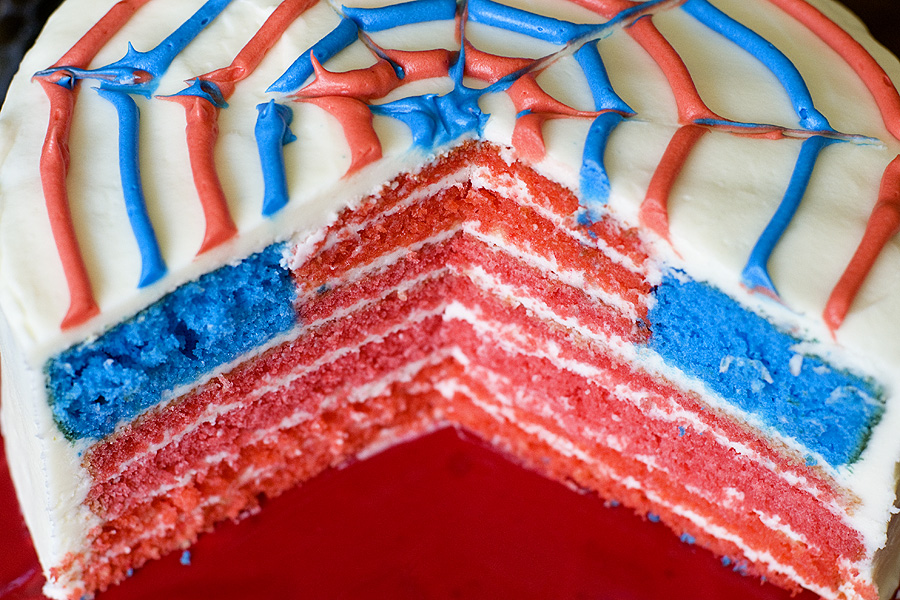
In the interest of full disclosure, let me just say right off the bat….. this cake was a pain in the ass to make! But it was so worth it! Everyone makes the traditional 4th of July cake – a sheet cake decorated with blueberries and strawberries/raspberries to look like the American flag. This cake is different because the surprise is on the inside.

American Flag Cake
Print Recipe

2 boxes white cake mix (plus oil and eggs)
Blue and red food coloring

For cream cheese frosting:
1-1/2 pound cream cheese (3 – 8oz. packages, not low fat)
1 pound unsalted butter (4 sticks)
2 pounds powdered sugar
1-1/2 teaspoons vanilla

1. Preheat oven to 350F and grease two 8″ cake pans with nonstick spray.
2. Make cake mixes according to box directions. You will need to make one 8″ blue cake, and three 8″ red cakes. I dyed one batch of cake batter red; I split the other batch in half and dye one half blue and one half red. Try to use as much batter as you can for each cake, because you want to end up with thick cakes.
3. Bake the 8″ cakes according to box directions. Cool completely before going on to the next step.
4. The most complicated part of creating this cake is torting the red cakes. Pain. in. the. butt.  I used a large serrated knife to cut the cakes. Torte two of the red cakes so that you end up with 4 or 5 thin and even layers. Try to make the layers as level as possible.
5. Use a knife to level off the blue cake (remove the “dome” that forms when the cake bakes). After the blue cake as been leveled, cut a hole out of the middle of the cake. I used a large round cookie cutter for this step. Using a round cookie cutter is a good idea because of the sizing consistency it provides. At the end of this step your blue cake should look like a donut — with a hole in the middle.
6. Use a knife to level off the last red cake. Once the cake is leveled, use the same round cookie cutter to cut a circle out of the red cake. Torte the circle you cut out to get three thin layers.
7. For the frosting, cream together the cream cheese, butter, and vanilla. Slowly add the cream cheese until you reach the desired consistency. I like thicker frosting, so I always add nearly 2 lbs of powdered sugar.
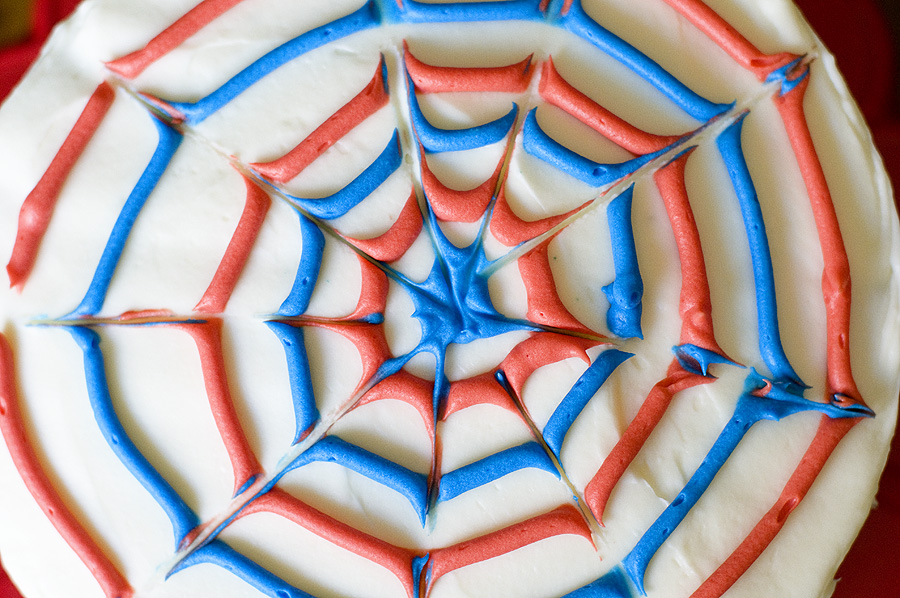
8. Time to assemble! Layer the first 4 or 5 full-sized red layers on a cake platter, adding cream cheese icing between each layer. Once the full-sized red layers are assembled, add the blue “donut” to the top. Fill the “donut hole” with the small red slices of cake, adding cream cheese icing in between each. Thoroughly frost the outside of the cake and decorate the top of the cake if you’d like to. I used red and blue frosting to create a spiderweb/fireworks design.
9. Before cutting into your cake, chill the cake in the refrigerator for a few hours so the frosting can set (and the cake will be easier to cut!).

Enjoy!

4th of July Mini Cupcakes

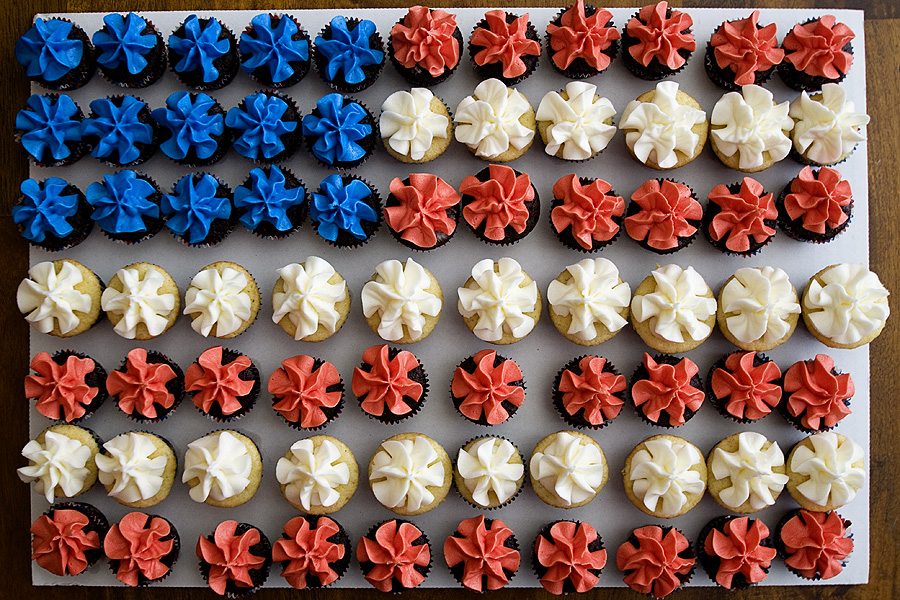
If you want to make an easy dessert for the 4th of July, this is it! I made about 90 mini cupcakes (which seems like a lot of work, but it isn’t bad at all!), frosting them red, white, and blue, and assembled them into an American flag! Easy squeezy!

4th of July Mini Cupcakes
Print Recipe

2 box cake mixes (your choice; I used white cake and chocolate cake)
Mini cupcake liners
1 stick salted butter, softened
1 stick unsalted butter, softened
1 cup shortening
1 Tablespoon vanilla
2 lbs powdered sugar
4-6 Tablespoons milk

1. Preheat oven to 350F and make box cake mixes according to directions. Line a mini cupcake pan with liners and add a scant Tablespoon of cake batter to each. Bake for about 12 minutes; remove from oven and cool on wire racks.  To create a full American flag cake, you’ll need about 80 mini cupcakes.
2. Make frosting by creaming the butters and shortening together. Add vanilla and mix. Slowly add the powdered sugar until incorporated, adding milk if you need to thin it out.
3. Divide the frosting into thirds. Dye one third blue and one third red. Can we just talk about red food coloring for a minute? It’s seemingly impossible to get a RED result! Always looks pink-ish. Oh well!
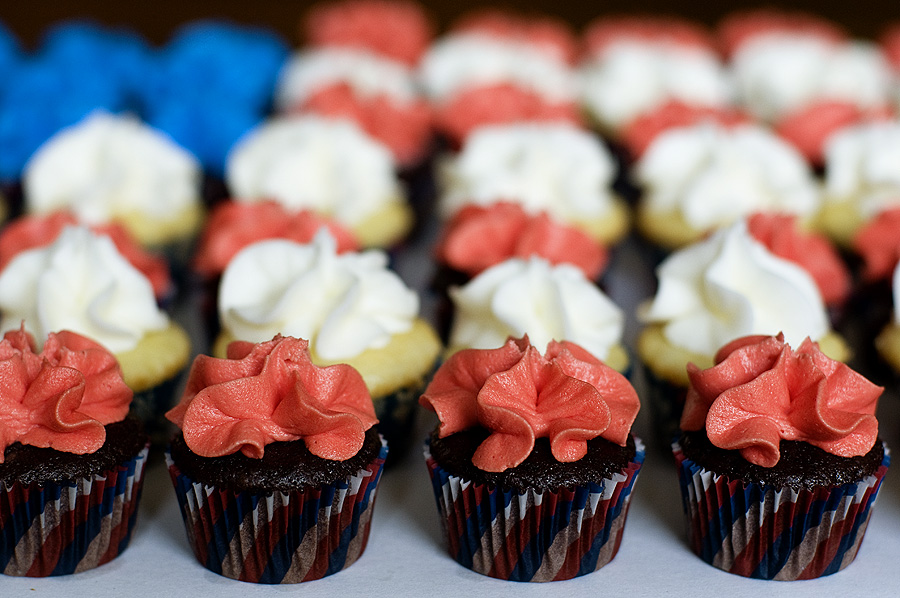
4. Pipe the frosting onto the cupcakes. I used a star pastry tip. About 15 of the cupcakes should be blue, and about 32 should be red and white.
5. Assemble into an American flag.

New Features + 26 Facts

Hi everyone! I thought I’d take a quick break in posting recipes and instead tell you about a few new-ish features of With Sprinkles On Top.

  • There is now a Print Recipe link included in almost every post. Hopefully this will make your lives easier if you ever want to print one of the posts.
  • If you are looking for something specific, be sure to check the master lists of recipes. I’ve made an alphabetical list and a categorical list. There is generally a bit of a lag in updating those lists, so recipes from new posts might not be added right away.
  • Everyone loves frosting, right? I’ve made a list of my favorite icing recipes. Also, is there a difference between the term “frosting” vs “icing”? I use them interchangeably.
  • One of the most common questions I get is, “what is your favorite recipe?” I can’t pick just one. I had a hard time narrowing it down to twenty five. But here are my twenty-five favorite recipes. I’m sure that list will change over time.
  • And now, a question for you: is there anything specific you’d like to see on the site? More cupcakes? Less chocolate? More this? Less that? I get a lot of questions about food photography, so I’ve been thinking about doing a tutorial on that topic (though I am, by no means, an expert!).

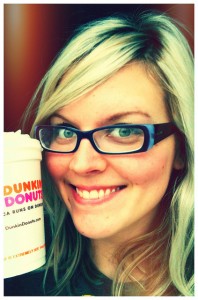
And finally, I thought I’d fill out this survey that I originally read on one of my favorite food blogs, Sugar Plum. I always enjoy learning more about the bloggers behind the blogs — and after maintaining this blog for almost 3 years, I thought I’d share more about me. That’s me to the left with my beloved Dunkin Donuts coffee. It’s one of the things I miss most about living in Chicago — and quite honestly, I will always love DD coffee more than the drinks found at fancy pants coffee shops. But anyway, on with the ABCs of Annie.

A. Age: 26. Almost 27. My birthday is on August 21… send presents. ;)
B. Bed size: Queen.
C. Chore you hate: Grocery shopping (the irony is not lost on me). I would rather vacuum, dust, clean toilets, or scrub the floors than go to the store.
D. Dogs: Would LOVE to have one.
E. Essential start to your day: Diet Pepsi + Quaker Corn Bran cereal (no milk)
F. Favorite color: Green
G. Gold or silver: It depends.
H. Height: 5’9″
I. Instruments you play: I played piano when I was young.
J. Job title: Unemployed twentysomething with a MPH
K. Kids: Eventually. Maybe. Not now.
L.  Live: Downtown Madison, WI
M. Mom’s name: Jeanne
N. Nicknames: Annie itself is a nickname, as my real name is Ann. Other nicknames I’ve had over the years include Peanut, Annid, and Hannie.
O. Overnight hospital stays: No, but a few trips to the hospital in the middle of the night.
P. Pet peeve: Just one? Habitually lateness. Inattentive drivers. Those little paper inserts in magazines.
Q. Quote from a movie: That rug really tied the room together.
R. Right or left handed: Right
S. Siblings: None
T. Time you wake up: It depends.
U. Underwear: No. I’m not going to discuss my underwear on my baking blog. As GOB would say, COME ON!
V. Vegetables you dislike: Carrots
W. What makes you run late: Usually nothing. I always like to be early or on time.
X. X-rays you’ve had: Dental; plus a few abdominal X-rays
Y. Yummy food you make: Uh, check out this blog.
Z. Zoo – favorite animal: Not a fan of zoos. But I do like elephants.