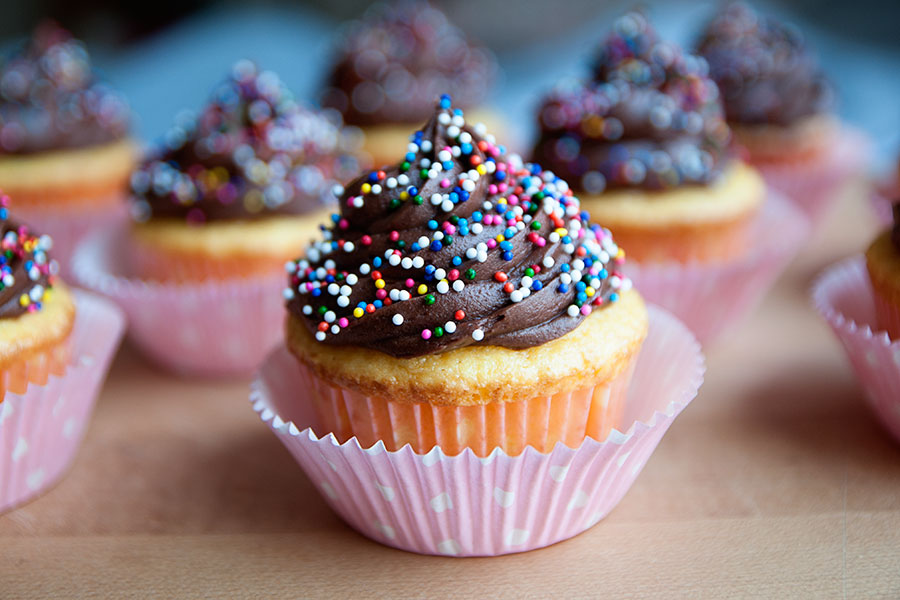
About a month ago I received a request to feature a recipe for yellow cake. My one problem is that I don’t like to make cakes — mainly because they go to waste in my house. It’s easy to bring…
Archives for February 2015
Tetris Cookies
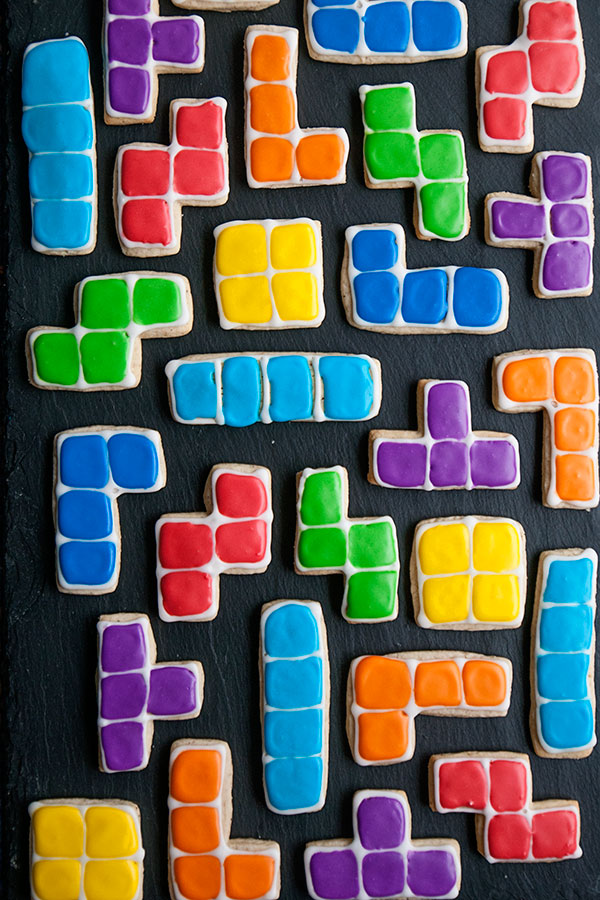
My favorite video game of all time is Tetris. It’s simple, addicting, and oddly soothing. My love of the game was intensified when the tetriminos were colorized. Each tetrimino has a color and I stayed true to that with these…
Cupcake Cookies

I’m a total sucker for novelty treats. Like these cookies that look like cupcakes. Or treats that are a miniature (balloon cookies!) or giant version (giant Oreo cake!) of their true selves. Or treats that just make no sense (like…
Red Velvet Oreo Cupcakes
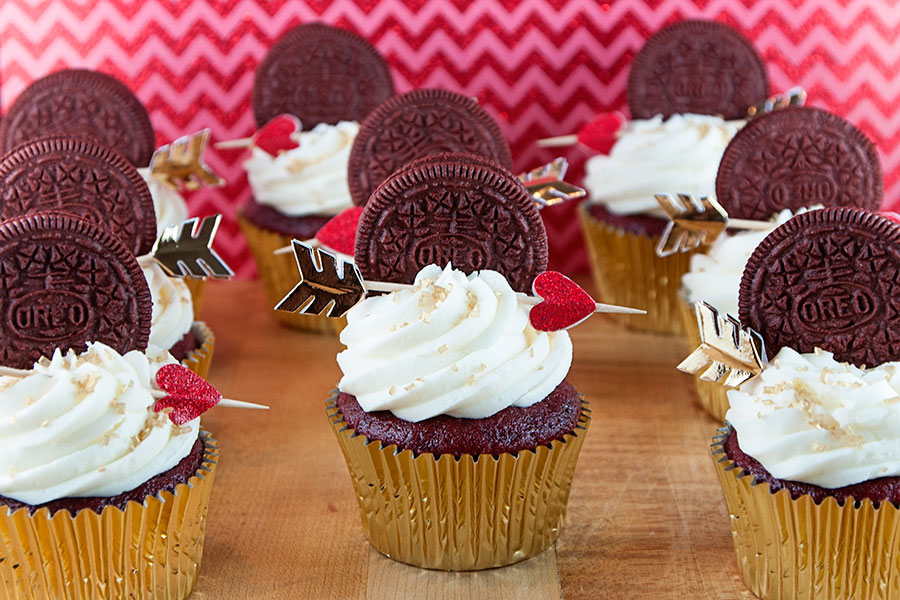
I have a secret. Most of my friends and family know this, but I’ve never said it publicly on my blog (at least I don’t think I have). Here it is: I roll my eyes at the thought of red…
Mardi Gras Ideas 2015
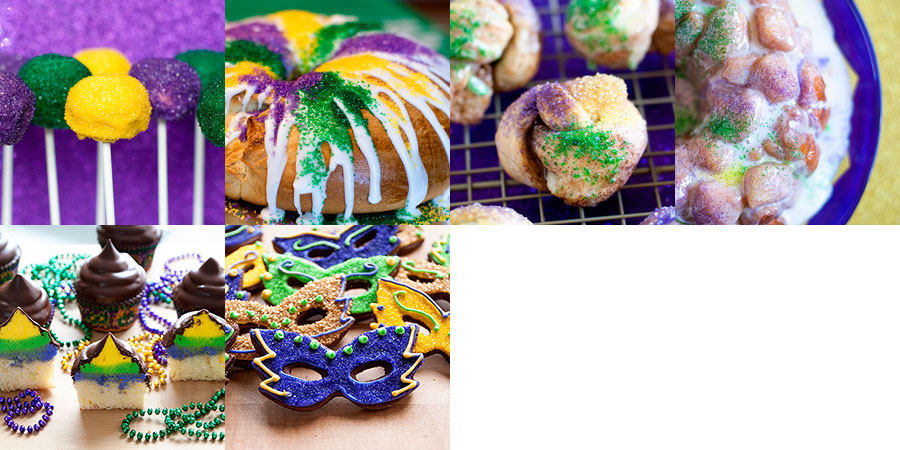
Mardi Gras is next Tuesday! Here are some ideas for your celebration! 1. Mardi Gras Cake Pops 2. King Cake 3. King Cake Knots 4. King Cake Monkey Bread 5. Mardi Gras Hi-Hat Cupcakes 6. Mardi Gras Mask Cookies
Mardi Gras Mask Cookies
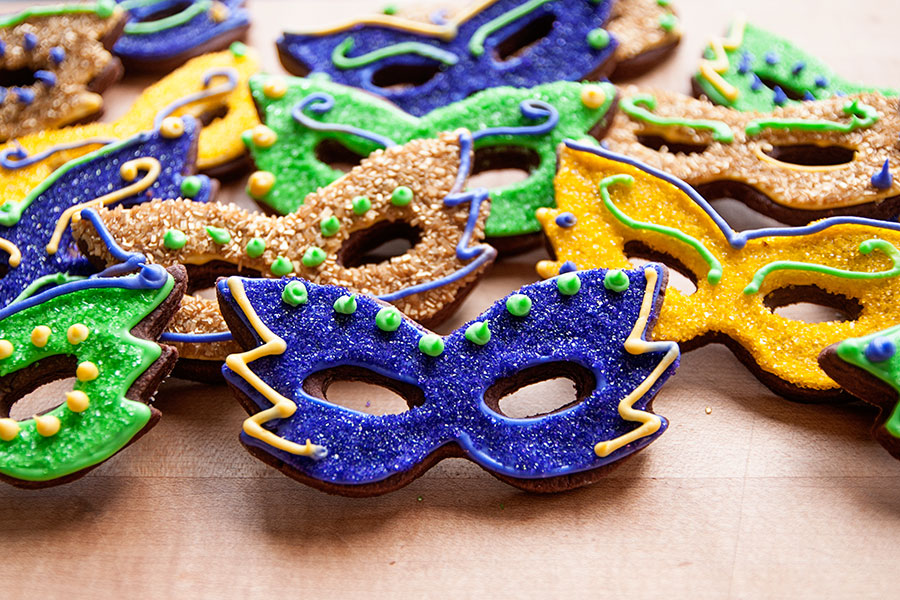
Mardi Gras is next Tuesday, February 17th! This is not a big holiday here in Wisconsin, but I still try to bake a treat or two each year in celebration. I love the idea of Mardi Gras and I love the…
Valentine’s Day Ideas 2015
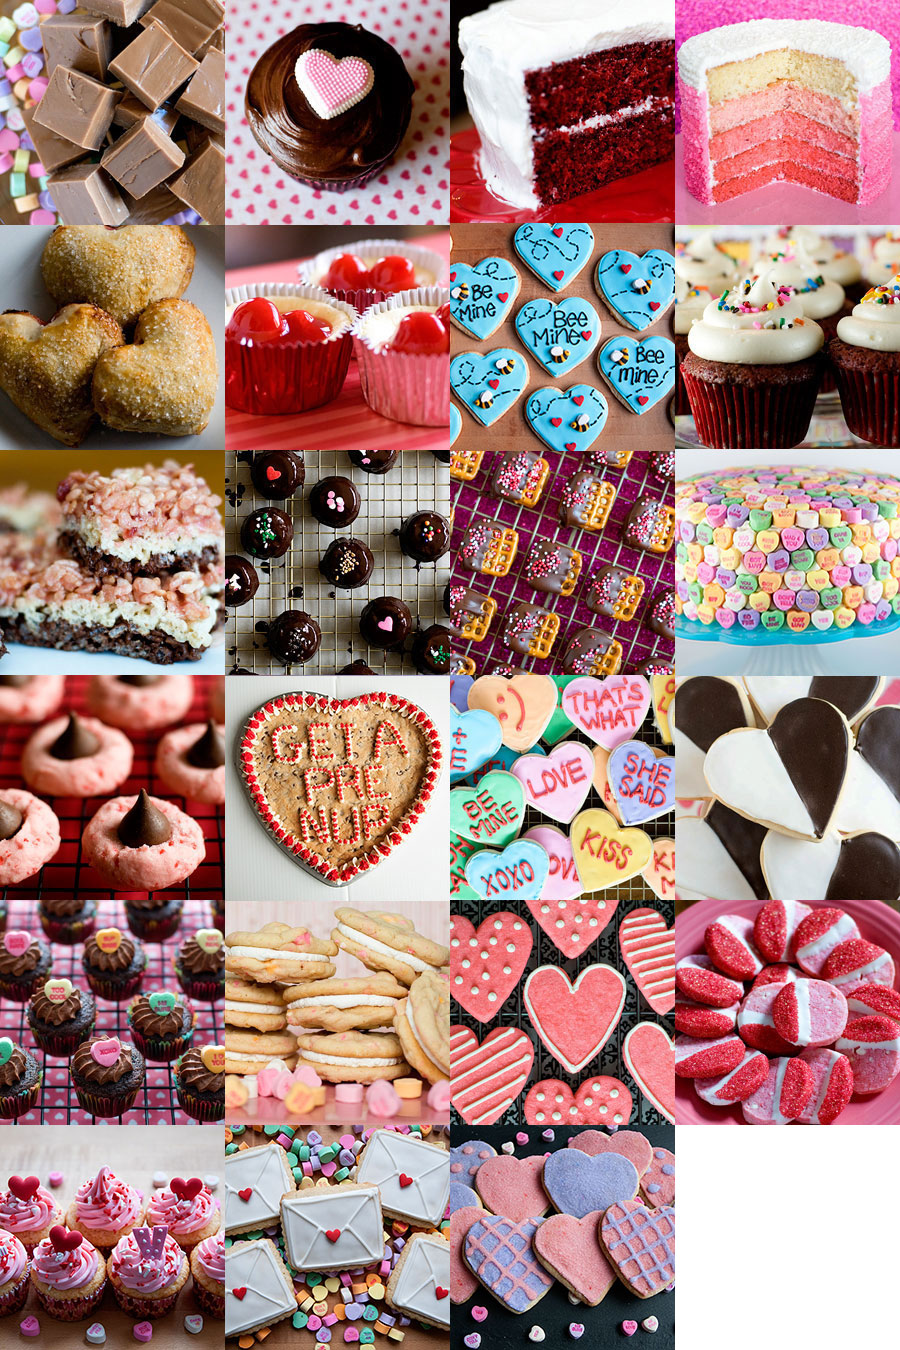
Valentine’s Day is this weekend! If you need sweet ideas, you’ve come to the right place! 1. Tootsie Roll Fudge 2. Chocolate Mayonnaise Cupcakes 3. Red Velvet Cake 4. Pink Ombre cake 5. Pear-Raspberry Heart Pies 6. Mini Cherry Cheesecakes 7….
Love Letter Cookies
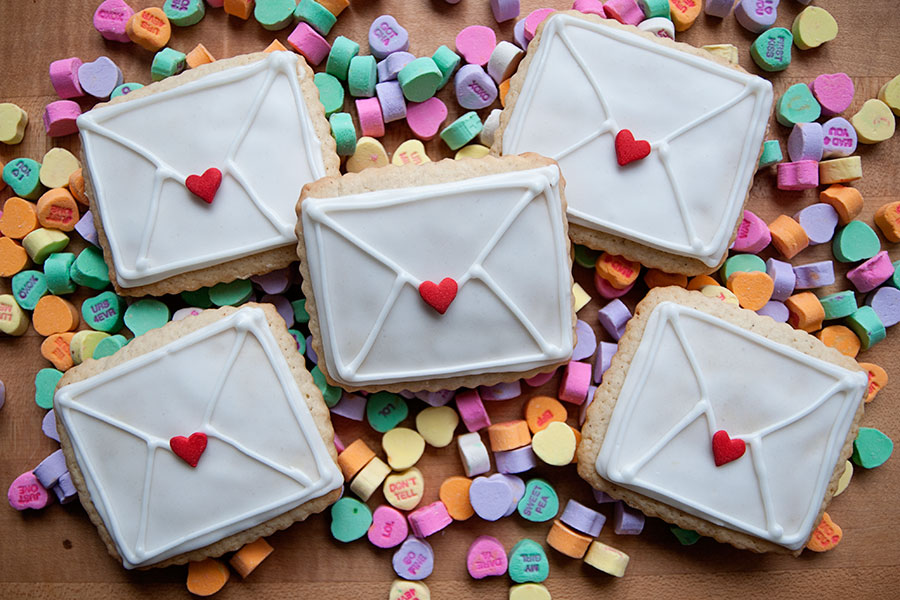
Handwritten letters and notes are the best, right? I love technology, the Internet, and social media like crazy, but I am also a huge believer in hand-writing thank-you notes, letters, etc. There’s just something more personal about receiving a hand-written note…
LOVE Cupcakes

If you need something EASY to make for work or for your kid’s class, this post is for you! Side note: are kids allowed to celebrate Valentine’s Day at school? Or is this another fun, innocent event that has been…
Pink + Purple Hearts
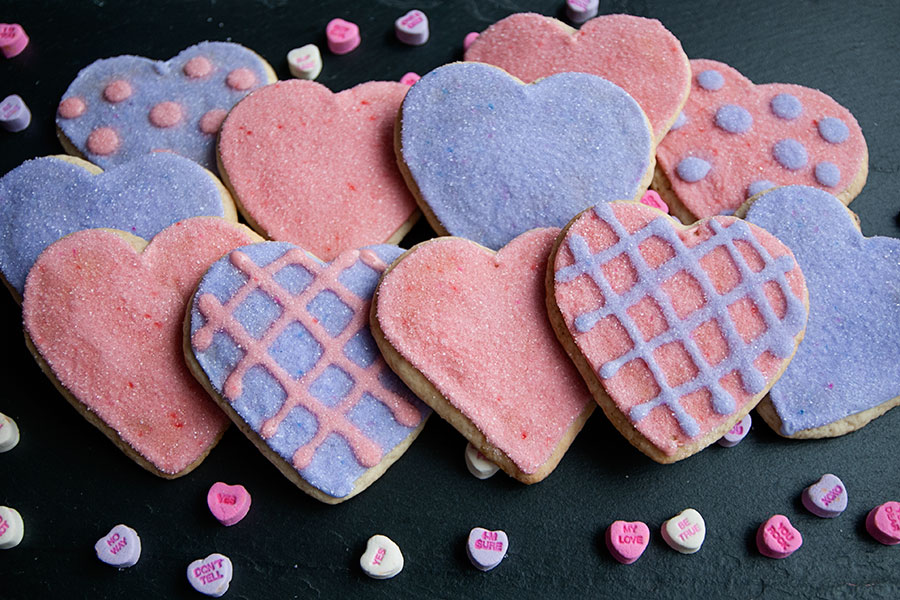
‘Tis the season for hearts and love! These cookies didn’t turn out quite like I had envisioned, but I’m posting them anyway. And a weird thing happened — some of the sprinkles turned red or blue overnight. See the little…
Sprinkles 101
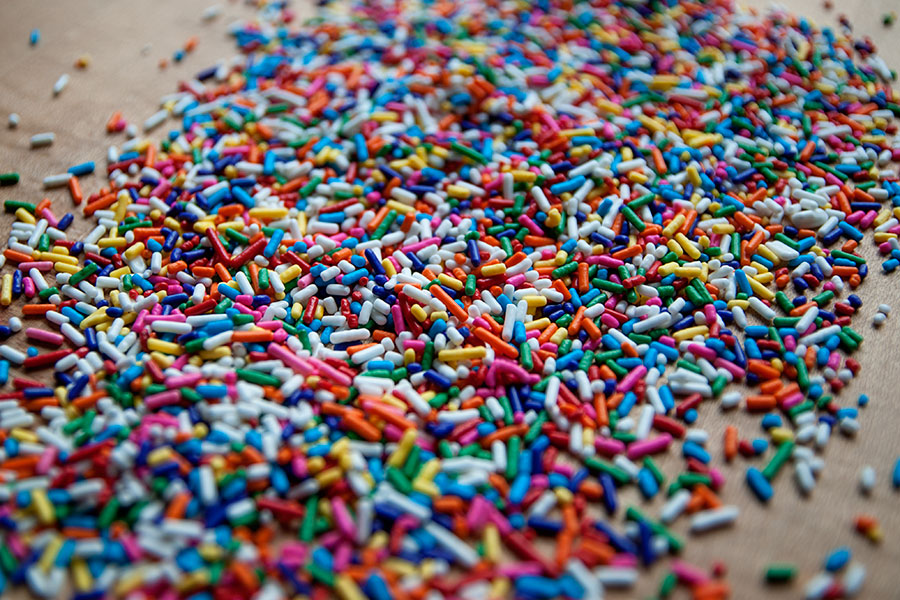
The title of my blog includes the word “sprinkles”, so it should be no surprise that I am obsessed with them. What I have learned in my years of baking is that there are about 3,297 different types of sprinkles. Jimmies….


