Author: Annie

Blue Velvet Cake

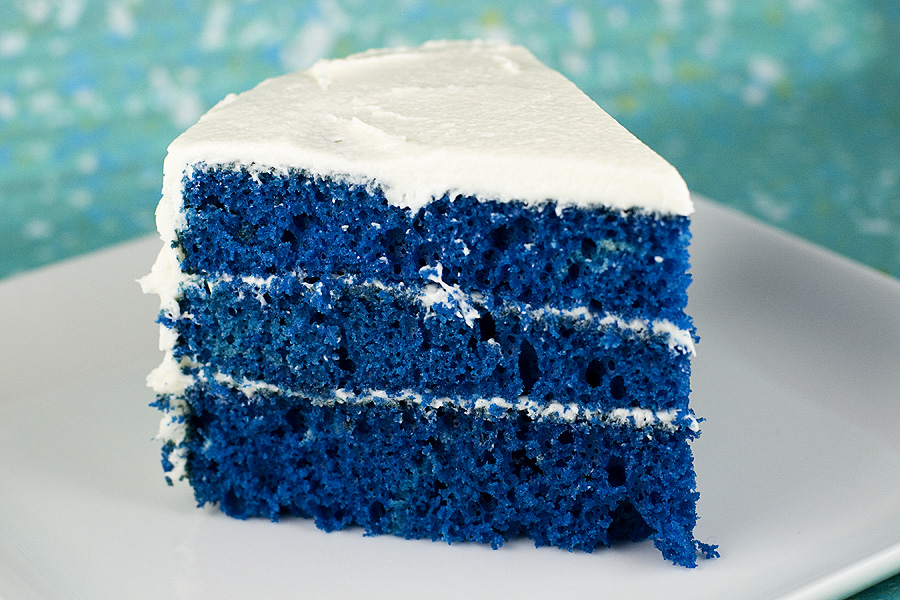
Father’s Day weekend is approaching! If you want to make red velvet cake a little more manly, try BLUE velvet cake instead! I am always a fan of things that are a little crazy and off-the-wall — and blue cake definitely fits that description. The frosting on this cake was delicious and reminded me so much of the marshmallow bits from Lucky Charms cereal. I hope you all have a great weekend and here’s to all of the amazing dads out there!

Blue Velvet Cake
Recipe source: Betty Crocker
Print Recipe

1 box white cake mix
1-1/4 cups buttermilk
1/3 cup vegetable oil
3 eggs
1 Tablespoon unsweetened cocoa powder
2 teaspoons royal blue paste food coloring
1 toothpickful violet paste food coloring

Frosting:
1 jar (7 oz) marshmallow creme
1 cup butter, softened
2-1/2 cups powdered sugar
1/8 teaspoon salt

1. Preheat oven to 325F. Grease bottom and sides of three 8-inch round cake pans (or spray with non-stick baking spray).
2. In a large bowl, beat all cake ingredients with an electric mixer on low speed for about 30 seconds or until moistened. Beat on medium speed for 2 minutes, scraping bowl occasionally.
3. Divide batter evenly among pans. Bake 23-28 minutes or until top springs back when lightly touched in the center. Cool 15 minutes; remove from pans and cool completely on wire racks.
4. In microwave-safe bowl, microwave marshmallow creme on high for 15-20 seconds to soften. Add butter and beat with an electric mixer on medium speed until smooth. Beat in powdered sugar and salt until smooth.
5. If necessary, trim rounded tops of cake layers to flatten before assembling. Layer and frost cake.
Rapunzel Birthday Cake

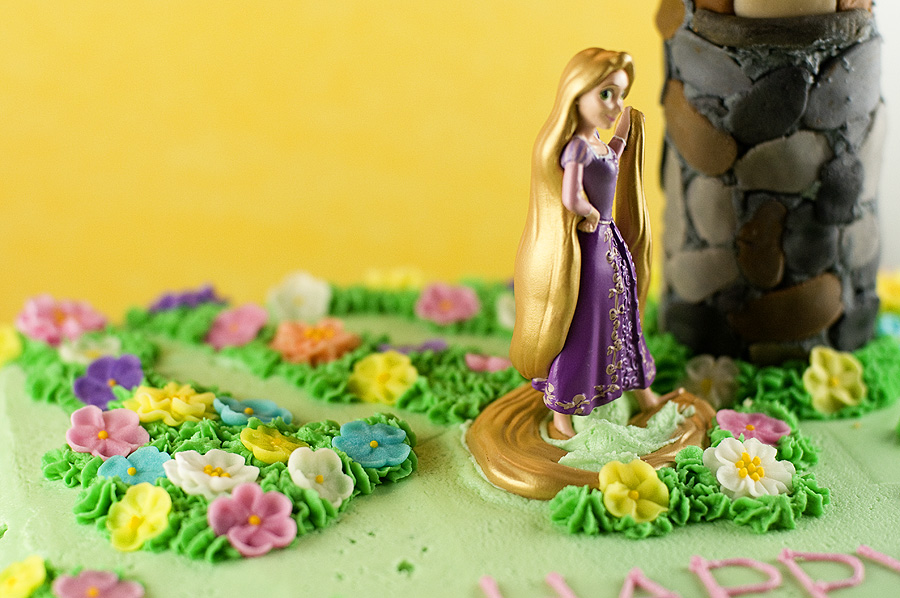
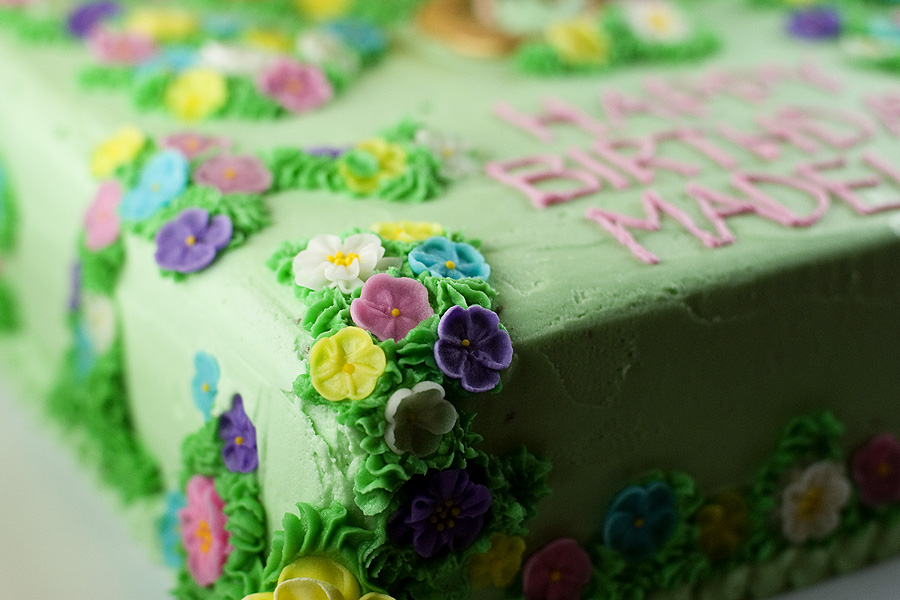
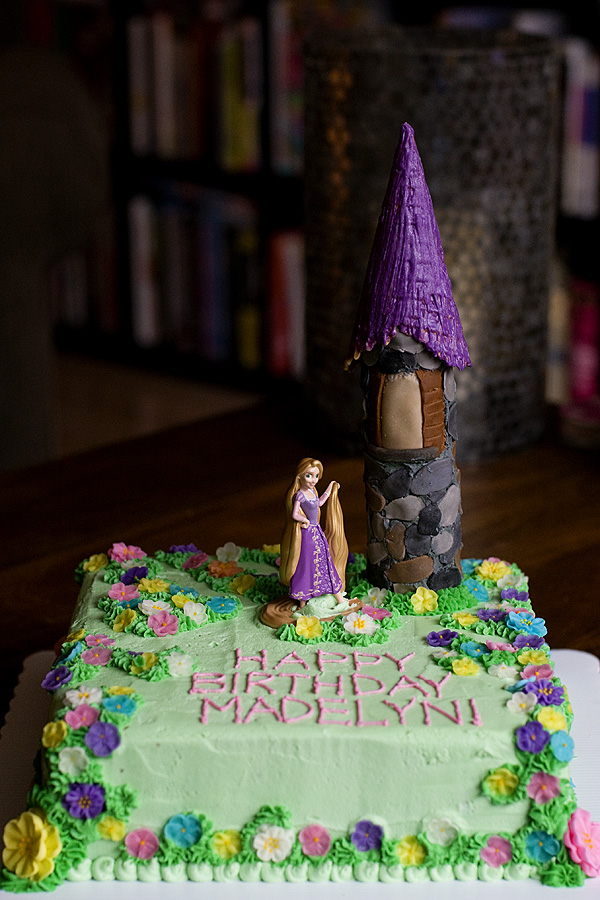
Happy birthday to Madelyn! Madelyn turns 5 this month and had an adorable birthday party last Saturday. She requested a Rapunzel cake, which immediately sent me into a slight panic because the story of Rapunzel involves a TOWER. But no challenge is too big and the cake turned out great. I need to give a HUGE thank you to my friend Meghan for all of her help – she made the tower… and rolled and dyed all of those fondant “stones”. She’s always so willing to help me with these cakes and it’s much appreciated. Here are the details about how I made the cake:

  • I used The BEST Chocolate Cake Recipe from Kevin & Amanda and the White Buttercream Frosting recipe from the Repressed Pastry Chef. I made a double batch of both the cake the the frosting.
  • I used a 10″ square cake pan.
  • I used Wilton Leaf Green gel food coloring; using a little for the pale green and more for the darker shade of green.
  • The green “leaves” were created by using a Wilton star pastry tip.
  • The sugar flowers were purchased from Vanilla Bean here in Madison.
  • The Rapunzel figure belonged to Madelyn and I’m not sure where her parents purchased it.
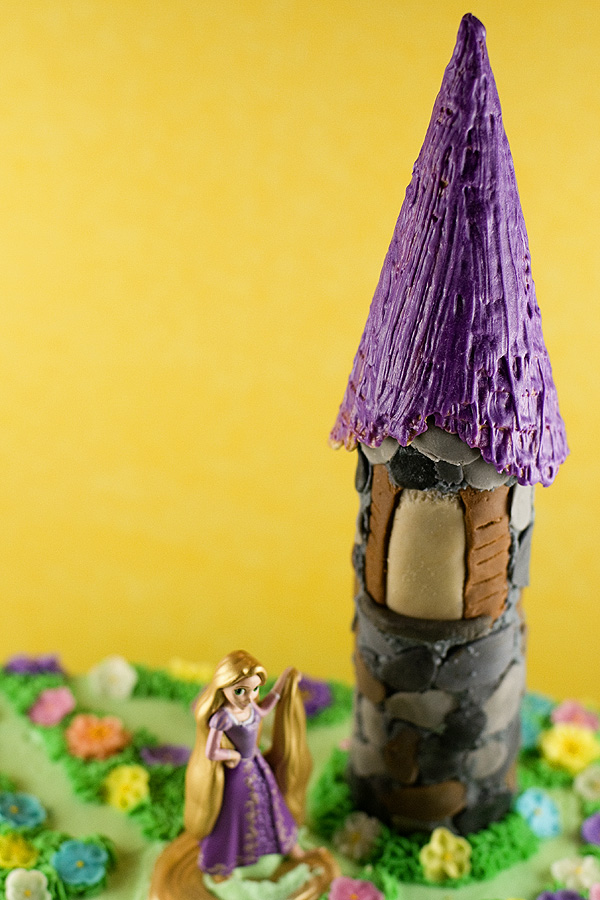
  • The base of the tower is a cardboard center from a roll of paper towel. We cut the roll down in size a bit.
  • Meghan covered the roll in gray frosting (use black food coloring to achieve the gray color); she covered the gray frosting with bits of fondant that she rolled out to look like stones, windows, and shutters. When finished, the tower was placed on the cake and pushed into the cake about 1.5 inches.
  • The roof of the tower was created by using a waffle cone covered in purple candy melts. The candy melts were purchased at Vanilla Bean (though I know stores like Hobby Lobby sell them). Once melted, I brushed the candy melt material onto the waffle cone using a pastry brush and set it on a piece of waxed paper to dry.
  • We placed a wooden dowel, that was significantly taller than the tower, inside of the tower. We then set the waffle cone roof on the dowel so it appears to be sitting on the tower. You could also “glue” the roof to the tower with frosting.
  • Here are a few more photos. As always, let me know if you have questions.

undefinedundefinedundefined


Sports-Themed Birthday Cake

I apologize for my lack of posting recently! May was a busy month for me and I was away from my kitchen quite a bit, so I haven’t had a chance to bake as much as usual. Hopefully that will change in the coming months, but let’s be real: it’s summertime! Time to enjoy the outdoors, travel, and in my case, keep looking for a job so I can put my newly acquired Masters degree to use.

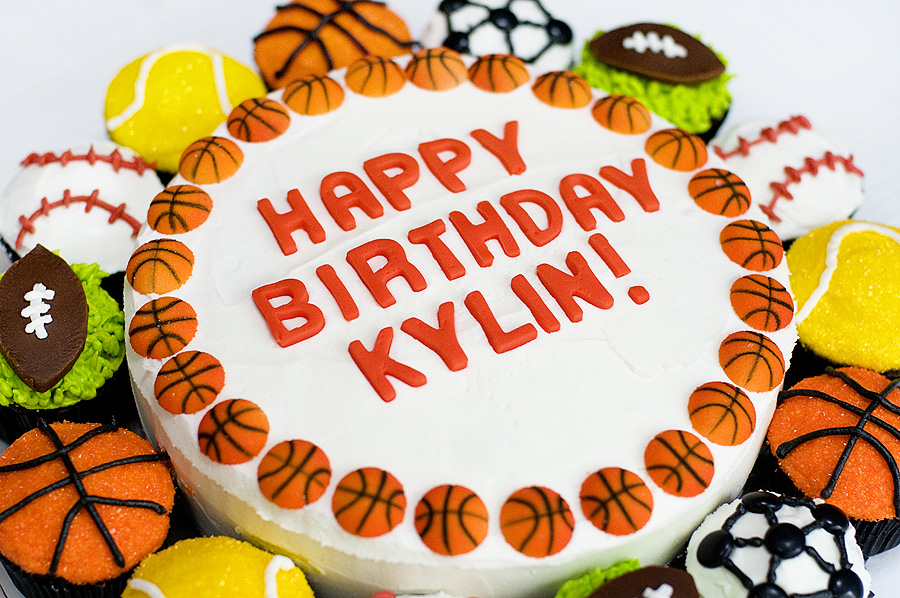
But enough about summertime. Back to baking! I was asked to make a birthday cake for my friend’s son, Kylin. He turned 3 years old about a week ago and he LOVES all things basketball! I thought I would do a bit more than just a basketball cake, so I expanded the design to include a variety of different sports. Kylin’s favorite color is orange, so the cake also incorporated quite a bit of orange — I even dyed the white cake orange as a special surprise.

Sports-Themed Birthday Cake
Print Recipe

– 1 box white cake mix (for the cake)
– 1 box chocolate cake mix (for the cupcakes)
– Eggs and vegetable oil for the cake mixes
– Ingredients for White Buttercream Frosting, as listed on my icing page. I made a double batch of frosting because this cake requires quite a bit.
– Brown or black cupcake liners (you can use another color if you’d like)
– Food colorings: orange, yellow, green, red, and black
– Fondant: brown (for the footballs) and any color of your choosing for the lettering
– Set of alphabet fondant cutters (sold at Hobby Lobby or amazon.com)
– Black M&Ms (for the soccer balls)
– Sprinkles: orange, yellow, green
– Basketball pressed sugars (I found mine at Vanilla Bean, here in Madison)
– Piping bags and small round tips
– Cake board (cardboard, plastic, it’s up to you!) that can accomodate at least 14″

Cake
I made the cakes according to box directions, though I dyed my batter orange. I made 9″ cakes, but 8″ would also work. Cool the cakes completely before frosting them! The rest is pretty self-explanitory: assemble and frost cake on a large round cake board; add embellishments, like fondant lettering or pressed sugars.

Cupcakes
All of the cupcakes are chocolate, made by following box directions. I made 4 cupcakes for each sport. Here’s what I did to make the basketballs, baseballs, tennis balls, footballs, and soccer balls.

Basketball:
– Tint about 1 cup of buttercream frosting orange. Frost 4 cupcakes with orange frosting and dip into orange sugar. Tint a small amount frosting black and pipe lines onto each basketball cupcake.

Baseball:
– Frost 4 cupcakes with white frosting. Tint a small amount of frosting red and pipe stitching onto each baseball cupcake.

Tennis ball:
– Frost about 1 cup of buttercream frosting yellow. Frost 4 cupcakes with yellow frosting and dip into yellow sugar. Pipe white frosting onto each tennis ball cupcake.

Football:
– Tint about 1 cup of buttercream frosting green. Frost 4 cupcakes with green frosting and dip into green sugar — or use a Wilton Tip 233 to make the frosting look like grass. I used the Wilton tip effect. Roll out a packet of brown pre-made fondant (I bought mine at Hobby Lobby) and cut into small football shapes with a knife. I don’t have a template for this, as I did mine by hand. Place each fondant football on top of the “grass” and pipe white laces onto each.

Soccer ball:
– Frost 4 cupcakes with white frosting. Place black M&Ms on each cupcake to resemble a soccer ball. Tint a small amount of frosting black and pipe lines connecting each M&M.

Pear and Apple Phyllo Crisp

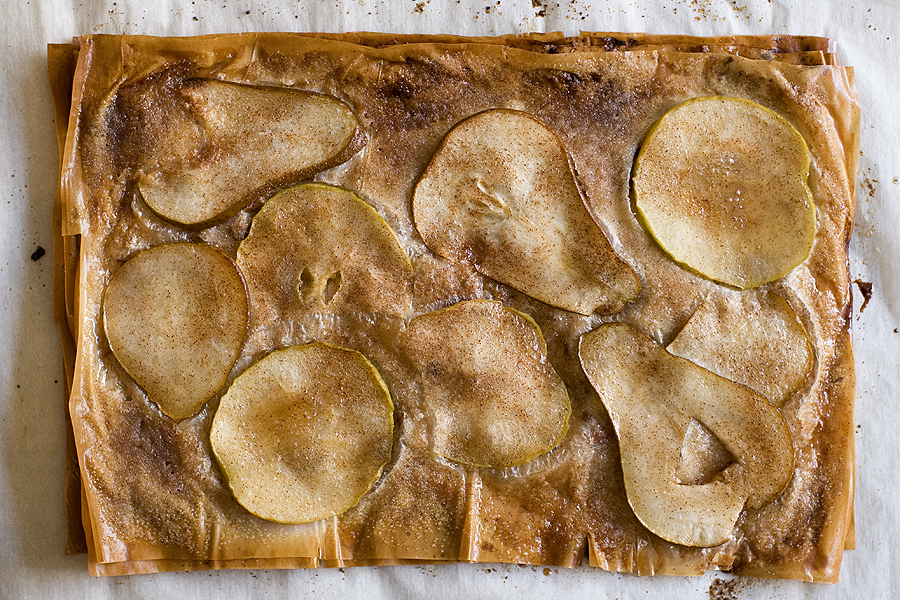
I know what you’re thinking: pears and apples? Shouldn’t this recipe be posted in the fall, not late spring?! I will admit that it’s not seasonally appropriate, but here’s the truth: my phyllo dough was about to expire and had to be used! When the scents of apple and cinnamon filled my apartment, I closed my eyes and *almost* thought it was October.

Pear and Apple Phyllo Crisp
Recipe source: Martha Stewart
Print Recipe

1/2 cup pecans, toasted and finely chopped
1/3 cup plain breadcrumbs
1/4 cup sugar, plus more for sprinkling
1/2 teaspoon ground cinnamon, plus more for sprinkling
6 sheets frozen phyllo dough (11-1/2 x 15 inches each), thawed
1 stick unsalted butter, melted
3 small firm pears (Forelle or Seckel)
2 Granny Smith apples (peeled is best, but I was too lazy to do that step!)

1. Preheat oven to 400F with a rack in the top position. Combine pecans, breadcrumbs, sugar, and cinnamon.
2. Line a baking sheet with parchment and top with 1 phyllo sheet. Brush phyllo all over with butter and sprinkle pecan mixture evenly over top. Repeat 4 times. Top with remaining phyllo sheet and brush with all but 2 Tablespoons of the butter.
3. Slice pears and apples 1/8-inch thick; discard seeds. Arrange pear and apple slices in a single layer on phyllo, leaving space between fruit and 1/4-inch border around edges. Brush fruit with reserved 2 Tablespoons butter. Sprinkle with sugar, and dust with cinnamon. Bake, rotating sheet halfway through, until phyllo is golden brown and fruit is soft — about 28-32 minutes. Let cool slightly, cut into 8 pieces.

Butterbeer Cupcakes

I visited the Wizarding World of Harry Potter at Universal Studios a few months ago. Being an avid Harry Potter fan, I was curious to know how the park would look and feel — and I was curious to know what the butterbeer would taste like! I was skeptical — mainly because I don’t like super, super sweet ANYTHING. I tried the frozen butterbeer and it was a-m-a-z-i-n-g. I would have had a second and third and fourth glass if I didn’t have a conscience that told me, “stop – there are probably 1,000 calories in one glass!” The theme park itself was also amazing and you really did feel like you were *in* the books. The employees even referred to the patrons as muggles.

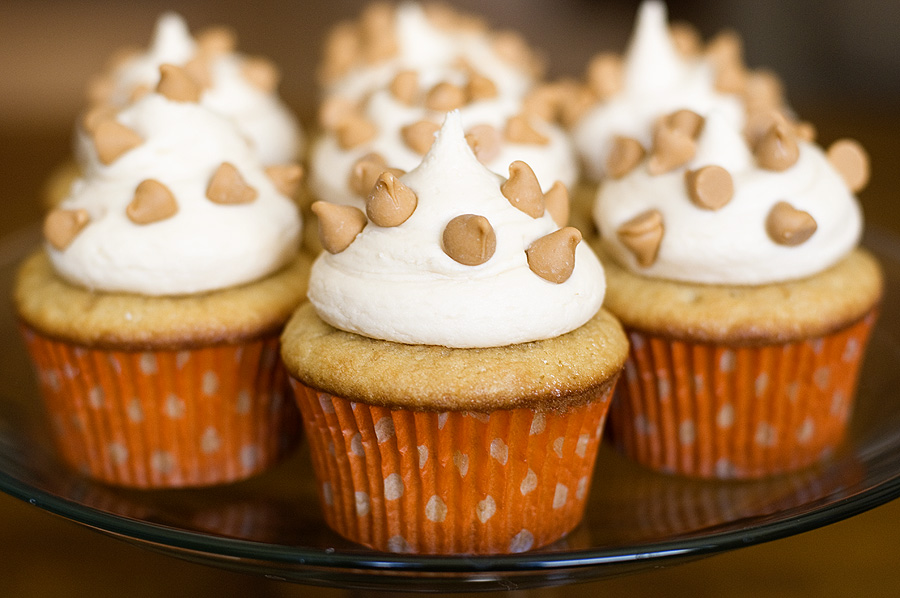
I found a recipe for butterbeer CUPCAKES and had to try! They are filled with butterscotch and cream soda flavors and really do taste like the butterbeer at the park!

Butterbeer Cupcakes
Recipe source: amybites.com

For the cupcakes:
2 cups flour
1-1/2 teaspoon baking powder
1/2 teaspoon baking soda
1/4 teaspoon salt
1/2 cup (1 stick) unsalted butter, softened
1/2 cup granulated sugar
1/2 cup dark brown sugar, packed
3 large eggs
1 1/2 teaspoon vanilla
1 teaspoon butter flavoring
1/2 cup buttermilk
1/2 cup cream soda

For the ganache:
1 11-oz. package butterscotch chips
1 cup heavy cream

For the buttercream frosting:
1/2 cup (1 stick) unsalted butter, softened
1/3 cup butterscotch ganache
1 teaspoon vanilla
1 teaspoon butter flavoring
1/8 teaspoon salt
1 16-oz. package powdered sugar
Splash of milk or cream (as needed)

For the cupcakes:
1. Preheat the oven to 350 degrees and line cupcake pans with paper liners.
2. Combine your flour, baking soda, baking powder, and salt in a bowl and set aside.
3. In a large bowl, cream your butter until light and fluffy. Add your sugars and beat until well-combined. Beat in your eggs, one at a time, mixing well after each addition. Then beat in your vanilla and butter flavoring.
4. Alternate adding your buttermilk, cream soda, and dry ingredients in batches until all are well incorporated.
5. Fill each cupcake liner 3/4 full, then bake for 15 to 17 minutes until a tester inserted into the center comes out clean and cake springs back to the touch. Cool completely on wire racks.

For butterscotch filling:
1. In a double boiler (heat-proof bowl over a pot of simmering water on the stove), combine butterscotch chips and heavy cream and stir until completely combined and smooth.
2. Cool to room temperature.
3. Fill a squeeze bottle with ganache and insert into the center of each cupcake, squeezing until filling begins to overflow.

For buttercream frosting:
1.
Cream butter in a large bowl until fluffy. Add in ganache, vanilla, butter flavoring, and salt and mix until well combined.
2. Beat in powdered sugar 1 cup at a time until reaching desired consistency. Add milk or cream by the Tablespoon as needed.
3. Frost cupcakes. You can top with a drizzle of ganache or with butterscotch chips.