Month: September 2014

Peanut Butter + Rolo Cookies

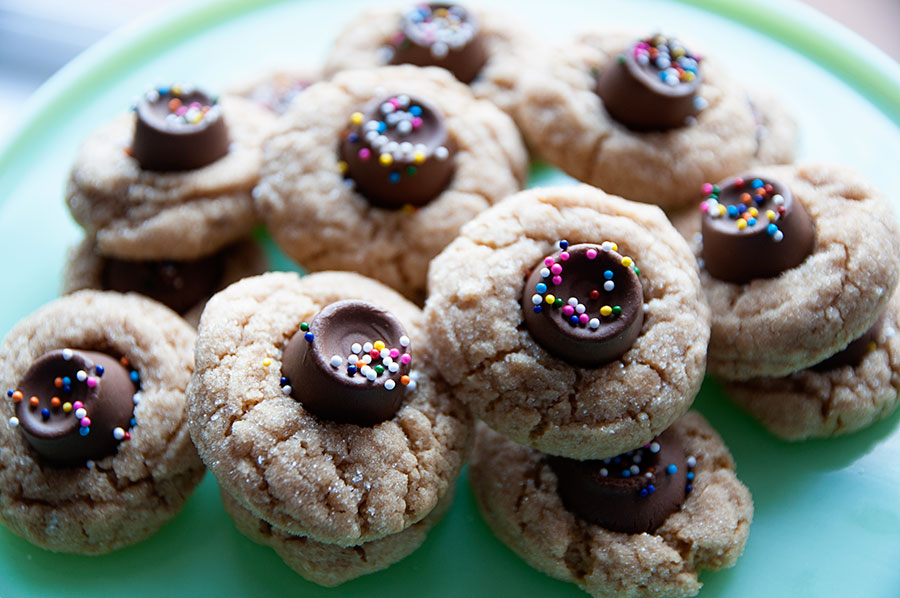
DSC_1073x900These cookies are a nice twist on the classic peanut butter blossom cookie — you know, the peanut butter cookie with the Hershey Kiss on top. The peanut butter blossom is a holiday staple and one of my favorites — but oh my, the addition of a Rolo instead of a Kiss? YESSSSSS. Plus… a few rainbow sprinkles never hurt anyone. If you make these for the holidays, try using red and green sprinkles instead!

Peanut Butter + Rolo Cookies
Recipe source: Julia’s Album
Print Recipe

1/4 cup creamy peanut butter
2 tablespoons unsalted butter, room temperature
1/2 cup brown sugar
1 egg
1/2 teaspoon pure vanilla extract
3/4 cup all-purpose flour, sifted (I didn’t sift – and the cookies still worked!)
1/2 teaspoon baking powder
1/8 teaspoon salt
1/6 cup granulated sugar for coating
18 Rolos
Sprinkles (optional)

1. Preheat oven to 350 degrees. Using an electric mixer, cream peanut butter and butter in a mixing bowl until smooth. Add brown sugar; beat until combined. Add eggs and vanilla, and continue beating until creamy.
2. In a separate bowl, whisk together flour, baking powder, and salt. Gradually add dry ingredients from step 2 to wet ingredients in step 1, beating on low speed.
3. Prepare baking sheet by lining it with parchment paper or lightly greased aluminum foil.
4. Place granulated sugar on a plate. Roll spoonfuls of cookie dough into balls, rolling each ball between your hands. Roll balls in sugar to coat them completely.
5. Place cookie balls 2 inches apart on a prepared baking sheet. Bake until cookies begin to puff up slightly, about 7 minutes. Remove from oven. Press one Rolo candy in center of each cookie. Return to oven; continue baking for about 5 more minutes, until cookies just turn golden brown and chocolate begins to melt. Remove from oven, sprinkle the melted Rolos with sprinkles, and let the cookies cool at least 10 minutes on baking sheet before transferring cookies to rack to cool completely.

Makes about 2 dozen cookies.

Cake Batter (+ Oreo!) Cookies

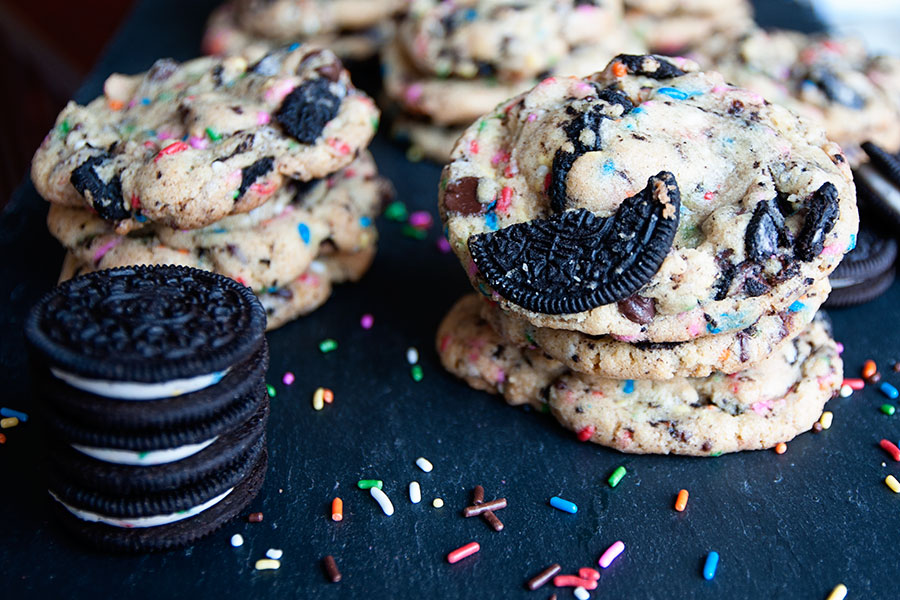
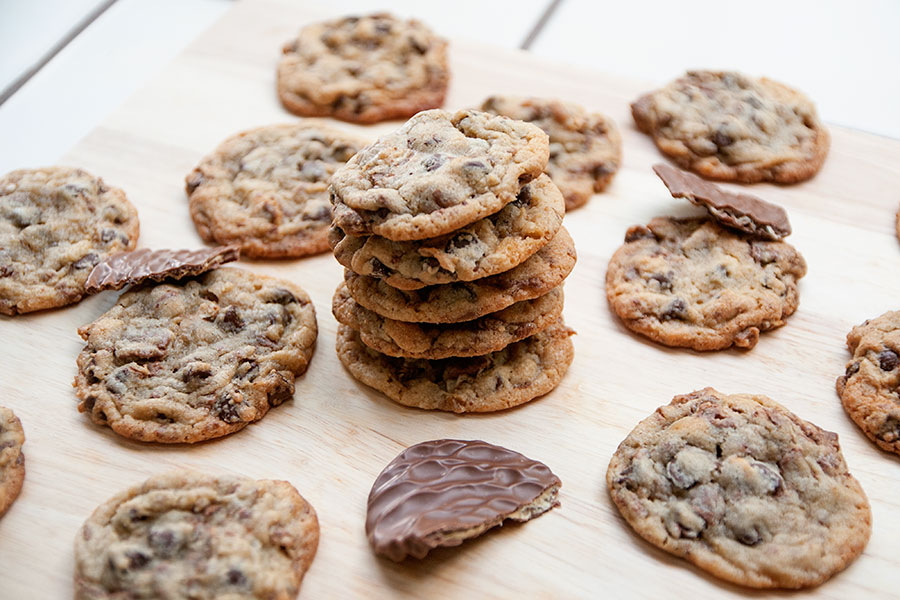
DSC_1091x900These cookies are pretty much identical to these, except for the addition of Oreos (which, come on, Oreos make everything better). I made these a few weeks ago and took them to school — nearly all disappeared within hours! Give them a try :)

Cake Batter (+ Oreo!) Cookies
Recipe source: Sally’s Baking Addiction
Print Recipe

1 and 1/4 cups all-purpose flour
1 and 1/4 cups yellow or vanilla boxed cake mix
1/2 teaspoon baking soda
3/4 cup unsalted butter, softened to room temperature
1/2 cup granulated sugar
1/2 cup light brown sugar
1 egg, at room temperature
1 and 1/2 teaspoons vanilla extract
2/3 cup semi-sweet chocolate chips
1/2 cup sprinkles
10 Oreos, crushed into pieces

1. In a large bowl, sift together flour, cake mix, and baking soda. Set aside.
2. Using a mixer, cream the softened butter and both sugars together on medium speed until smooth. Add the egg and mix on high until combined, about 1 minute. Scrape down the sides and bottom of the bowl as needed. Add the vanilla and beat on high until combined. Add the flour mixture to the wet ingredients and mix on low-medium speed until just combined. Add the chocolate chips, sprinkles, and crushed Oreos. Mix on low until the add-ins are evenly disbursed.
3. Cover tightly with plastic wrap and refrigerate the dough for at least 2 hours (I let mine sit overnight).
4. Preheat oven to 350F. Line two large cookie sheets with parchment paper. Scoop rounded balls of the cold dough onto an ungreased baking sheet. Use about 2 Tablespoons of cookie dough per cookie. Shape your cookie dough balls to be “taller” than they are wide.
5. Bake the cookies for 10-12 minutes until edges are slightly browned. Allow the cookies to cool on the baking sheet for 5 minutes and transfer to a wire rack to cool completely.

Makes about 2 dozen.

Butterscotch Pudding Cookies

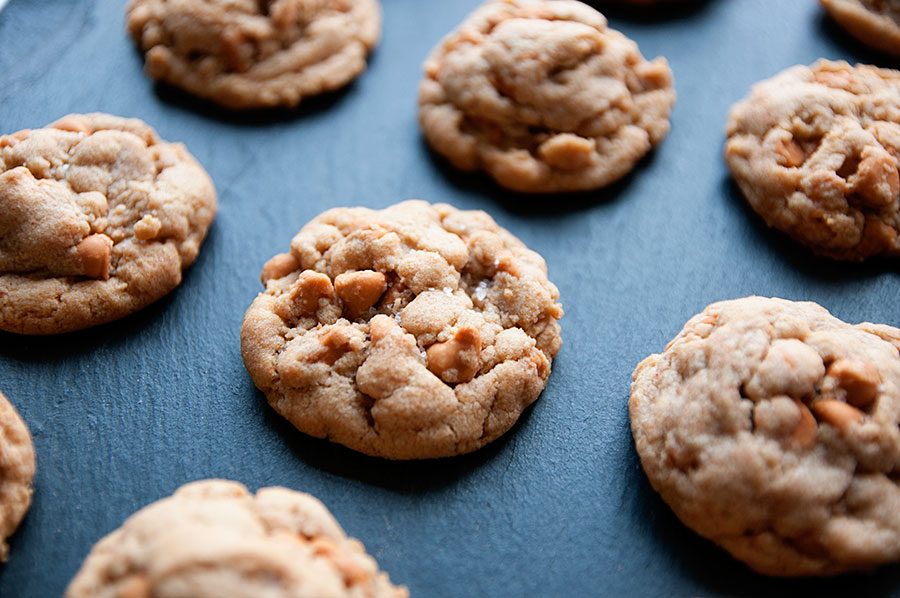
DSC_1046x900Mmmmm butterscotch. Butterscotch is amazing, right? The butterscotch dilly bars are the best. Those little butterscotch disk candies are addicting. And let’s be real, I could (and do) eat butterscotch morsels right out of the bag. These cookies were great because they were soft (thanks, pudding!), butterscotch-y, and a little salty — thanks to the much-needed addition of a sea salt.

And before someone comments (because I know it’ll happen), I will say this: these are SWEET cookies. That is the very nature of butterscotch, ladies and gents. So if SWEETNESS isn’t your jam, move on to a different cookie. :)

Butterscotch Pudding Cookies
Recipe source: Creme de la Crumb
Print Recipe

3/4 cup butter (one and a half sticks), softened
3/4 cup brown sugar
1/4 cup sugar
1 teaspoon vanilla
1 egg
2 cups flour
1 small (3.5 ounces) box instant butterscotch pudding mix (dry, not prepared)
1 teaspoon baking soda
1 bag butterscotch chips
Coarse sea salt

1. In a large bowl, cream together butter and sugars. Mix in vanilla and egg until smooth.
2. In a medium bowl whisk together flour, butterscotch pudding mix, and baking soda. Add dry mixture to wet ingredients and mix until combined. Stir in butterscotch chips. Cover and chill 1 hour.
3. Preheat oven to 350. Scoop about 2 tablespoons of dough and roll into balls. Place on lightly greased baking sheet at least 2 inches apart for spreading.
4. Bake 10-12 minutes. Immediately after removing from the oven, sprinkle cookies with coarse sea salt. Allow to cool completely on baking sheet. store in airtight container at room temperature.

A Bob’s Burgers Birthday

DSC_0979x900
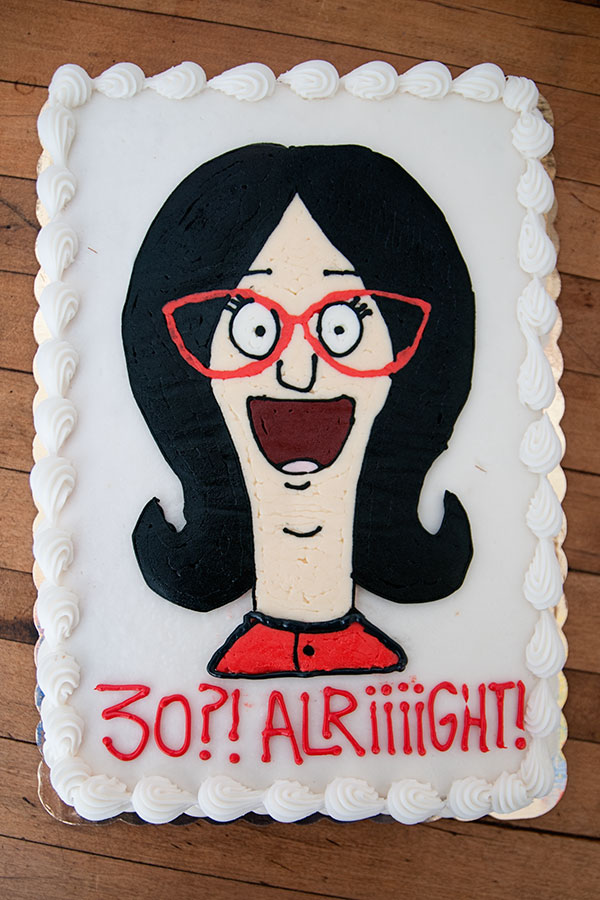
I turned thirty last month. I could have celebrated my new decade with a boring, fancy pants cake. Instead, I reverted and went with a cartoon. I LOVE Bob’s Burgers. Do any of you watch it? I think it’s one of the most charming shows on television. Laughter, awkwardness, weirdness — and stories of a family that really loves one another.

Linda, the Belcher mom, is my favorite. She’s loud, sassy, and completely in her own world. LOVE. HER. One of her signatures is “alriiiiiiiiiight!” – her enthusiastic response to just about everything.

I decided to make a cake featuring Linda. I made a buttercream transfer based on this image. If you have no idea what a buttercream transfer is, check out my Golden Girls cake post.

I bought a plain white cake from a local bakery — and just placed the buttercream transfer on top. It was faster and easier than making my own cake, especially when busy with other birthday party-related duties.

And finally, in keeping with the Bob’s Burgers theme, I also ordered a hamburger cake — and topped it off with the Belcher family. My apologies that I don’t have detailed instructions for anything in this post — but it was all half-homemade! If you have any specific questions, please leave a comment and I’d be happy to help!

DSC_0991x900

Golden Girls Cake – and Six Years!

DSC_0908x900
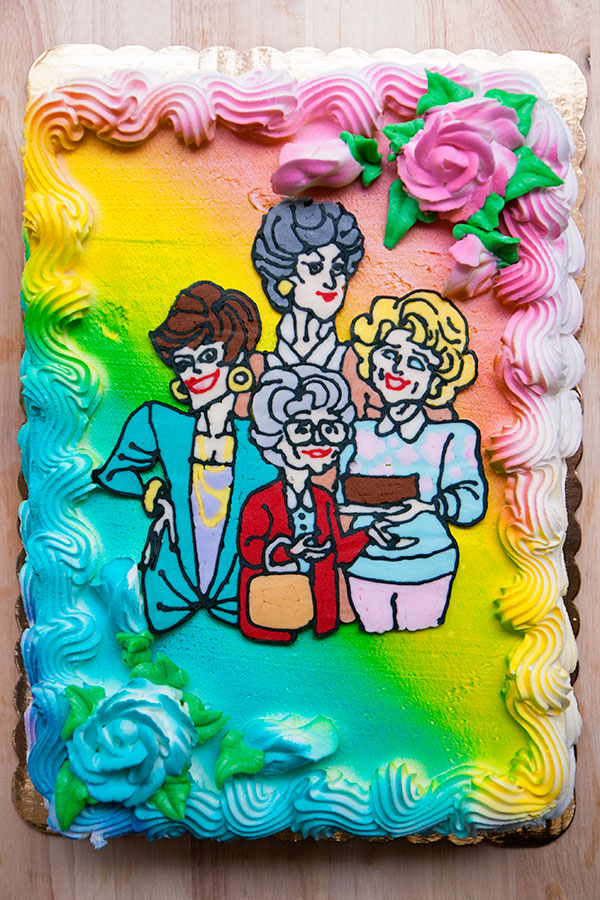
With Sprinkles on Top turned SIX YEARS OLD yesterday! I can’t believe that I started the blog back in 2008. Doesn’t that seem like eons ago? Last year I made a polka-dotted cake to celebrate. This year I’m celebrating Dorothy, Rose, Blanche, and Sophia with a Golden Girls cake!

I love the Golden Girls. Aside from the fact that it’s just a damn funny sitcom, I also love it because my grandma and I used to watch it together. The show used to air on Saturday nights (weird, right?). My grandparents babysat me on Friday and Saturday nights…so my parents could, you know, drink up and have a social life. I can still remember seeing those four funny ladies on the television in my grandparents’ living room. I miss my Omi and Poppi (and their cozy house) more than words can say.

The Golden Girls theme song was titled “Thank You For Being a Friend” — and thank YOU, my dear blog readers, for being my friend throughout the years. I appreciate every single comment and suggestion you leave. Truly. Here’s to many more years of sugary treats!

Golden Girls Cake
Print Recipe

I don’t have a recipe for this cake — I had no idea if the technique would even work — so here are my bullet points in case you are interested in trying it!

  • First and foremost, I must bow down and give thanks to the amazing Tiffany — whose blog and Golden Girls cake inspired me to try and make my own. Seriously, so cool!
  • The technique used to make the Golden Girls is a buttercream transfer. Tiffany has a buttercream transfer tutorial that I used to learn. Essentially, you trace your design onto wax paper and fill it in with icing. Kind of a color-by-numbers approach. When you are finished, the design must be frozen for AT LEAST 2 hours. The longer you freeze it the better though.
  • When you remove the design from the freezer, you must work quickly because wow, that frosting comes back to room temperature quickly! While working as fast as possible, flip the design over and onto your cake — and peel off the wax paper. You’ll be left with a beautiful design that looks like you somehow hand-drew the whole thing.
  • This is the Golden Girls cartoon drawing that I used for the cake. You’ll need to re-size the image to make it larger. Much larger. I re-sized it so that it would fit a 8×11 sheet of paper.
  • Once you’ve got a re-sized version printed, tape a piece of wax paper on top of the cartoon. Then begin the buttercream tracing, etc. This design was tedious and took quite a while to do because of all the colors involved.
  • I used the white buttercream icing recipe listed here for the entire design.
  • Speaking of colors — I used all Wilton gel colorings. You’ll need just about every color for this! If you have any specific color-related questions, let me know. It would be too difficult to list every single color I made/used.
  • I used small round pastry tips. The smaller the better for the black outlining. You can go a bit bigger when you start to fill the other colors in. I think I mainly used a #2 round tip.
  • And a word about the cake. I had never done a buttercream transfer before and I had NO IDEA if it would be a success or a total disaster. Because of this uneasiness, I decided to buy a cake from the grocery store. I didn’t want to take the time and energy to make one from scratch — only to have the transfer not work! I bought the cake at Festival Foods and it only cost about $18. Of course, I picked the most ridiculous rainbow cake they had — because what are the Golden Girls if not flamboyant?!
  • I hope these links and tips have helped you. If you want to try making a cake like this and have more questions, please contact me! I apologize for not having more instructions — but this was a last-minute, who-the-hell-knows-if-this-will-work kind of endeavor. :)

how-to