Month: November 2014

Popcorn Birthday Cake

DSC_2283x900
Happy birthday, Lori! Lori is Andrea’s mom. I’ve mentioned Andrea a lot on my blog — as she’s one of my favorite people and a BFF. Lori’s birthday was exactly one week ago. Andrea and I made her this popcorn cake because popcorn is her favorite food (smart lady because popcorn is nearly perfect, am I right?!)

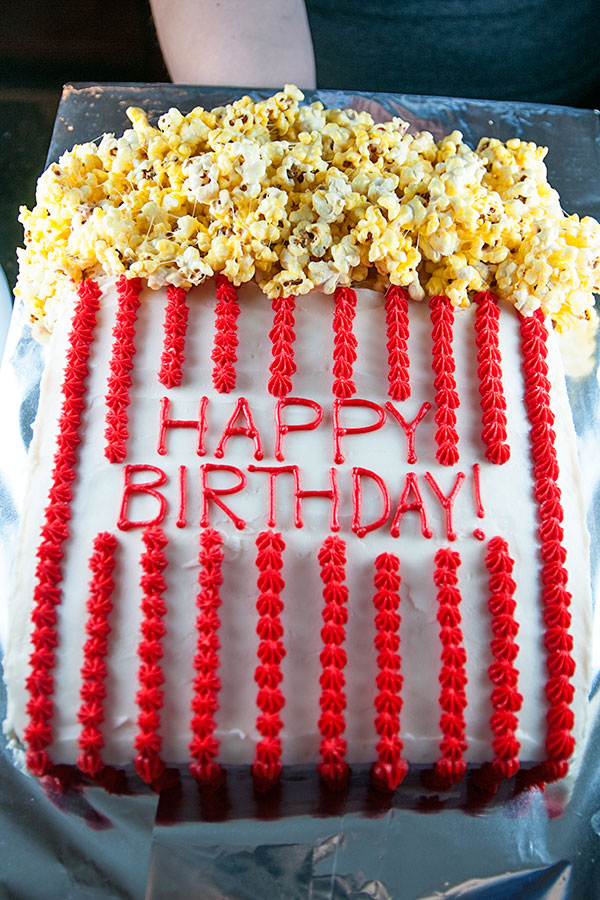
The cake was relatively simple to make. It’s a basic 9×13 cake covered in icing — and topped with gooey-marshmallow-covered popcorn. Here are the instructions if you’d like to try this yourself for the popcorn lover in your life.

Popcorn Birthday Cake
Print Recipe

You’ll need:
9×13″ cake pan
2 boxes of cake mix, plus required oil + eggs (use any flavor you’d like)
A batch of buttercream icing (I would recommend the White Buttercream recipe here)
Red food coloring (I would recommend AmeriColor’s Super Red)
A small round pastry tip
A small star pastry tip
A few disposable pastry bags
5-6 cups of popcorn
2 Tablespoons butter
A half bag of mini marshmallows

1. Make the cake batter according to box directions — and use two boxes, as you’ll want a thick cake. Spray the 9×13″ pan with non-stick spray and fill with cake batter. Bake until a tester comes out clean. Since I used two boxes worth of cake batter, it took my cake about an hour. But ovens vary — so check on your cake frequently!
2. While the cake is baking, make the buttercream icing according to the directions provided in the link above.
3. Once your cake has cooled entirely, level it with a knife (in other words, slice the dome off the top of the cake — so you have a nice, flat surface). Frost the cake with white icing.
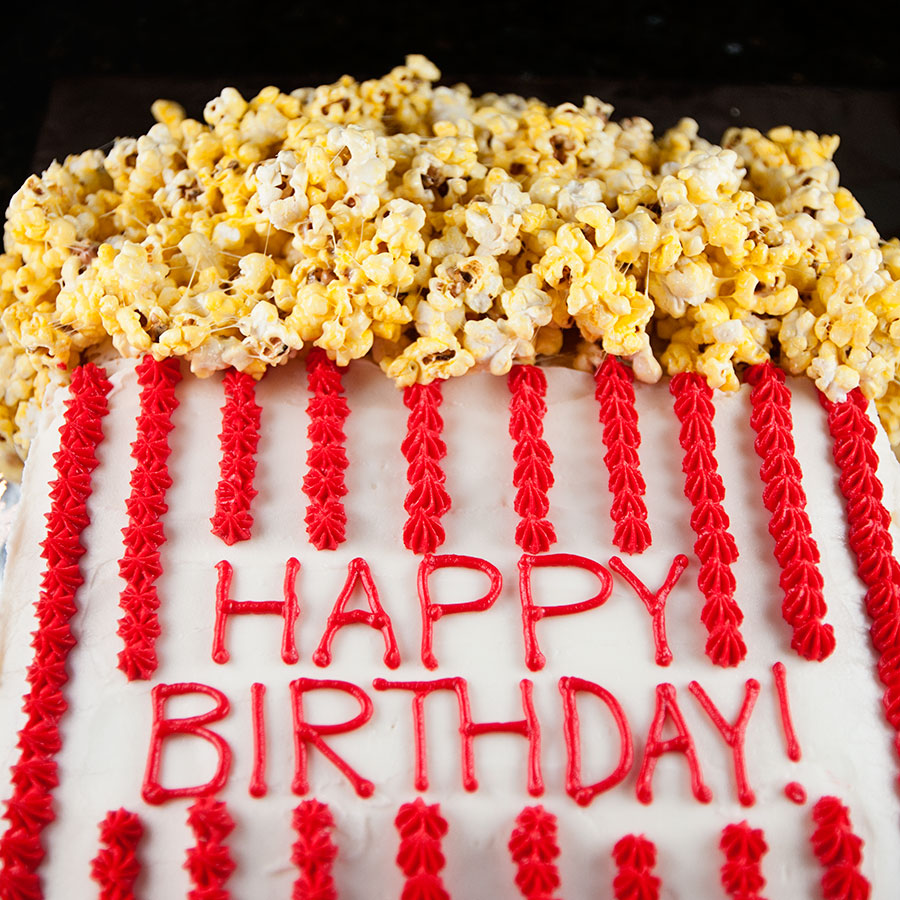
4. Dye some of the left over icing red. Use the small round tip to write “Happy Birthday!” near the middle of the cake and use the small star tip to create the stripes.
5. In a large pan, melt the 2 Tablespoons of butter over low heat on the stove. Add about a half a bag of mini marshmallows and stir until the mixture is smooth. Add in your popcorn. We didn’t write down exactly how much popcorn we added, but I’m guessing it was about 5 cups. What you want is something akin to rice krispie treats — but with popcorn instead of krispies. If you don’t incorporate the marshmallow, the popcorn pieces have no way of sticking together.
6. Cut a portion of the top of the cake off. You will need to do this to make room for the popcorn and to give the popcorn a place to sit. Don’t be afraid, just slice off the top 1/4 or so of the cake!
7. While the popcorn mixture is still warm, add it to the top of your cake. Again, no exact science here — just do what works best to make it look like popcorn is coming out of the box.

Enjoy!

PS: I hope you have leftover popcorn + marshmallow mixture — because that was our greatest discovery while making this cake. It’s phenomenal!

DSC_2277x900

Crock Pot Chex Mix

DSC_1982x900
Oh yes, CROCK POT CHEX MIX! I love homemade Chex Mix. I would rank it in my top 10 all-time favorite foods. There is something so perfect about it — or maybe I just love salt a little too much. I’ve always thought that making it was a giant pain in the ass though. Until now.

CROCK. POT. You dump all of the ingredients into the Crock Pot. Add the butter and seasoning. And let it go for 3 hours. Your house will smell magical and you won’t have to lift a finger. Give the Crock Pot method a try for the holidays!

Crock Pot Chex Mix
Print Recipe

3 cups wheat Chex
3 cups corn Chex
3 cups rice Chex
1 cup pretzels
1 cup Cheerios
1 cup nuts (I left them out)
6 Tablespoons butter (I used 8 Tablespoons — because yay butter!)
1 packet of Chex Mix seasoning (you’ll find this in the cereal aisle of your grocery store)

1. Melt the butter in the microwave and add the seasoning mix. Stir until well blended.
2. Add the cereals, pretzels, and nuts to the Crock Pot. Pour the butter + seasoning mixture on top of everything. Stir everything to make sure that the butter coats the cereal.
3. Cook on low for 3.5 hours. Stir about every hour (so the pieces on the bottom don’t burn).
4. Cover your countertop with foil or newspaper. When the 3.5 hours are up, spread the Chex Mix out on the counters so it can cool completely.

Enjoy!

Note: I don’t think there’s an exact science to making Chex Mix. Don’t worry if you don’t use exactly 3 cups of each cereal. Just use what you like — and don’t worry too much about being precise in the measurements. Additionally, if you REALLY like salt and seasoning like I do, you might consider doubling the butter and seasoning mixture. Just sayin’. It’s awesome. :)

DSC_1985x900

Confetti Cookies

DSC_2597x900
These are my new favorite cookies. For real. Making a good sugar cookie is more difficult than you’d think. Some are too crunchy. Some don’t have enough flavor. Some turn out looking like pale, anemic blobs of dough. But these babies are different — soft, full of vanilla flavor, and covered in happy rainbow sprinkles.

The recipe is from Joy the Baker’s new book — “Homemade Decadence.” I’ve been reading Joy’s blog for as long as I can remember and her recipes are foolproof. I’d highly recommend her new book — and these cookies!

Confetti Cookies
Recipe source: Joy the Baker
Print Recipe

1-1/2 cups all-purpose flour
1 teaspoon baking power
1 teaspoon cream of tartar
1/2 teaspoon baking soda
1/2 teaspoon salt
1/2 cup (1 stick) unsalted butter, at room temperature
3/4 cup sugar
1 vanilla bean (I didn’t have one, so I left it out; the cookies turned out fine!)
1 large egg
1 teaspoon pure vanilla extract
About 1 cup of rainbow sprinkles (use jimmies, not nonpareils)

1. In a medium bowl, whisk together the flour, baking power, cream of tartar, baking soda, and salt.
2. In the bowl of an electric mixer fitted with the paddle attachment, beat the butter and sugar at medium speed until light and fluffy. Split the vanilla bean and scrape the seeds into the bowl (I skipped this step). Add the egg and vanilla extract, and beat until thoroughly combined.
3. Reduce the mixer speed to low and slowly add the dry ingredients to the wet ingredients. The dough will be thick. Fold in 1/4 cup of the sprinkles.
4. Put the remaining 3/4 cup of sprinkles in a small bowl. Scoop up 2 Tablespoons of dough and roll it into a ball (I used a cookie scoop and it worked well!). Dip the ball into the bowl of sprinkles to cover lightly. Put the ball on a plate. Repeat with the remaining sprinkles and dough, and chill the balls of dough for at least 2 hours.
5. Preheat oven to 350F. Line two baking sheets with parchment paper.
6. Transfer the chilled balls of dough onto the baking sheets, leaving about two inches between each ball.
7. Bake until the cookies have spread and are just beginning to brown around the edges, but are mostly pale and soft — about 10 minutes. Let cool on the cookie sheets for 5 minutes before transferring to wire racks to cool completely.

Makes about 18 cookies.

DSC_2617x900

Fall Leaf Cookies

DSC_2248x900
Sadly, the beautiful fall colors in Milwaukee have peaked. The leaves are starting to fall of the trees and the colors are starting to dull. I think October is the prettiest month of the year and I’m always sad when it comes to an end. In an effort to cling to fall a little bit longer, I made these cookies. My friend Andrea made similar cookies a few weeks ago and I fell in love — who knew that swirling different colors together would be so easy and produce such a pretty result? You can use any colors you’d like!

If you are a new to decorating with royal icing, here are some helpful tips and links:

  • I used my grandma’s sugar cookie recipe, which is listed below.  Another good cut-out cookie recipe can be found at Bridget’s wonderful Bake at 350.
  • I used a royal icing recipe from Annie’s Eats, which is listed below.
  • If you are new to decorating with royal icing, please visit this post by Annie’s Eats, which will teach you about outlining and flooding.  Bake at 350 is also a great resource for cookie decorating and ideas (I love Bridget’s book, too!).

Here are the specifics on how I made these cookies:

  • I used a leaf cookie cutter from Wilton. The one I used is from their comfort grip line
  • I used three colors for the icing — all Wilton gel dyes: buttercup yellow, orange, and copper. You can use any fall colors you’d like — reds, oranges, yellows, browns, and greens!
  • I would recommend making two batches of royal icing — you won’t be able to cover all the cookies with just one.
  • Once you have all of your icing made, divide it into three bowls — use your gel dyes to color the icing.
  • I outlined my cookies with yellow icing, but you can use any color you’d like.
  • Once the outlines have set and you’ve thinned your icing and filled the plastic squeeze bottles (if you are lost at this point, see the links above!), squeeze the different colors of icing onto your cookies. Use a toothpick to swirl the different colors together.
  • There is no perfect way to do this — experiment and see what technique you like best!

Omi’s Sugar Cookies
Print Recipe
1 cup butter
1 cup sugar
1 large egg
1/2 teaspoon salt
3 cups flour
1 teaspoon baking soda
1/2 cup sour cream
1 teaspoon nutmeg

Beat butter and sugar. Add eggs, sour cream, and nutmeg. Add dry ingredients gradually. Chill the batter overnight or for at least 4 hours. Roll out dough and cut with cookie cutters. Bake at 350F until golden (in true fashion, my grandma didn’t give a specific baking time. I baked the cookies for about 8 minutes).


White Royal Icing
4 cups powdered sugar, sifted
2 Tablespoons meringue powder
5 Tablespoons water

Directions:
Combine all ingredients in the bowl of a stand mixer fitted with the paddle attachment. Mix on low speed until the sheen has disappeared and the icing has a matte appearance (about 7-10 minutes).  Transfer the contents of the mixing bowl to an air-tight container. This will be the stiffest consistency of the icing, and at this point it is still too stiff to use for decorating. Add water a very small amount at a time and stir by hand until fully incorporated. Continue until the icing has reached a consistency appropriate for piping.

*I made two batches for this project.

OMG Peanut Butter Cookies

DSC_1487x900
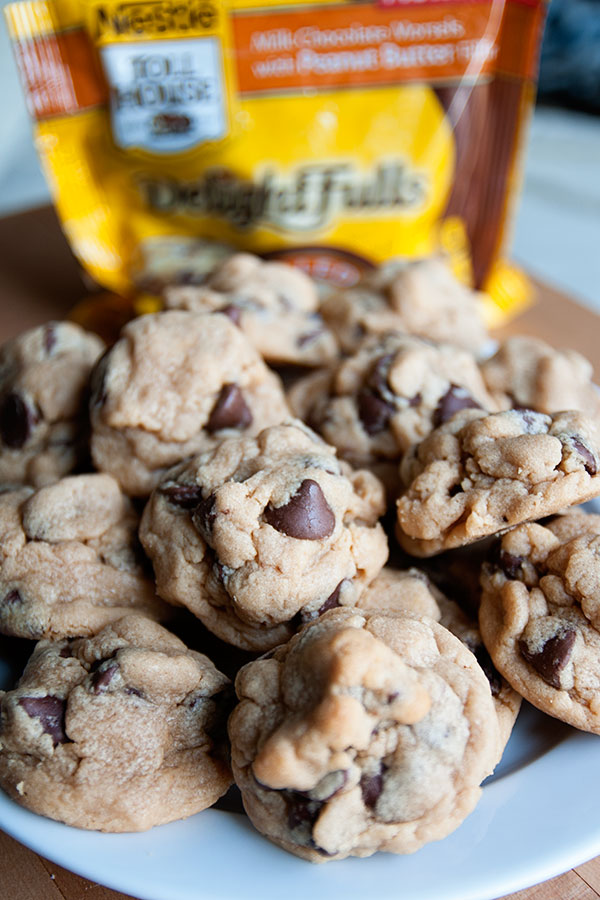
OMG. You guys. Have you tried Toll House’s DelightFulls? They are amazing. A chocolate chip with peanut butter inside the chocolate chip. I know, right? I saw them in the baking aisle at my grocery store and a few things ran through my mind: why were these not invented sooner? I hope they are as good as they sound! And honestly… America, effff yeah. Cause where else but the land of excessive and ridiculous foods would you find these?

Good news though — they are even better than you may have imagined. They make other flavors as well — mint, raspberry, and one more that I’m forgetting. I’m not being paid or compensated by Nestle to promote these. They’re just really, really good!

OMG Peanut Butter Cookies
Recipe adapted from: Sally’s Baking Addiction
Print Recipe

1/2 cup salted butter, softened to room temperature
1/2 cup light brown sugar
1/4 cup granulated sugar
1 large egg
3/4 cup creamy peanut butter
1 teaspoon vanilla extract
1/2 teaspoon baking soda
1-1/4 cups all-purpose flour
1/2 cup honey roasted peanuts [I left these out]
1 cup Nestle Toll House Peanut Butter DelightFulls

1. In a large bowl, using a hand-held mixer or stand mixer with paddle attachment, cream the butter and sugars together on medium speed. Mix in the peanut butter, egg, and vanilla.
2. Slowly mix in the baking soda and flour. Do not overmix.
3. Fold in the peanuts, peanut butter cups, and peanut butter chips. Chill the dough for at least 30 minutes.
4. Remove dough from the refrigerator. Allow the dough to sit at room temperature for 10 minutes so you can easily roll it. Preheat oven to 350 degrees.
5. Drop chilled dough by tablespoonfuls onto parchment-lined cookie sheets. Gently press down to slightly flatten. Bake for 8-9 minutes. Cookies will be soft and may appear undone. They will firm up as they cool. Allow to cool completely on a wire rack.

Makes 2-3 dozen cookies.