Month: May 2014

Chocolate-Stuffed Strawberry Crinkle Cookies

DSC_8160x900
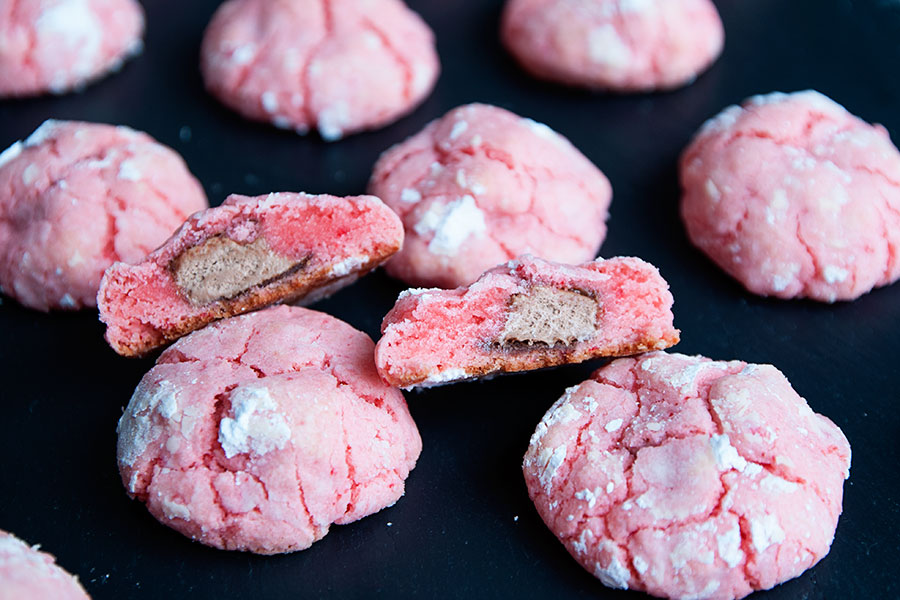
This lovely recipe comes from my dear friend Amber’s blog, Bluebonnets & Brownies. I love Amber, her cute family, her love of Disney, and her consistently great recipes. But I will be honest: I’m not a huge fan of strawberry-flavored foods. Love me some strawberries, but something always goes awry for me with strawberry flavoring. These cookies though? Ohhh my goddddd. I loved ’em! Really and truly.

Chocolate-Stuffed Strawberry Crinkle Cookies
Recipe source: Bluebonnets & Brownies
Print Recipe

1 box Pillsbury “Pudding in the Mix” Strawberry Cake Mix
2 large eggs
1/3 cup vegetable oil
1 teaspoon pure vanilla extract
1/3 cup powdered sugar
18 “fun-size” Three Musketeers Candies, frozen

1. Freeze a bag of “fun-size” Three Musketeers Candies for at least 2 hours.
2. Preheat the oven to 375F and line a baking sheet with parchment paper.
3. In a large bowl, combine the cake mix, eggs, oil, and vanilla extract. Stir vigorously with a spatula until will blended.
4. Place the powdered sugar into a separate small bowl, then unwrap 18 frozen Three Musketeers.
5. Using a medium cookie scoop or tablespoon, shape a dough ball, and then drop it into your hand. Press a frozen chocolate into the ball of dough and then roll it in your hands until the chocolate is completely enrobed in cookie dough. The dough will be sticky.
6. Drop balls of dough into the powdered sugar sugar and roll to coat heavily.
7. Place the balls of dough on the parchment lined baking tray 2 inches apart. Bake for 9-11 minutes.
8. The middles of the cookies may look slightly undercooked when removed from the oven. That is okay. They will continue to cook as they cool. Allow to cool for 5 minutes in the pan, then remove to a cooling rack to finish cooling completely.

Makes about 18 cookies.

DSC_8144x900

Lemon Cookies

DSC_8790x900
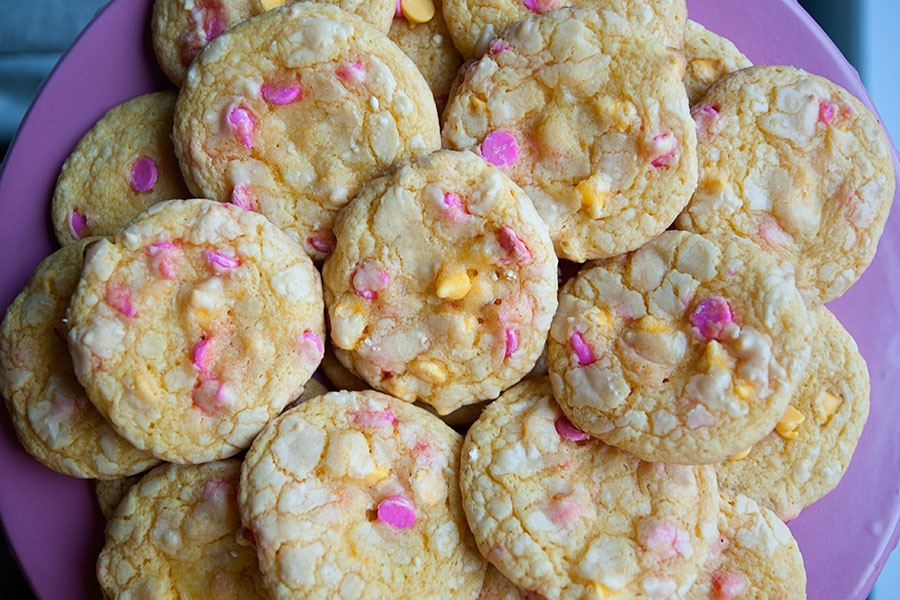
My friend Britteny’s birthday was a month ago today. We were in the midst of law school finals, so she didn’t really get a proper celebration. As I’ve always said, law school is the killer of all things joyous. But I digress. Britteny loves anything and everything lemon, so I made her these cookies. They were a big hit at school!

Hope all of you in the United States had a nice Memorial Day weekend!

Lemon Cookies
Recipe Source: Love from the Oven
Print Recipe

1 box lemon cake mix
2 tablespoons flour
1/2 tsp baking powder
2 eggs
1/3 cup vegetable oil
Juice from one lemon
Grated lemon peel from one lemon
1 cup pink and yellow Nestle Springtime Morsels (or white chocolate chips)

1. In a large bowl, combine all ingredients and mix well to combine. Dough will be quite sticky. Chill covered in refrigerator for 30-60 minutes.
2. When ready to bake, preheat oven to 375F. Once oven is ready, remove cookie dough from fridge and drop by spoonfuls (approximately 1-2 tablespoons per cookie) onto a baking sheet covered with parchment paper.
3. Bake for 7-10 minutes or until very lightly browned. Remove from oven and allow to cool completely. Store tightly covered.

Princess & the Frog Cupcakes

DSC_8900x900
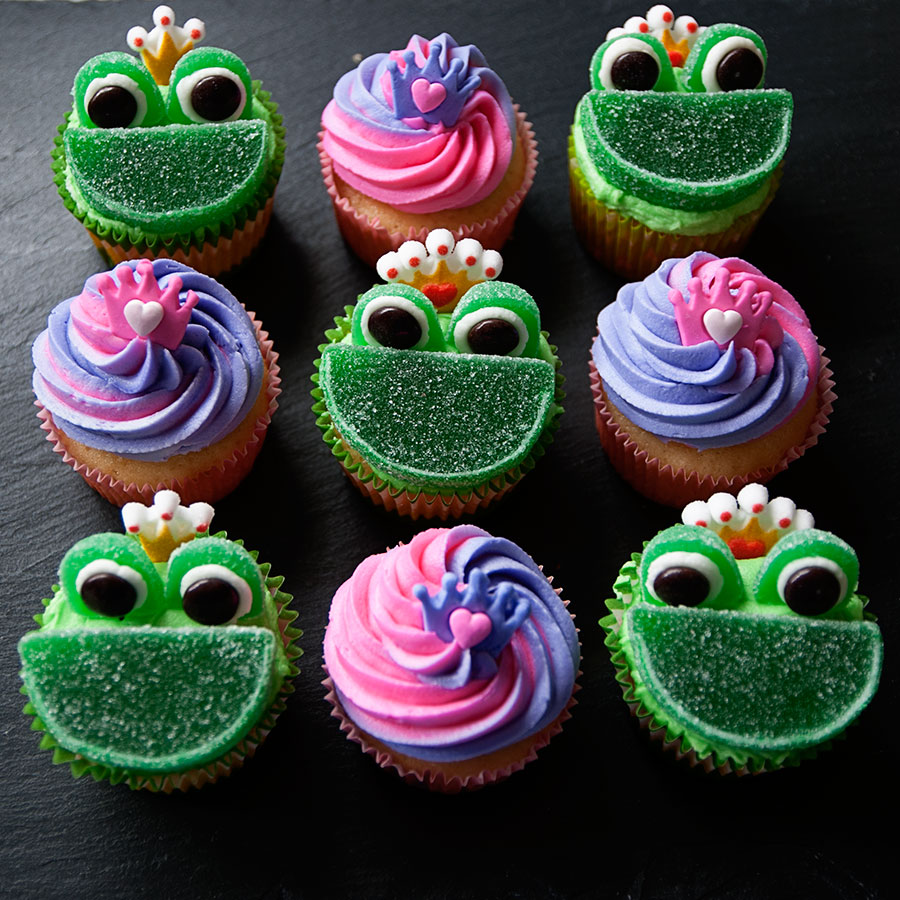
I recently watched The Princess & the Frog for the first time, upon my friend Andrea’s insistence. I was skeptical because quite frankly it looked ehhhhhhhhh. I became too old (and oh, waaaay too cool) for Disney movies around the time that Aladdin was released. This means that I missed out on the cult of the Lion King, Pocahontas, the Hunchback of Notre Dame, Hercules, Mulan, Tarzan, and a long list of others. I still haven’t seen most of those movies but I gave in and watched the Princess & the Frog.

IT WAS SO GOOD! For real. The music was great, the story was great, I loved it all. And I really wish New Orleans was shiny and clean and mostly innocent — just like it’s portrayed in the film!

Naturally, I had to find a way to translate my love of this cute movie into some sort of baked good. Here’s the result!

Princess & the Frog Cupcakes
Print Recipe

1 box cake mix (any flavor; plus required eggs and oil)
1 batch of buttercream icing (any recipe will work – or you can use store-bought vanilla icing)
Food coloring: pink, purple, green (I used Wilton gel colorings)
Crowns (the pink/purple crowns are a Wilton product; the yellow crowns I found on Amazon)
Lime flavored fruit slices
Large green gumdrops, cut in half
Brown M&Ms
Toothpicks
Disposable pastry bags + a star tip

1. Make cupcakes according to box directions and allow them to cool completely.
2. Divide your icing into three bowls; dye one bowl green, one pink, and the other purple. Leave a small amount of white icing for the frogs’ eyes.
3. For the princess cupcakes, fill a pastry bag half with pink icing and half with purple. This will allow the colors to swirl when you pipe the icing onto each cupcake. Once you’ve iced the cupcakes, place a crown decoration on the top of each cupcake.
4. For the frog cupcakes, spread a generous amount of green icing onto each cupcake. Place a fruit slice onto each cupcake for the frogs’ smiles. On each halved gum drop, pipe a small circle of white icing and place a brown M&M on top. Use the toothpicks to anchor the frog eyes onto the cupcakes. Place a yellow crown behind the eyes.

That’s it! These were super easy to do and would be fun for a birthday party!

DSC_8910x900

Disney Frozen Cupcakes

DSC_8878x900
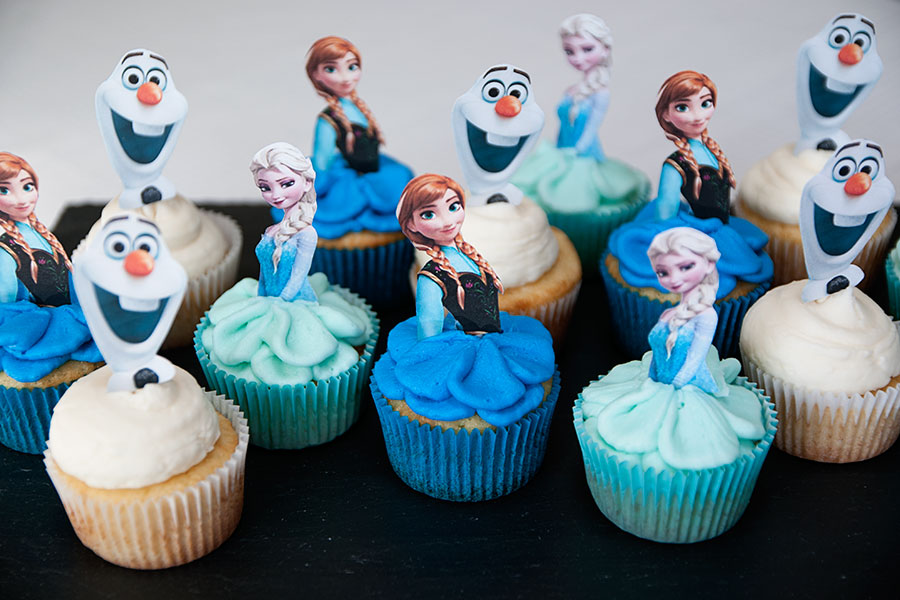
I am one of the gazillion people on the planet who love Frozen. I think it might be my new favorite Disney movie (sorry, Beauty and the Beast, you’ve been knocked down). I won’t go on and on about how wonderful Frozen is (but believe me, I could). Last summer I made Disney Princess cupcakes, which are very similar to these.

Disney Frozen Cupcakes
Print Recipe
Recipe source: Erica’s Sweet Tooth

24 cupcakes (any kind you would like; I used box mix white cake)
A batch of buttercream icing (I used the white buttercream icing recipe here)
A large petal tip, Wilton #127
Disposable pastry bags
Food coloring: dark blue, light blue (I used Wilton gel colorings)
Lollipop sticks, cut in half
Tape
Elsa, Anna, and Olaf images

A note about the Elsa/Anna/Olaf pictures: I searched for each individual character using Google, save the corresponding images, and resized them all so that they would be proportionate. I then printed 4 of each on cardstock. I cut them out and attached them to the lollipop sticks using tape. I do not want to post the images on my blog (because it might be a murky area, copyright-wise). If you’d like them, please leave a comment & I will send them your way.

PLEASE READ: I have received approximately 1 million requests for these images (as you can see by the comments below). I try to get the images out to you as soon as I can, but I ask for your patience. Also, and this is important, if you do not provide me with a valid email address, I can’t help you. I’ve had numerous emails bounce back to me because the addresses are erroneous. If I haven’t responded to you, this may be why, so re-submit your comment and we can try again.

1. Bake your cupcakes and allow them to cool entirely. While they are cooling, make a batch of buttercream icing. You may want to make an extra 1/2 batch, especially if you are doing these for the first time and haven’t gotten a hang of using the petal tip.
2. Divide the icing into three small bowls. Use the food coloring to dye each batch a different princess skirt color, leaving one bowl plain white.
3. Fit a pastry bag with the large petal tip and fill the bag with one of the batches of colored icing. Pipe two layers of petals onto the top of each cupcake. I would highly suggest practicing this on a napkin first. It took me a few tries to get the petal look just right. You will want the wider end of the tip pointing out.
4. Olaf, obviously, doesn’t have a princess skirt. So I just used a large round tip for his cupcakes.
5. Once all of the cupcakes are frosted, stick the Elsa/Anna/Olaf toppers into the cupcakes.

Enjoy!

Mickey Balloon Cookies

DSC_8852x900
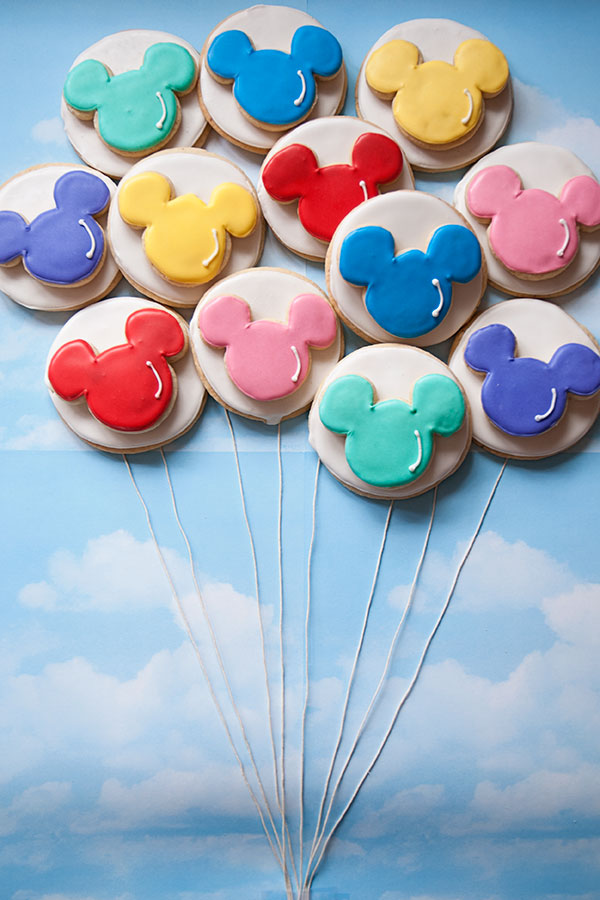
You guys, I LOVE DISNEY BALLOONS. I have loved balloons since I was young, but the Mickey balloons at Disney World or Disneyland? A whole other level of adoration. Just ask Andrea who traveled to Disney World with me — and gracefully and patiently put up with me squee-ing and freaking out every time a balloon vendor walked by. There’s something about a balloon that is just happy, you know? Anyway, I decided to attempt to make Mickey balloon cookies — as a tribute to my love for them. I think these cookies turned out pretty well! [keep scrolling to the end of the post to see more pics!]

If you are a new to decorating with royal icing, here are some helpful tips and links:

  • I used my grandma’s sugar cookie recipe, which is listed below.  Another good cut-out cookie recipe can be found at Bridget’s wonderful Bake at 350.
  • I used a royal icing recipe from Annie’s Eats, which is listed below.
  • If you are new to decorating with royal icing, please visit this post by Annie’s Eats, which will teach you about outlining and flooding.  Bake at 350 is also a great resource for cookie decorating and ideas (I love Bridget’s book, too!).

Here are the specifics on how I made these cookies:

  • I found the Mickey Mouse cookie cutter in a three-pack – I think I bought it at Hobby Lobby or another craft store.
  • I used a simple circle cookie cutter for the outer part of the balloon. If you make these cookies, my advice would be to find your Mickey Mouse cookie cutter first, then try to match the size to a circle.
  • I make a bunch of circles and covered them in plain white icing. You don’t have to do the circle step, but those of you who have been to a Disney park recently know that the Mickeys balloons are inside of a larger circular balloon.
  • The colors of the Mickeys are accurate to what you’ll find in the parks: red, pink, yellow, green/teal, blue, and purple. I made batches of icing with each color — and outlined and flooded a few Mickeys with each.
  • I added a little curved line on each Mickey to make it look more like a balloon.
  • Below are the recipes I used for the cookies & the icing.
  • I used Wilton gel dyes for most of the colors. To avoid a neon pink, I used a little Dusty Rose from AmeriColor for the pink balloons — and then added just a little Wilton pink to brighten it up. The pink balloon was the hardest color to get right.
  • Hope you enjoy!

Omi’s Sugar Cookies
Print Recipe
1 cup butter
1 cup sugar
1 large egg
1/2 teaspoon salt
3 cups flour
1 teaspoon baking soda
1/2 cup sour cream
1 teaspoon nutmeg

Beat butter and sugar. Add eggs, sour cream, and nutmeg. Add dry ingredients gradually. Chill the batter overnight or for at least 4 hours. Roll out dough and cut with cookie cutters. Bake at 350F until golden (in true fashion, my grandma didn’t give a specific baking time. I baked the Mickeys for about 8 minutes, the larger circles for 10-12 minutes).


White Royal Icing
4 cups powdered sugar, sifted
2 Tablespoons meringue powder
5 Tablespoons water

Directions:
Combine all ingredients in the bowl of a stand mixer fitted with the paddle attachment. Mix on low speed until the sheen has disappeared and the icing has a matte appearance (about 7-10 minutes).  Transfer the contents of the mixing bowl to an air-tight container. This will be the stiffest consistency of the icing, and at this point it is still too stiff to use for decorating. Add water a very small amount at a time and stir by hand until fully incorporated. Continue until the icing has reached a consistency appropriate for piping.

DSC_8860x900DSC_8838x900

Here’s another way to make them — sans white circle.
Disney2014__019

The real thing!
Disney2014__249

Love!
Disney2014__087

Balloon love in Frontierland.
Disney2014__279

MGM (er, Hollywood Studios) was the only place I spotted the yellow balloons.

And so marks the end of my balloon geekery. Check back this week – I have a few more Disney treats coming up!