Today marks the start of a series of cupcake recipes that mimic popular candy bars. I saw these ideas in Food Network Magazine a few years ago and knew that I had to try them all. Every Monday for the…
Archives for August 2012
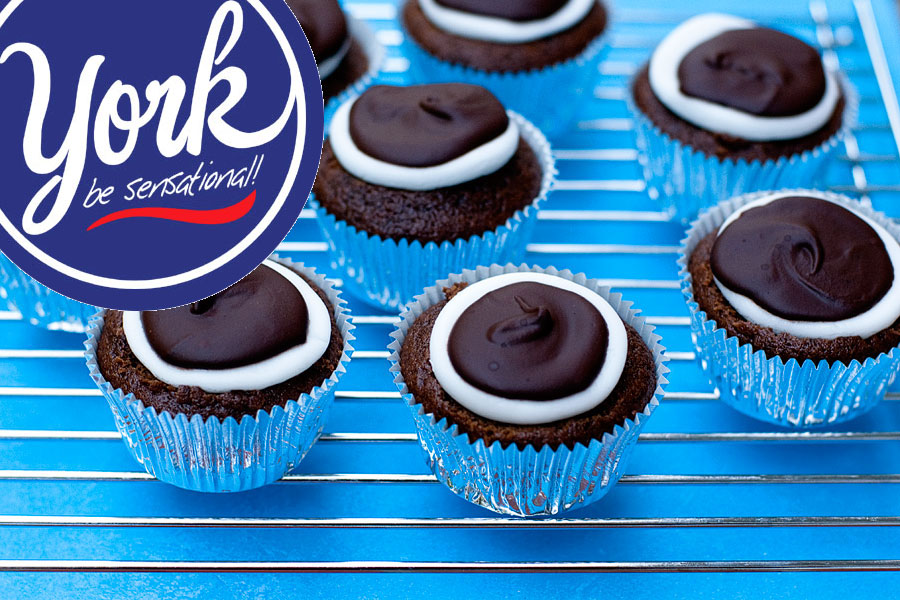
Homemade Hostess Cupcakes
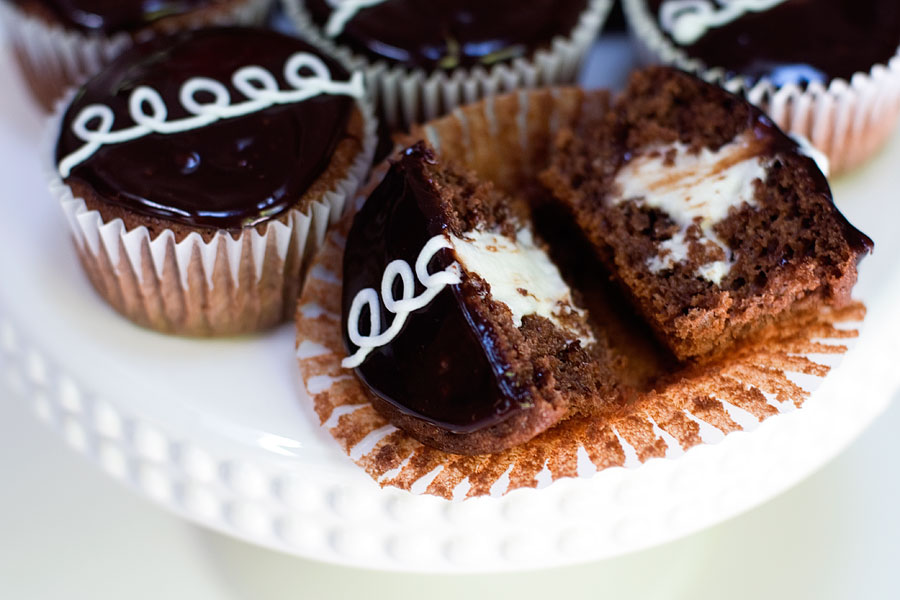
I saved my favorite for last! I LOVE the classic Hostess Cupcake. When I was a little kid my grandma used to treat me to these cupcakes or Ho-Hos for my after-school treat. The first Hostess cupcake was sold on…
Homemade Hostess Sno Balls
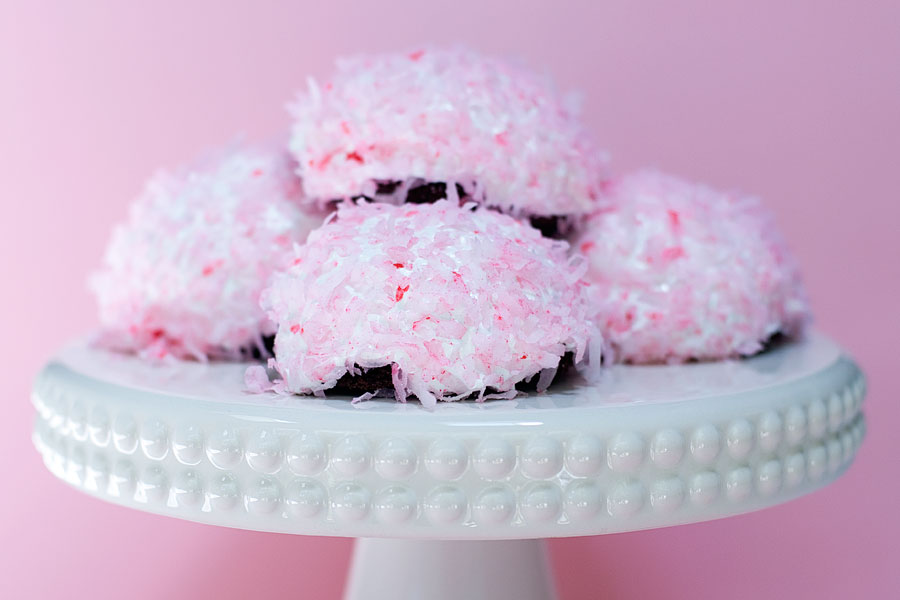
If you are a regular reader of this blog you know that I cannot stand coconut. But I had to include Sno Balls in this week’s series! Sno Balls are pink and cute and will forever remind of “Overnight Delivery”,…
Homemade Drake’s Devil Dogs
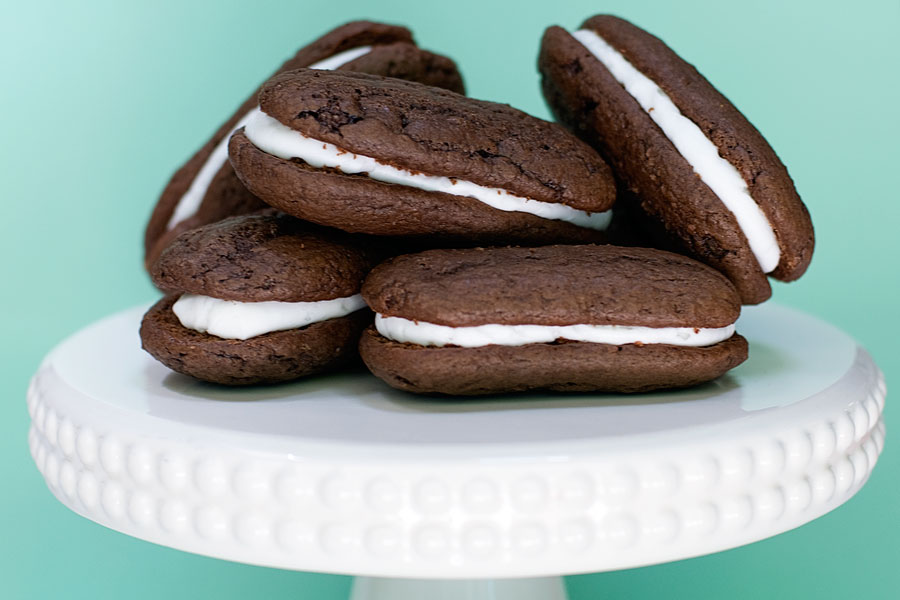
Devil Dogs are made by a company named Drake’s, which is owned by Hostess. Devil Dogs are described as “An unfrosted devil’s food cake sandwich with vanilla creme with round edged cake wafers resembling a hot dog.” Sounds good to…
Homemade Hostess Twinkies
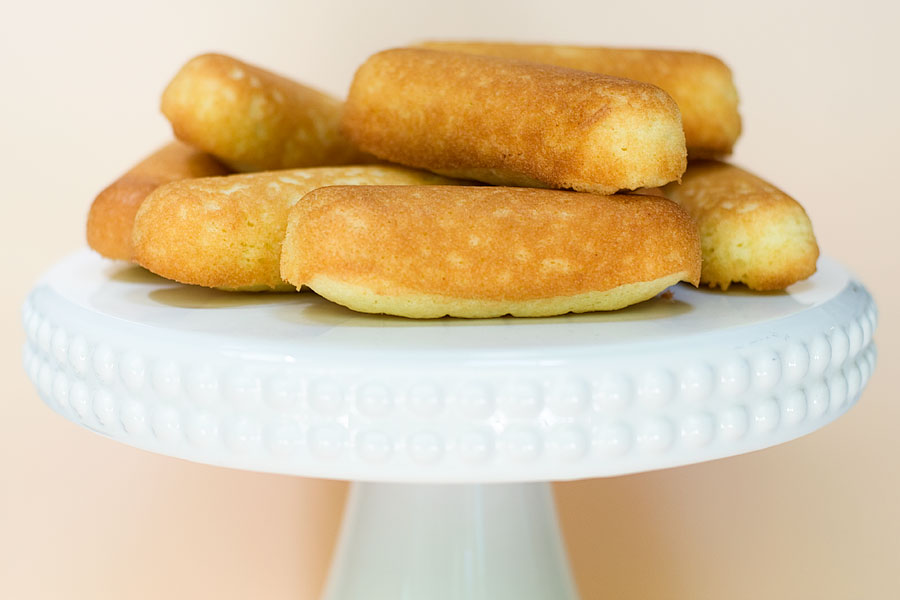
Twinkies are the food we all love to hate… and hate to love. You’re not supposed to eat Twinkies (because they have a shelf-life of 398,408 years! Not quite, but I’ll get to that in a minute) but what human…
Homemade Hostess Coffee Cakes
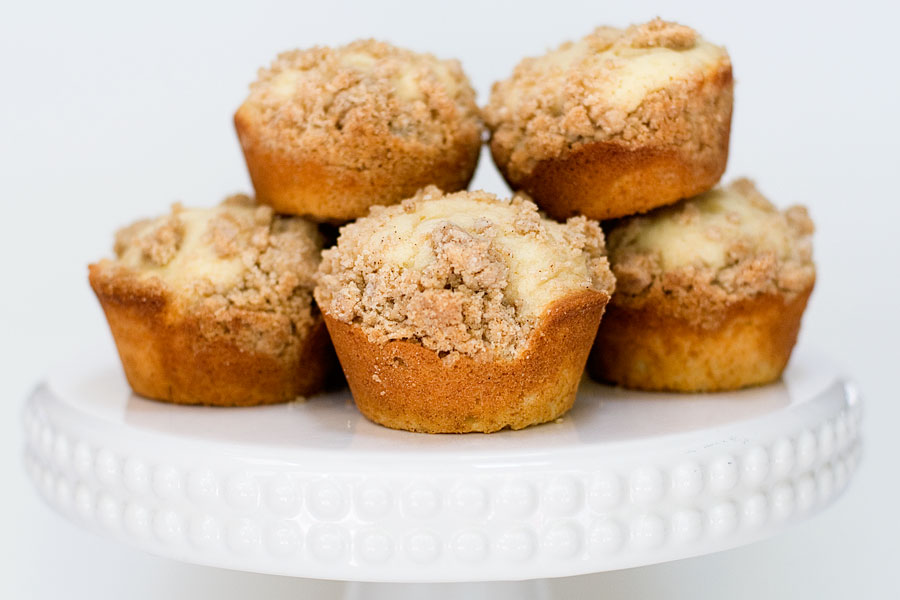
Happy Monday, everyone! Today marks the beginning of a week-long series of posts demonstrating how you can make homemade versions of your favorite Hostess treats. Over the course of the week I’ll provide recipes for homemade coffee cakes (today’s post!),…


