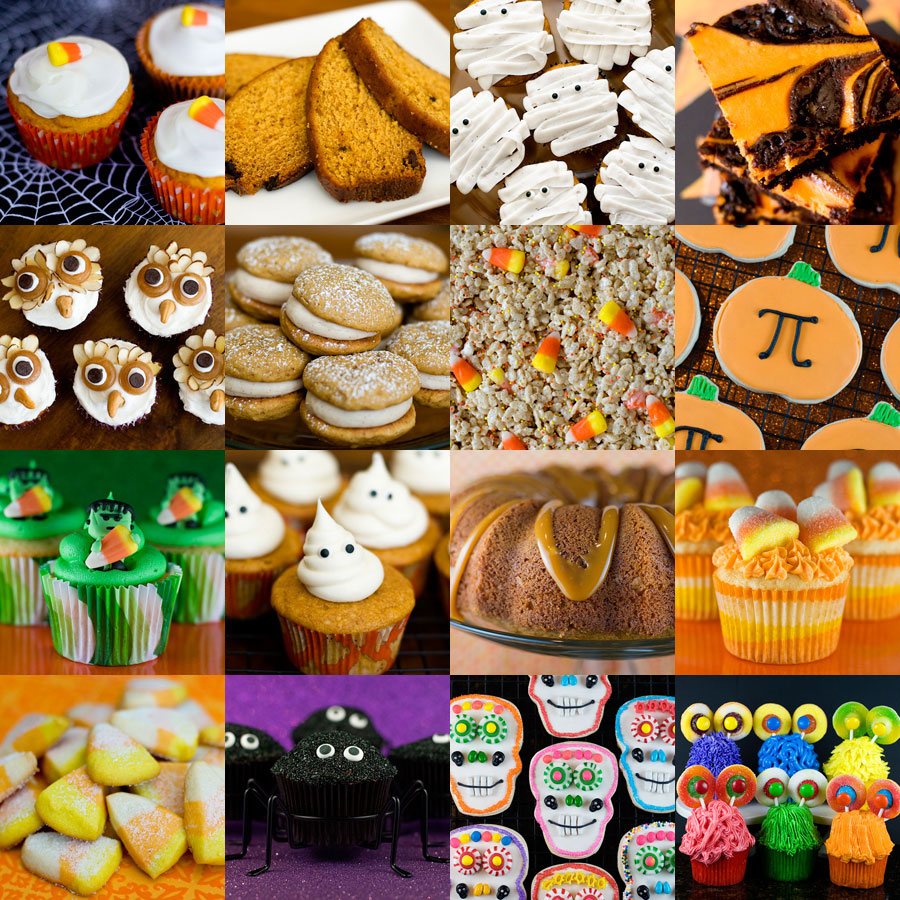
Here’s my Halloween/Fall recipe roundup for this year! Hope you are all enjoying the season. 1. Pumpkin Cupcakes 2. Pumpkin Raisin Bread 3. Mummy Cupcakes 4. Halloween Brownies 5. Hoot Owl Cupcakes 6. Pumpkin Sandwich Cookies 7. Trick-or-Treat Rice Krispie…
Archives for October 2012
Day of the Dead Cookies
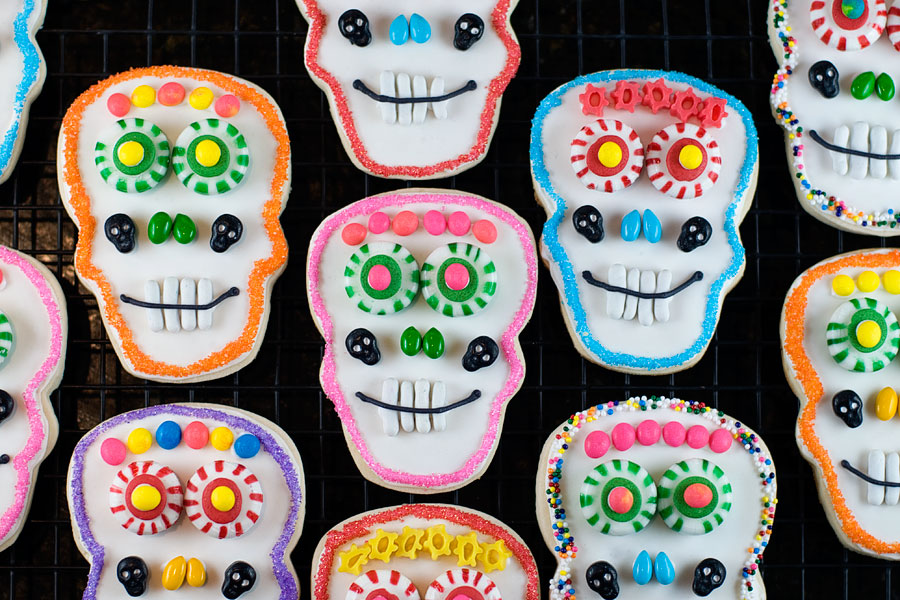
Most Americans celebrate Halloween but are unaware of another interesting holiday: the Day of the Dead (Dia de Los Muertos, if you know Spanish). The Day of the Dead is celebrated primarily in Mexico, but extends throughout the world. Family…
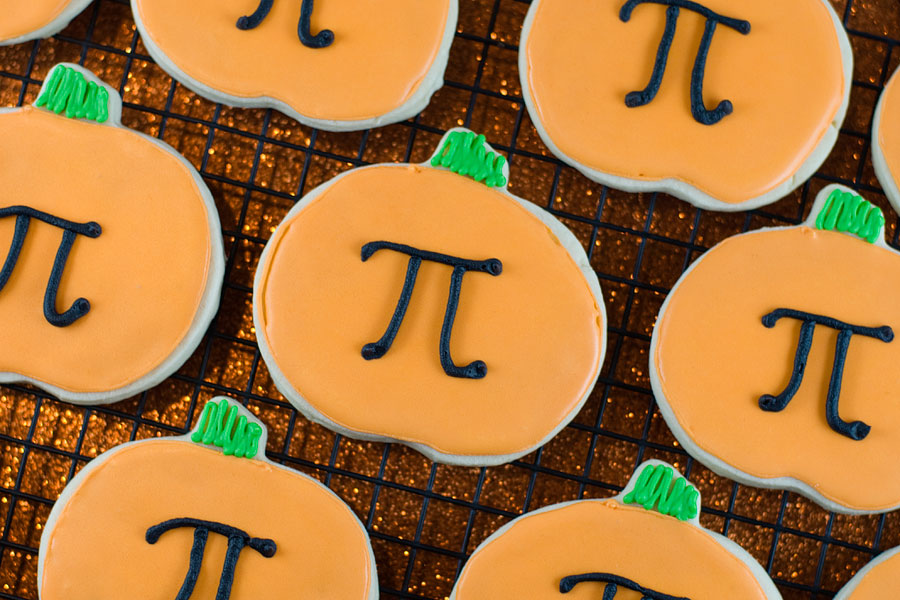
Pumpkin Pi Cookies
Halloween is 1 week away! Also, I want to say hi to Linzy! Thanks for reading my blog as much as you do – and I love that you and your Dad enjoy baking together. I got my love of…
Candy Corn Cookie Cake
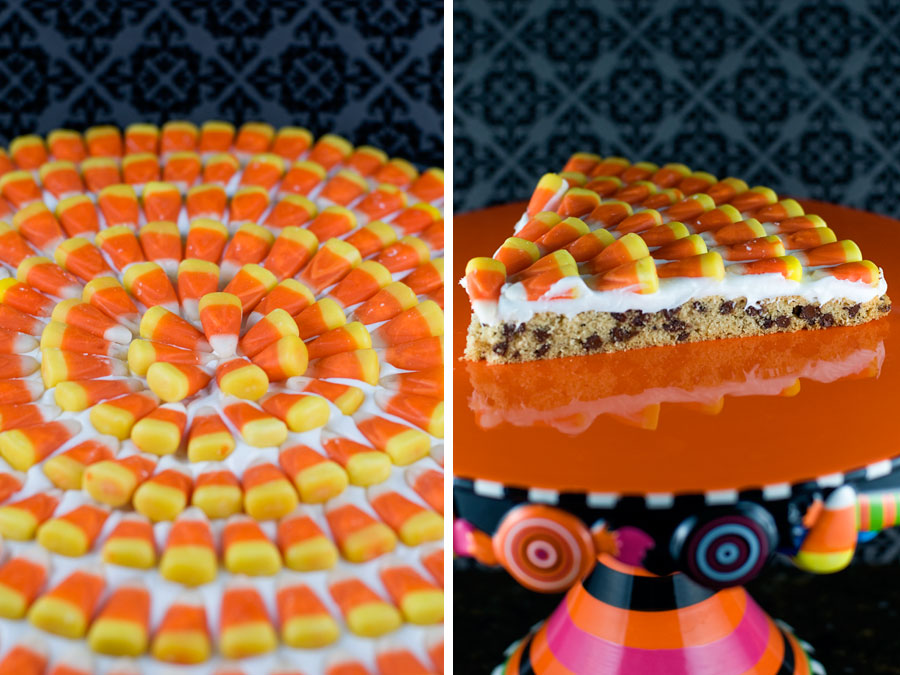
Candy corn is one of those polarizing candies – you either love it or hate it. I love it… for about 5 minutes. Then I want nothing to do with it until next Halloween. But just about anything having to…
Monster Cupcakes
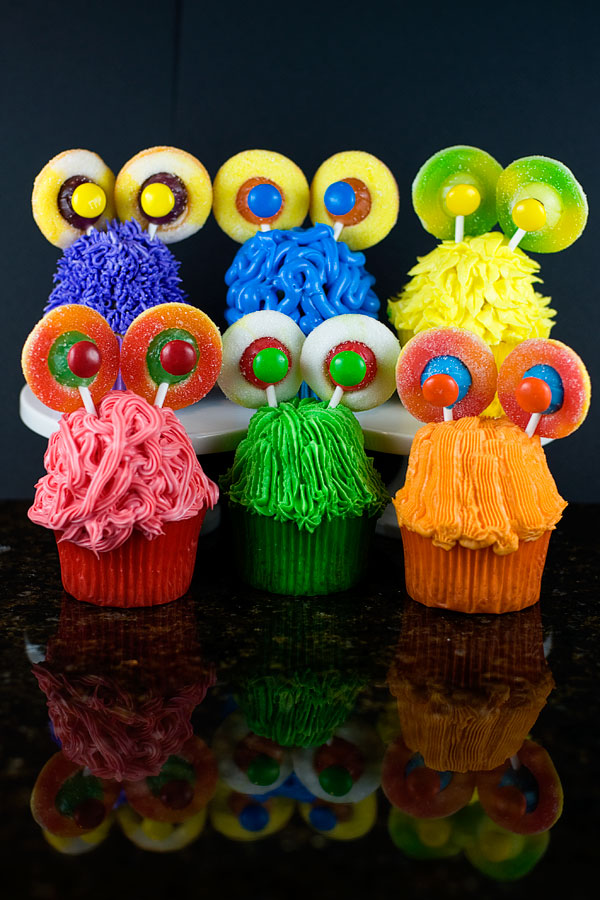
Boo! Halloween is less than two weeks away! Do you have your costume planned? Candy ready to hand out to the kids? I always loved the houses that handed out chocolate candies – or even better, the houses that handed…
Candy Corn Gummy Cupcakes

I don’t have much to say in today’s post except that these candy corn gummies were really tasty. :) Candy Corn Gummy Cupcakes 1 box cake mix (plus required oil and eggs) 1 tub vanilla frosting (or you can make…
Frankenstein Cupcakes
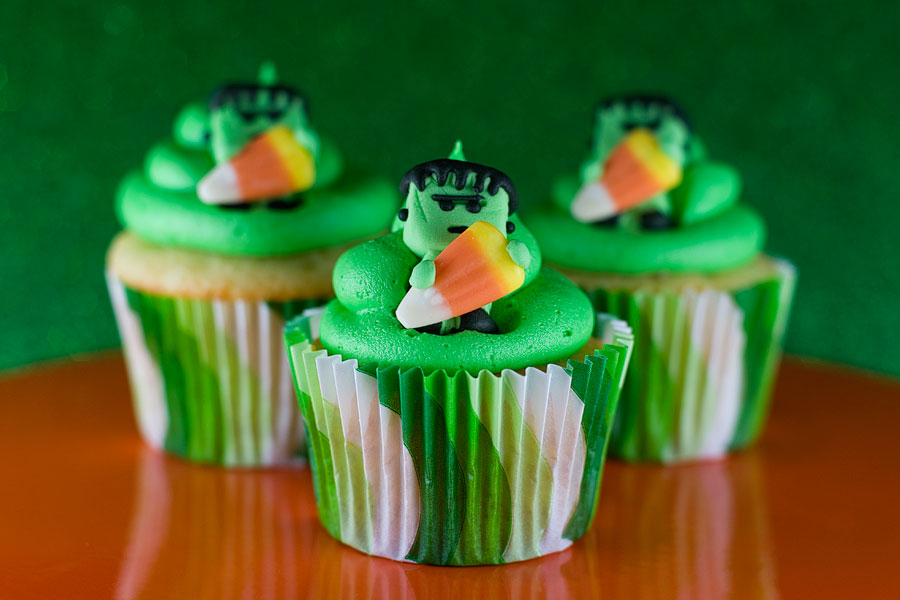
I saw these little Frankenstein cupcake toppers at Target and fell in love. Oh so cute, aren’t they?! I have some Halloween cupcake ideas lined up for this week. Yesterday I featured spiders, today is Frankenstein, tomorrow will involve candy…
Spider Cupcakes
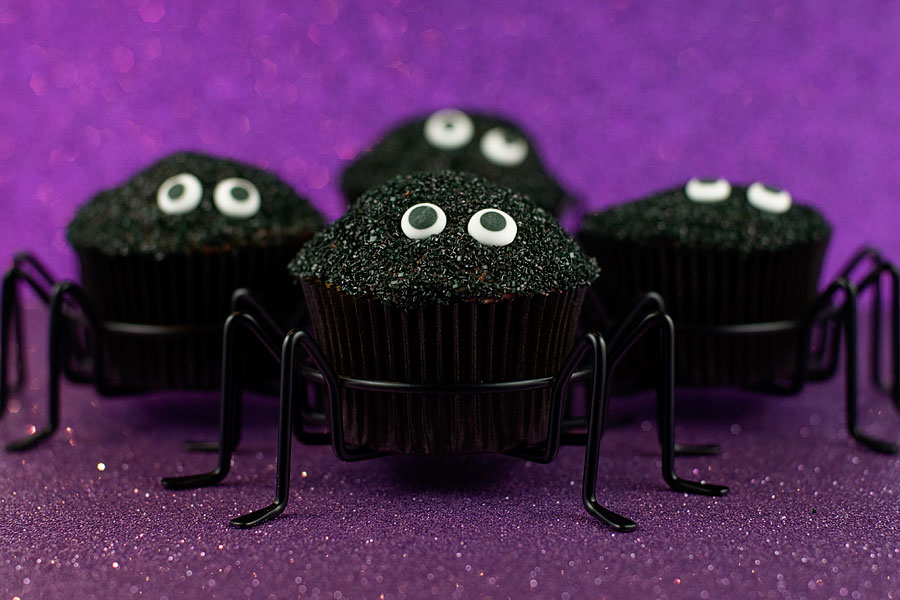
I am terrified of spiders. Well, I should be more specific. I am terrified of big spiders. The little bitty jumpy ones are fine. The wispy ones with really skinny legs are fine. But the big ones? Ahhhhh! My chest…
Caramel Apple Cake
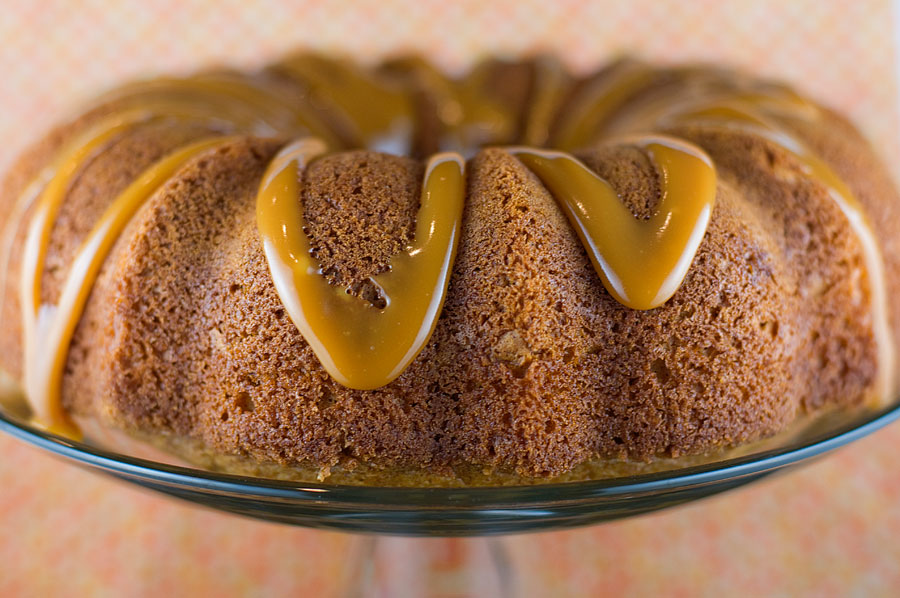
Fall is my favorite time of the year. The trees are beautiful, the smells of cinnamon and apple and burning leaves, the chill in the air, football on Sundays, all things pumpkin, and the promise of Thanksgiving and Christmas in…
Giant M&M Cookies
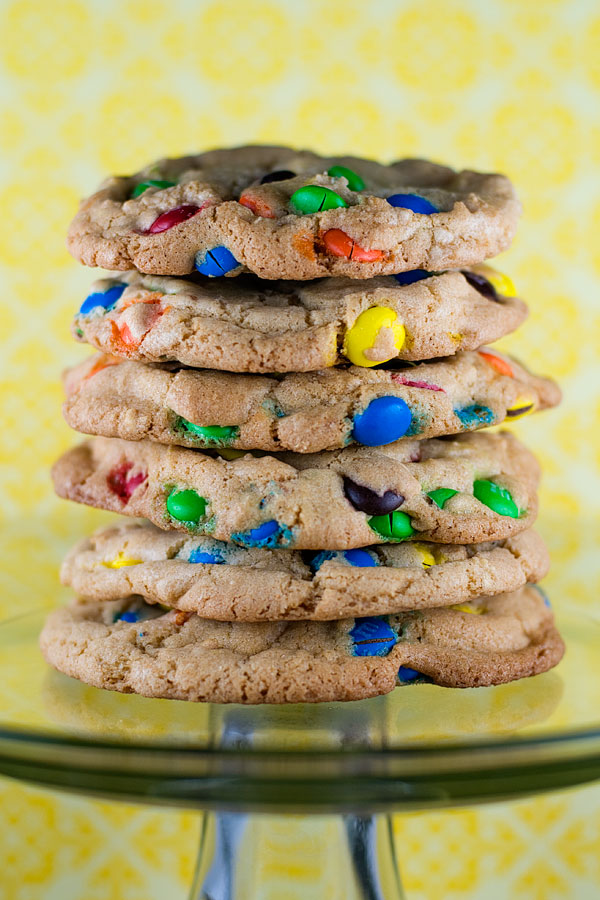
I started law school this fall which means that I don’t have nearly as much time to devote to baking as I once did (cause you guys, law school is i-n-t-e-n-s-e). But I have planned out a few things for…
Sugar Cookie Bars
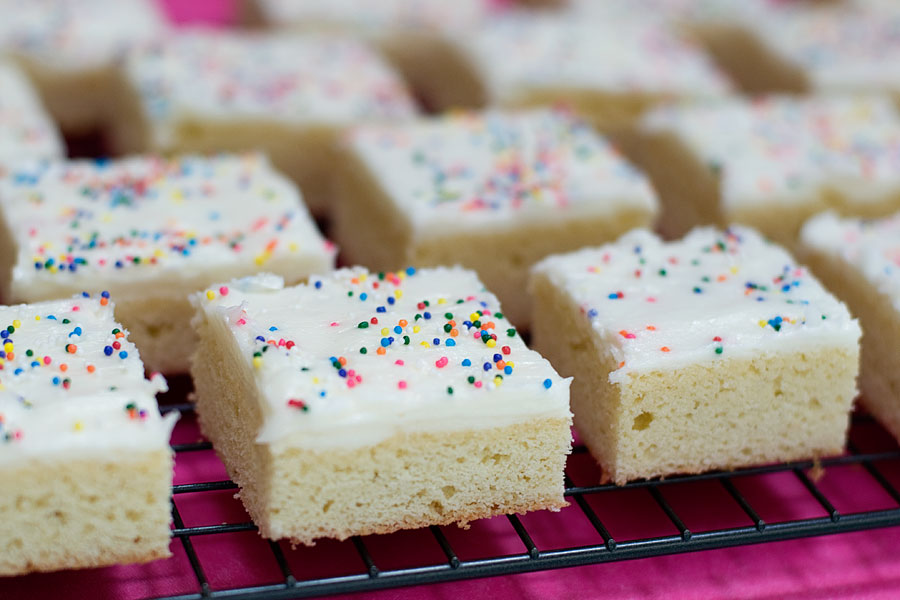
Sugar cookies are great. But you know what’s not-so-great? Having to roll out the dough… cut out shapes… bake the cookies… roll out the remaining dough… cut out more shapes… bake more cookies… repeat… repeat. Sometimes you just want something…
Confetti Compost Cookies
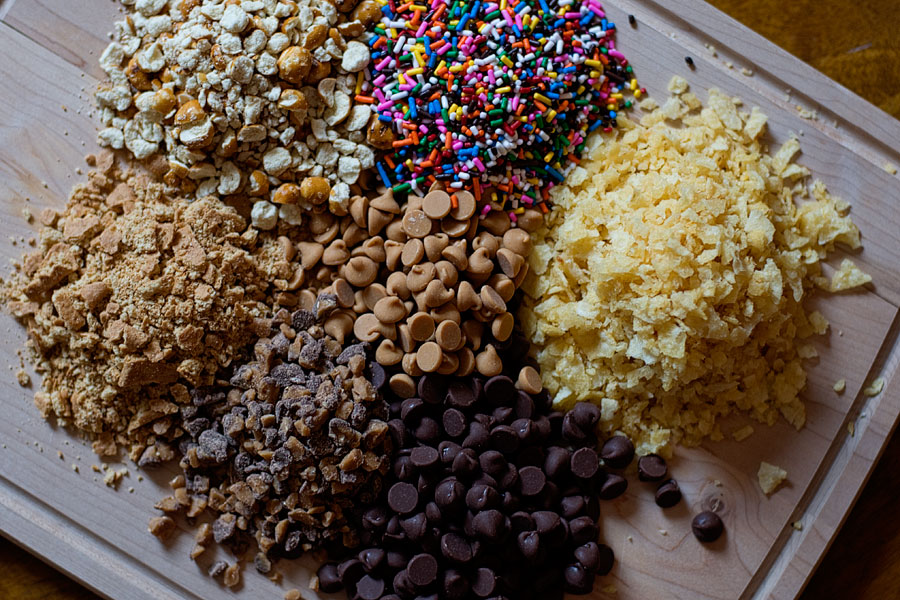
I’m always slightly skeptical of “garbage” cookies – the oddly-named cookie that includes everything under the sun. There are a million different variations of the garbage cookie and you can throw just about anything into the mix – chocolate, nuts,…


