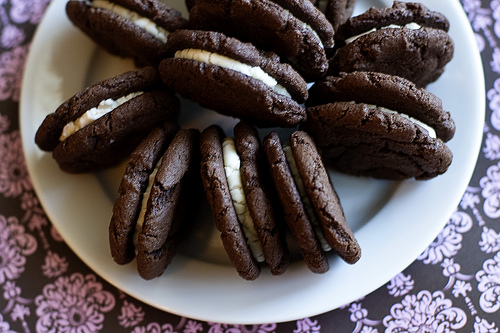
Oreos are one of my favorite store-bought cookies. But I know that they are really unhealthy, filled with preservatives and additives, and heavily processed. I still eat them from time to time, but I wanted to try to make a…
Archives for May 2009
Snickerdoodles
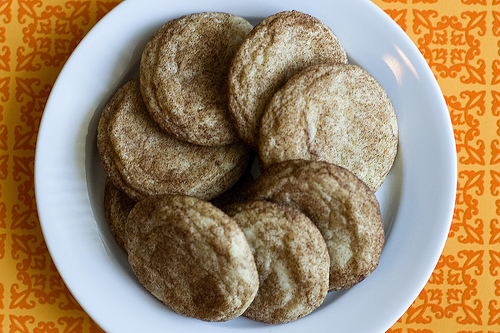
I love everything having to do with cinnamon. Cinnamon candies, cinnamon rolls, and of course, snickerdoodles. I decided to make these as I dip my feet back into my baking hobby, figuratively speaking of course. ;) The recipe was taken…
Our Unplanned Hiatus
The blog has been DEAD for a while, hasn’t it? Well, not to make excuses… eh… whatever, I’m going to make excuses. I’ve been consumed with moving from Illinois to Wisconsin (but hurrrrrrah for being back in my home state!)…
Lemon Rosemary Shortbread
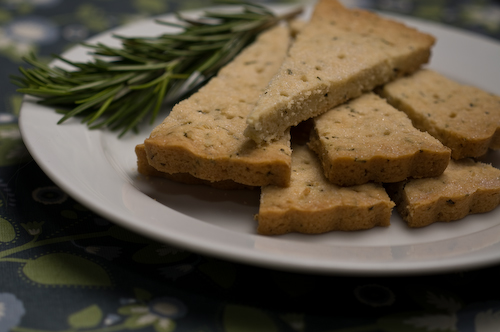
I LOVE anything with butter and shortbread is one of my secret shames. I would probably cut off my left hand to get the recipe for that Scottish Walker’s shortbread, which in my mind, is the quintessentially perfect cookie. In…
Happy Mother’s Day

In honor of Mother’s Day, I decided to make some flower cupcakes. As you may or may not know, I’m in the middle of moving from Chicago to Madison. So most of my baking stuff is packed in a box….
Black Walnut Cornflake Cookies
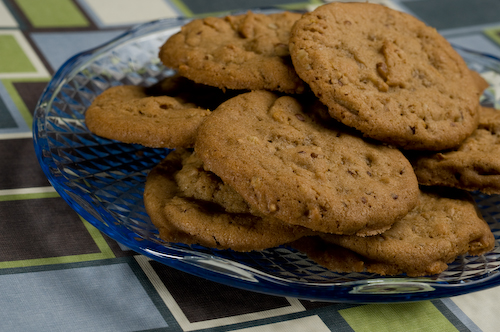
So as part of my inheritance from my Grandmother, I’ve received a big box of old recipes- books, clippings and nigh 20 different scratch papers with about 20 different recipes, each claiming to be something called an “Italian” cookie. I…
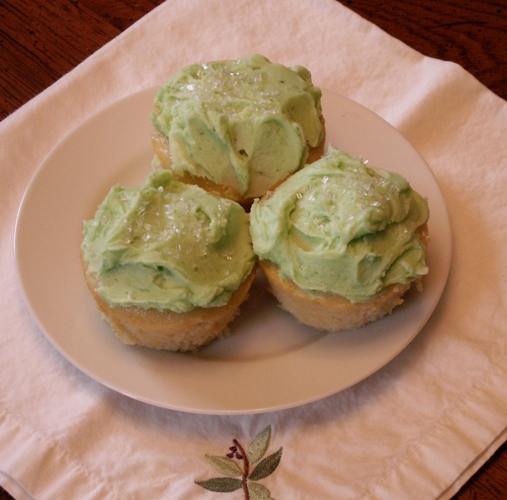
Coconut Cupcakes with Lime Buttercream Frosting
Today’s post is a guest post by my lovely sister-in-law, who is also lethally-infected by the cupcake bug. Enjoy! “These are cupcakes to celebrate spring. They are from the May 2009 issue of Cooking Light, and the picture looked so…


