Ahhh, Sundays in autumn. Football season is in full swing. I love football. LOVE football. My beloved Green Bay Packers play tomorrow night against the Bears and I can’t wait to watch. But for all of you watching the NFL…
Archives for September 2010
Puppy Chow
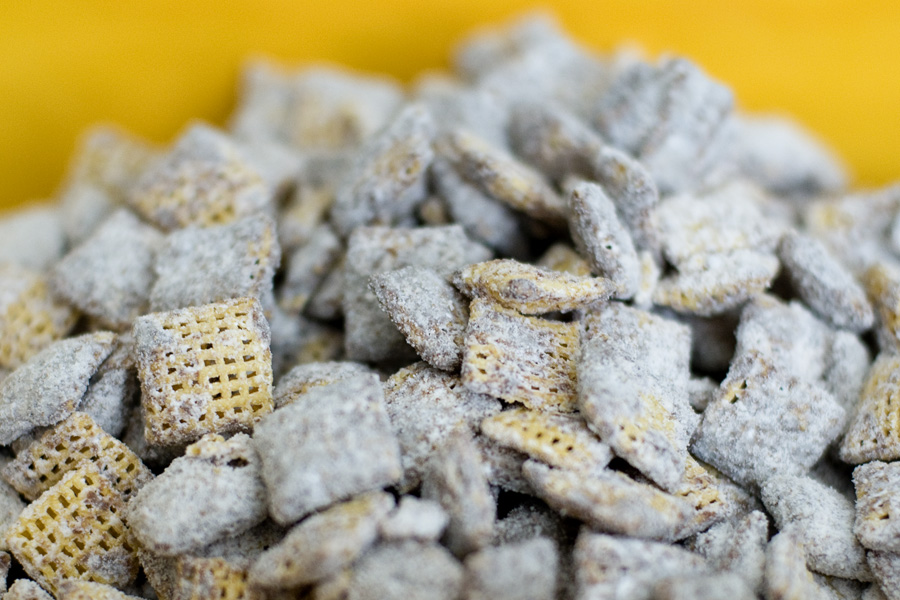
Okay okay, there isn’t really much baking involved in this recipe. Or much effort, for that matter. But Puppy Chow is one of the most simple and delicious treats imaginable. It’s one of those treats where I lose all control…
Black & White Cookies
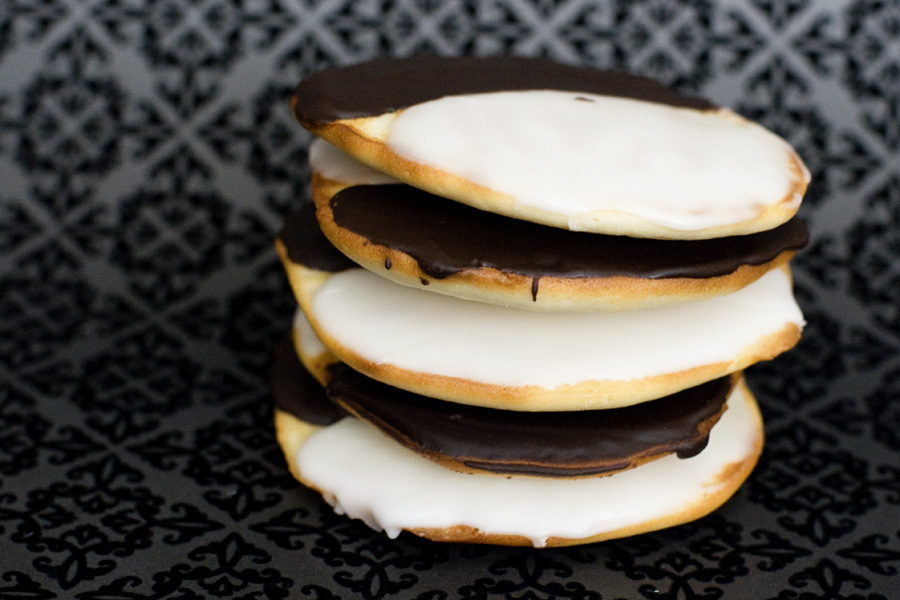
I’ll be honest, if the recipe is good, one of my favorite cookies of all time is the Black & White Cookie. The soft, almost-cake-like consistency of the cookie. The subtle hint of lemon. And of course, the duo of…
PB&J Chocolate Bars
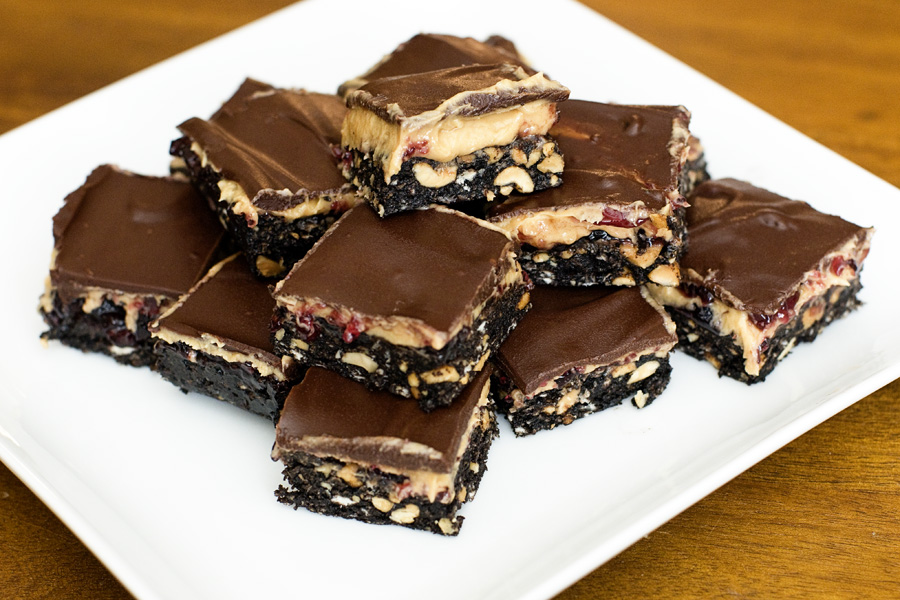
I had mixed feelings about posting this recipe. Not because it’s not a good recipe or because the bars turned out badly — but instead because I didn’t like them! I always think that I should only post things on…
Sweet Potato Cupcakes
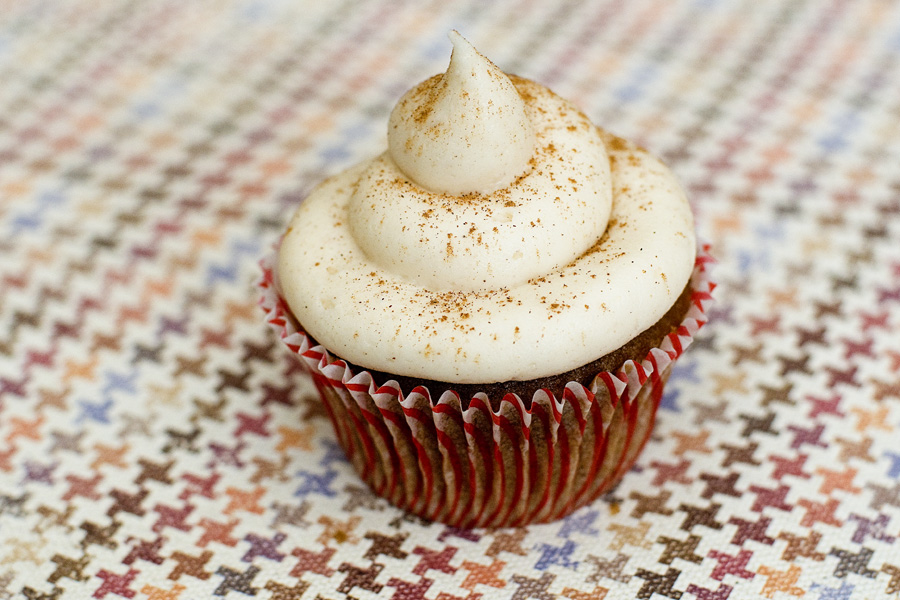
A simple and delicious recipe for your Monday morning. Sweet Potato Cupcakes Recipe source: Paula Deen 1 box spice cake mix 1 teaspoon ground cinnamon 1 teaspoon ground ginger 1/2 teaspoon ground nutmeg 1 can (15 oz.) sweet potatoes, drained…
Mini Maple-Chocolate Chip Muffins
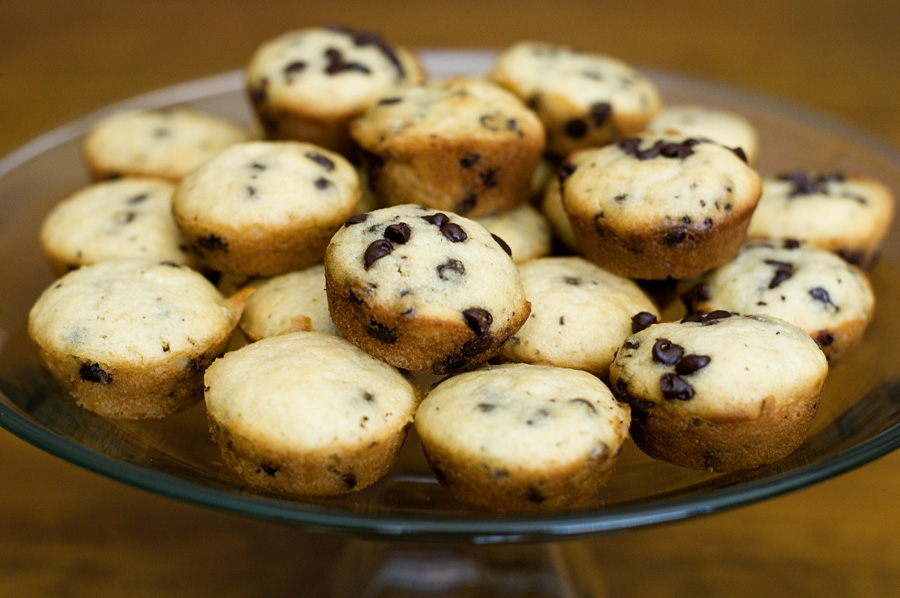
Happy Saturday! The weekend, for many people, brings relaxation, sleeping in, and the time to cook a warm breakfast. If you want to make something delicious and easy, try these mini muffins. Serve them warm and enjoy! Have a good…
Cranberry Upside-Down Cake
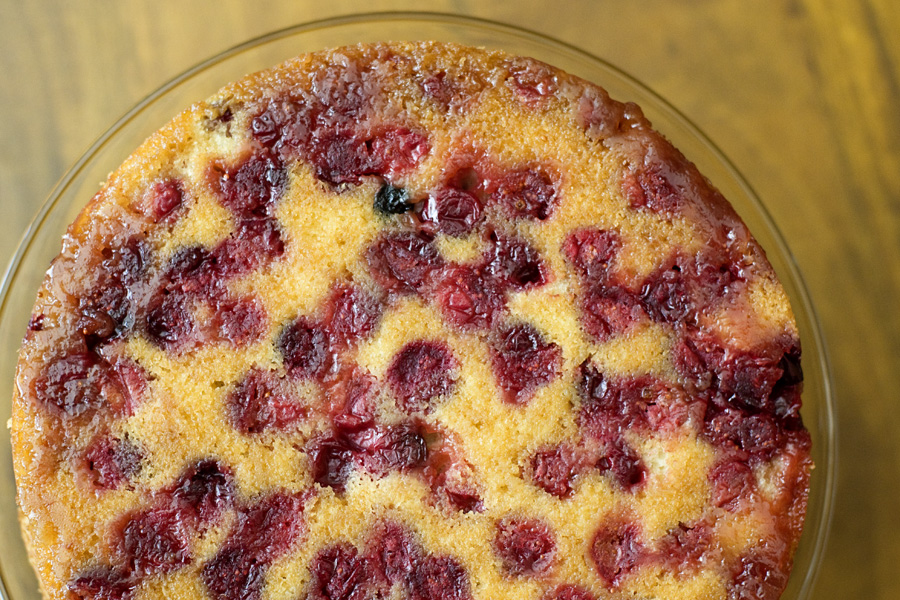
A sure sign of autumn and winter: cranberries! This cake is simple and delicious and would make a perfect fall dessert. Cranberry Upside-Down Cake Recipe adapted from Cooking Light Magazine Topping: 1/3 cup packed brown sugar 2 Tablespoons butter 6…
Oreo Cookie Pound Cake
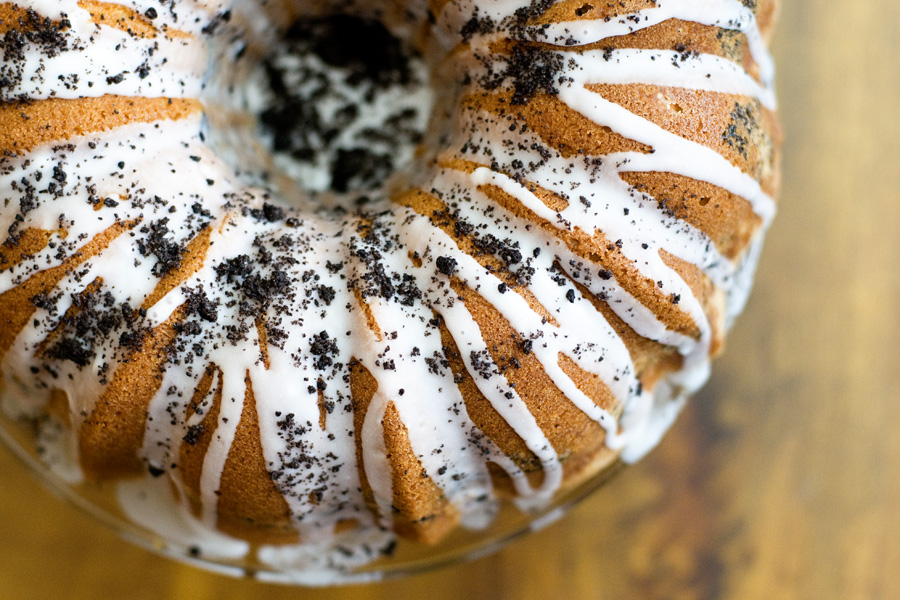
I saw this recipe in a Paula Deen magazine and instantly squealed with joy. Oreo cookies + pound cake + Paula Deen? Seriously. Oreo Cookie Pound Cake Recipe source: Paula Deen 1-1/4 cups butter, softened 3 cups sugar 6 large…
Peanut Butter Cup Cupcakes
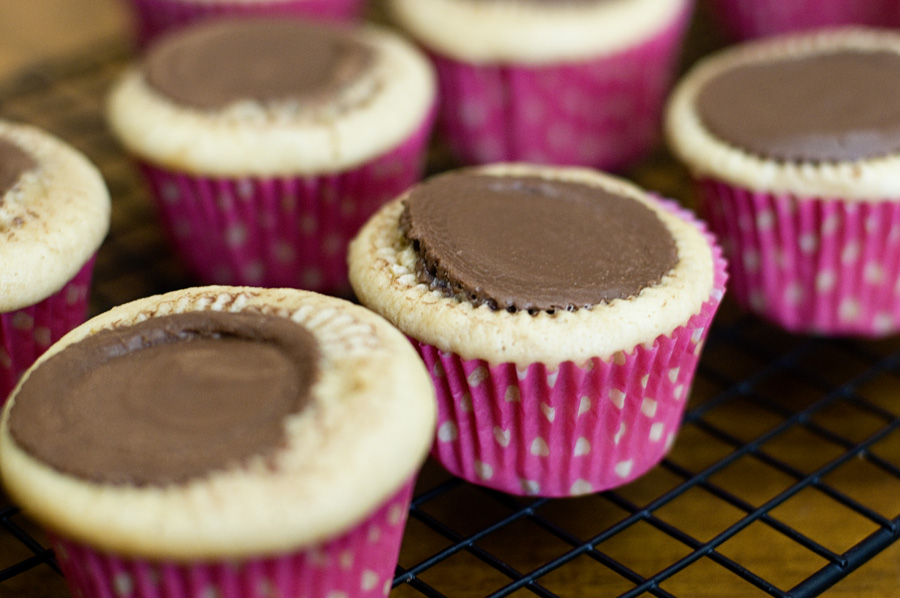
Peanut butter. Oh heaven. If you’ve spent any time on this blog you have probably noticed that I LOVE peanut butter. LOVE. And don’t even get me started on my love for Reese’s Peanut Butter Cups. I don’t have a…
Fudge Brownies
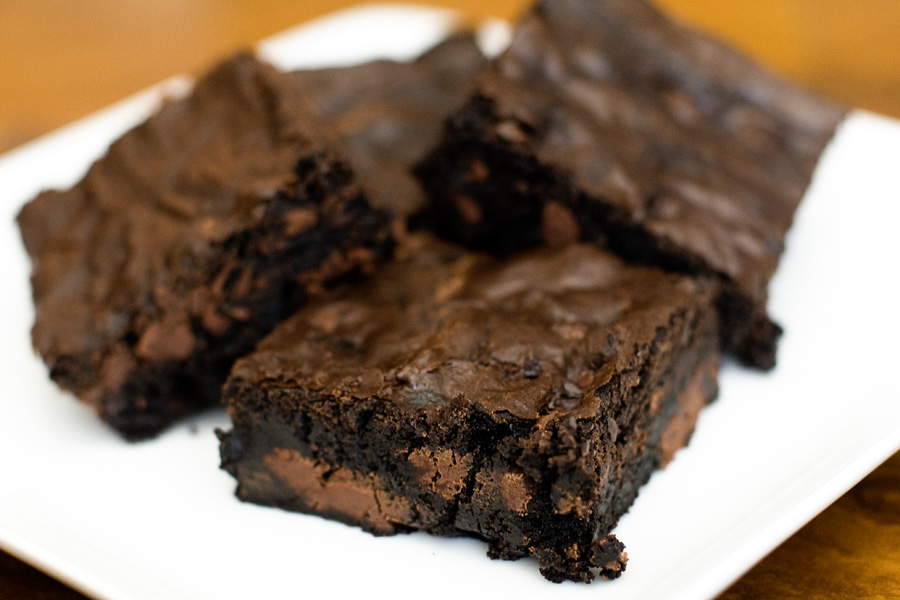
Oh heaven. This recipe was highly recommended by my friend Jen, so I just had to try! She was right – these are to-die-for!
Burgers & Fries
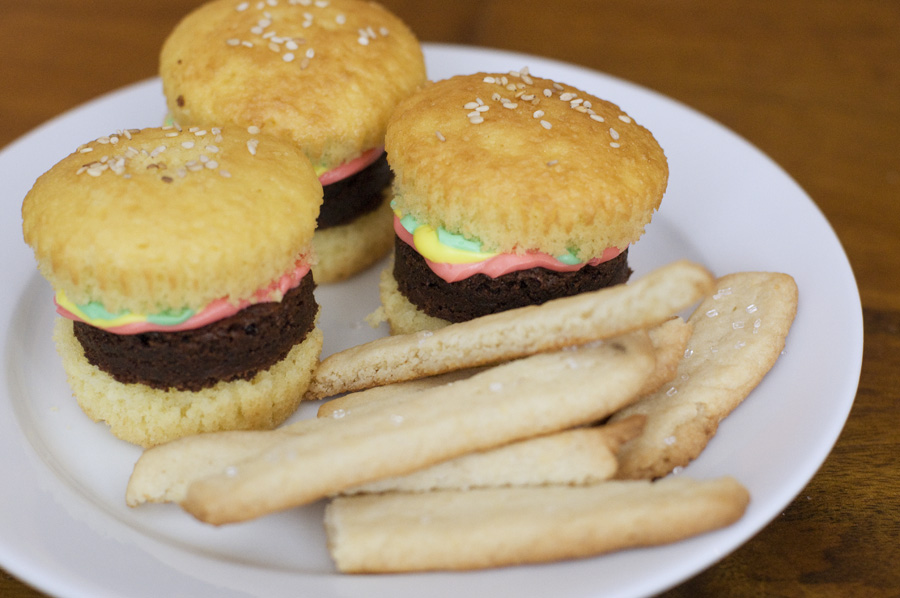
Happy Labor Day weekend! Hopefully you are all out and enjoying the last long weekend of summer. Since holiday weekends usually bring cookouts, today’s recipe fits right in! Burgers & Fries Recipe source: Adapted from Bakerella 1 box yellow cake…
Mini Pie Cupcakes
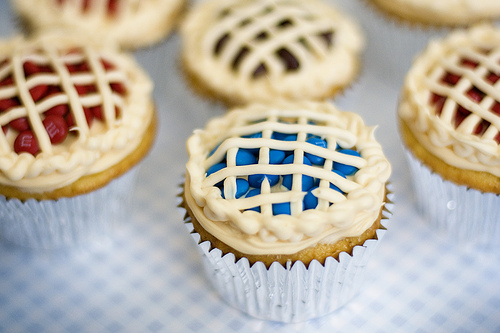
September is here! In my mind, September always marks the beginning of fall. School is back in session for most, the air starts to feel and smell different, and the leaves start to turn yellow. Fall is prime pie-baking season,…


