Tootsie Rolls rank high on my list of favorite candy. Did you know that Tootsie Rolls were the first penny candy to be individually wrapped? Or that 64 millions Tootsie Rolls are made each day? Or that the Tootsie Roll…
Archives for January 2012
Buckeye Bites
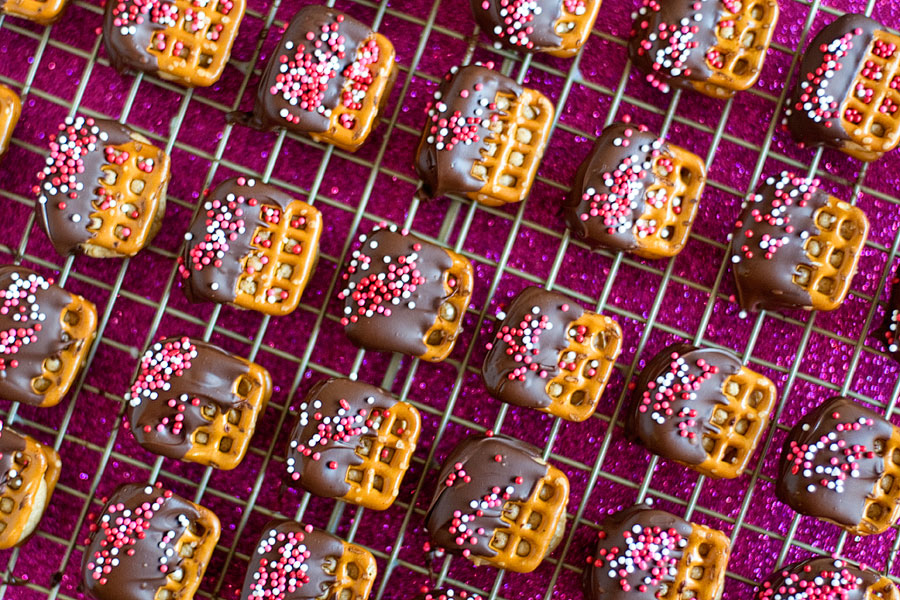
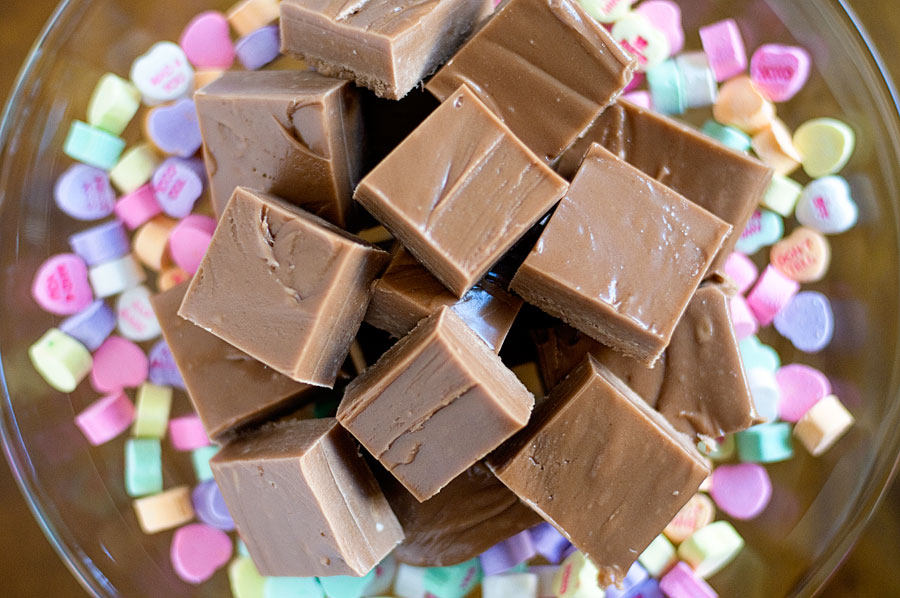
Valentine’s Day is rapidly approaching! Love it or hate it, it’s unavoidable. One of my favorite quotes that I found on Twitter was, “Valentine’s Day needs to get the hell out of my Target.” Maybe I’m just bitter that Christmas…
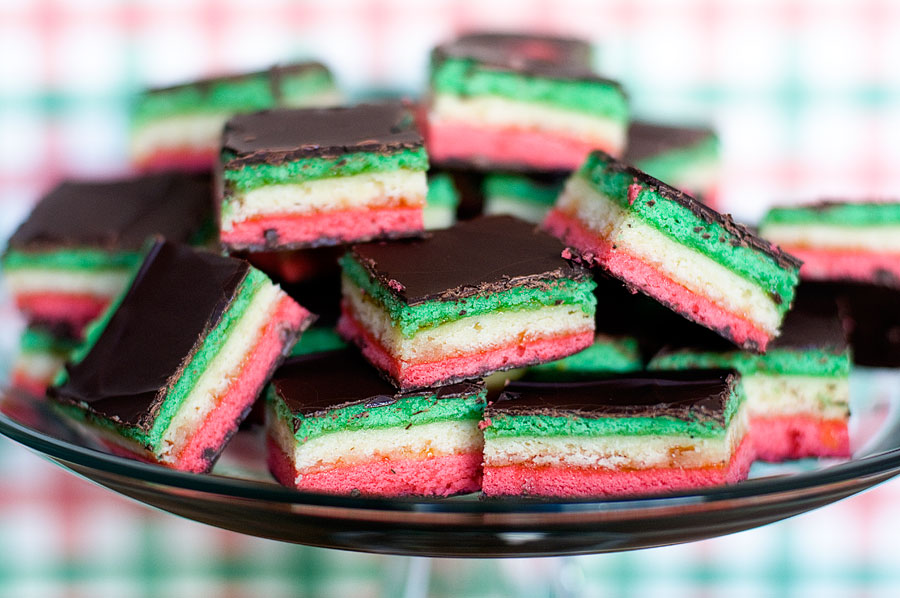
7 Layer Cookies
This recipe has been on my to-bake list for, no joke, TWO YEARS. It was one of those recipes that I longed to make.. I knew I would love the results.. but I was intimidated. These cookies (sidenote: why does…
Zoo Animal Cake II
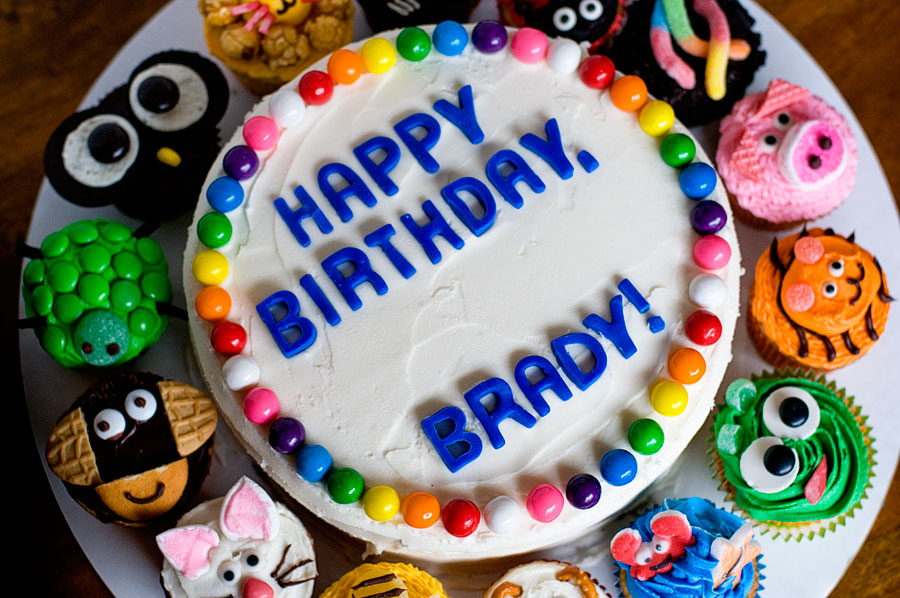
I made this cake for Brady’s 2nd birthday! The space between “Happy Birthday” and “Brady” was left to make room for a “2” candle. I made an almost-identical cake a few years ago, so instead of re-typing directions, check it…
Sesame Street Cupcakes
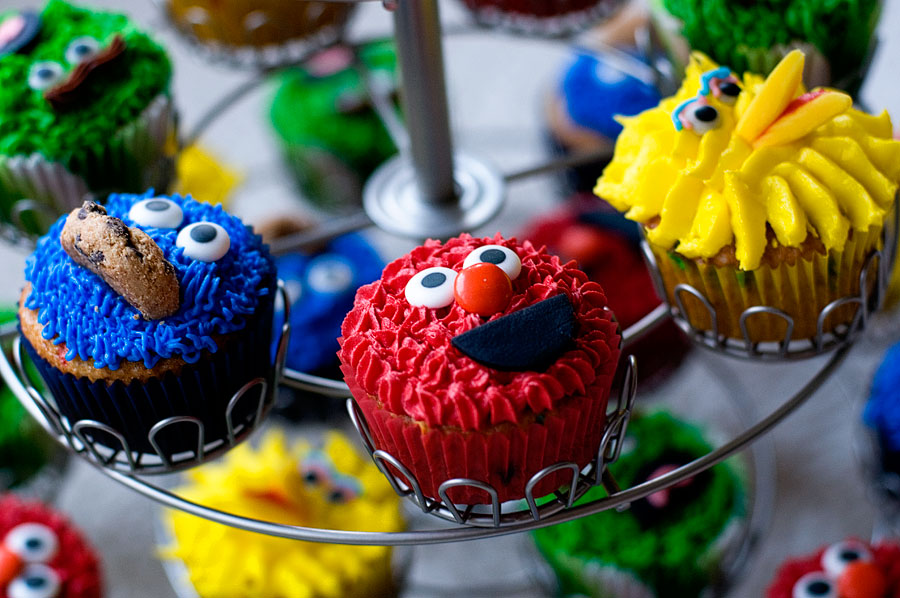
Oh, Sesame Street, I love you. I’ve loved you since I was 2 years old and had a fascination with Big Bird (or Bigga Bird, as I called him). These cupcakes went along with the Elmo cake that I posted…
Elmo Cake
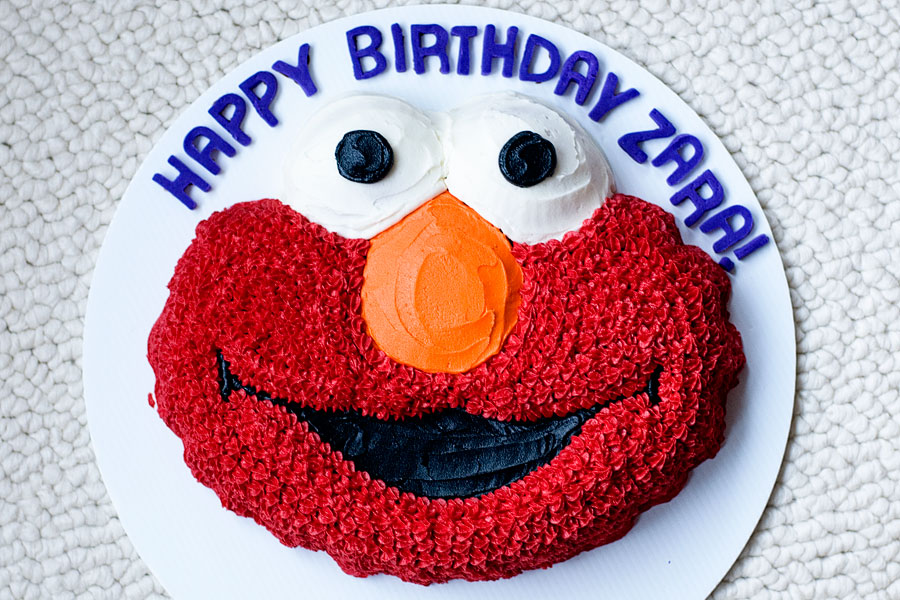
Elmo!! I still remember the Tickle Me Elmo CRAZE from about 10 years ago. I guess the little red dude is still popular. This cake was a breeze to make — thanks to Wilton and their great shaped cake pans!…
Angry Birds Cake
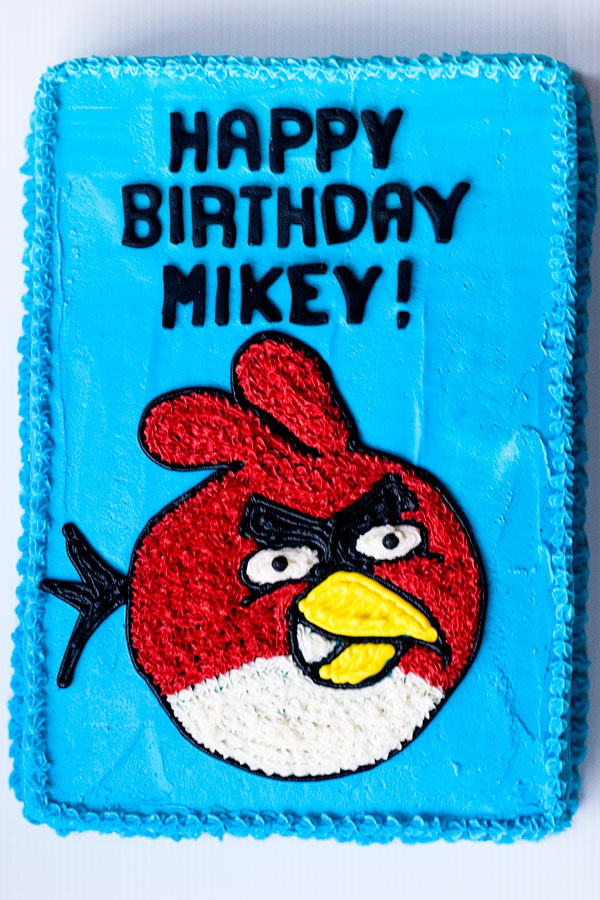
Who is addicted to Angry Birds? I’m sure many of you are! It’s a game that I just can’t get into, but maybe I’m more of a Tetris girl. I was asked to make an Angry Birds cake for Mikey’s…
Chemistry Cake
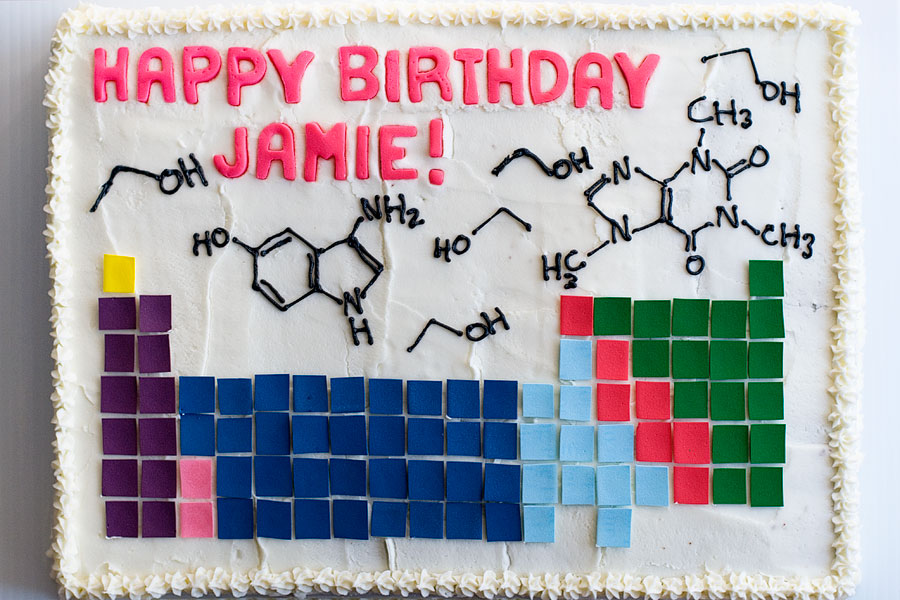
My lovely friend Jamie had a birthday back in Deceember. She works as a quality control chemist and is almost as much of a science geek as I am. I decided to make her a big ol’ chemistry themed birthday…
Union Jack Cake
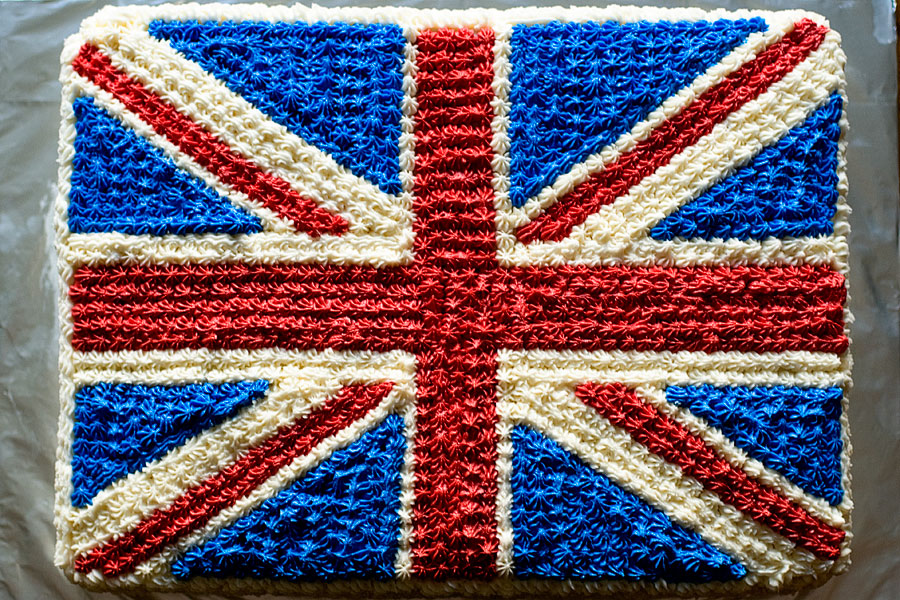
As promised yesterday, here is the Union Jack cake! This cake was much easier to make than it maybe looks — but it was VERY time-consuming (each of those little blobs of frosting was piped on — it took a…
Keep Calm and Carry On Cupcakes
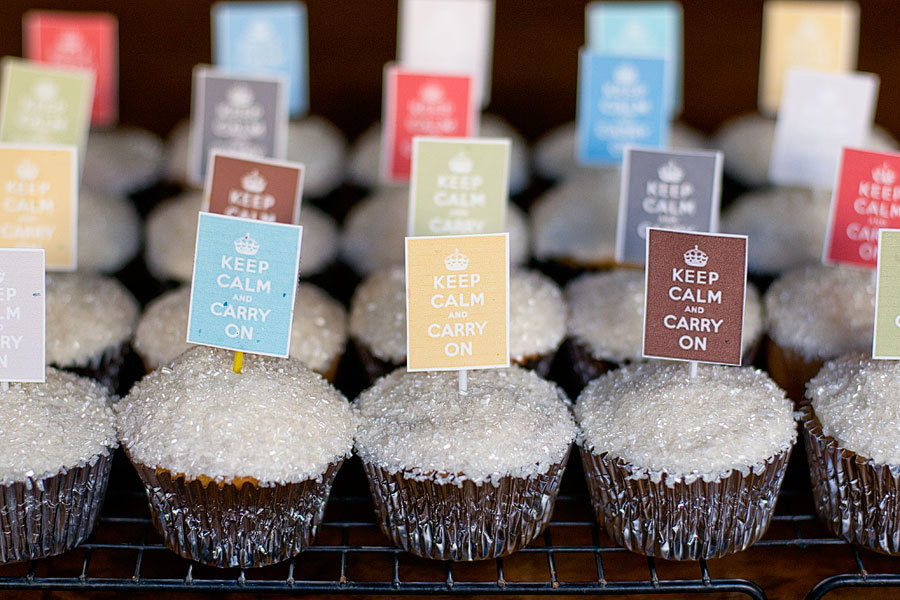
Some friends of mine in Madison are moving to England this month! Their goodbye party was in December and I was asked to make British-themed desserts. I made these cupcakes, as well as a Union Jack cake (which I’ll post…
Hippo Birthday Cake
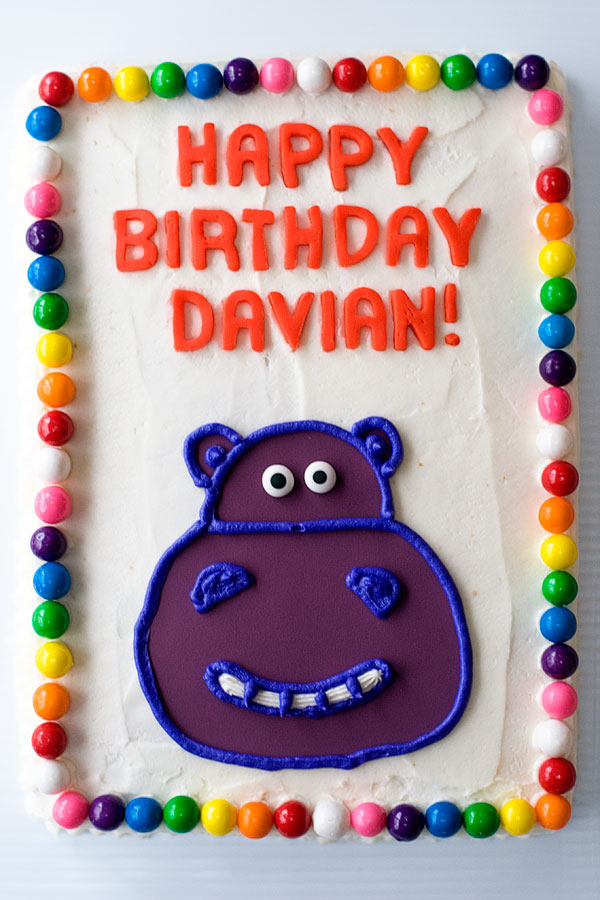
Davian’s birthday was back in November (I’m soooo late in posting his cake!) and his mom said that he loved animals, specifically hippopotamuses. Here are the mish-mesh of instructions on how I created this cake. I made a 9×13″ cake…


